
CX-7 FWD L4-2.3L Turbo (2010)
Adhesive agent thickness
-
1.0 mm {0.039 in}
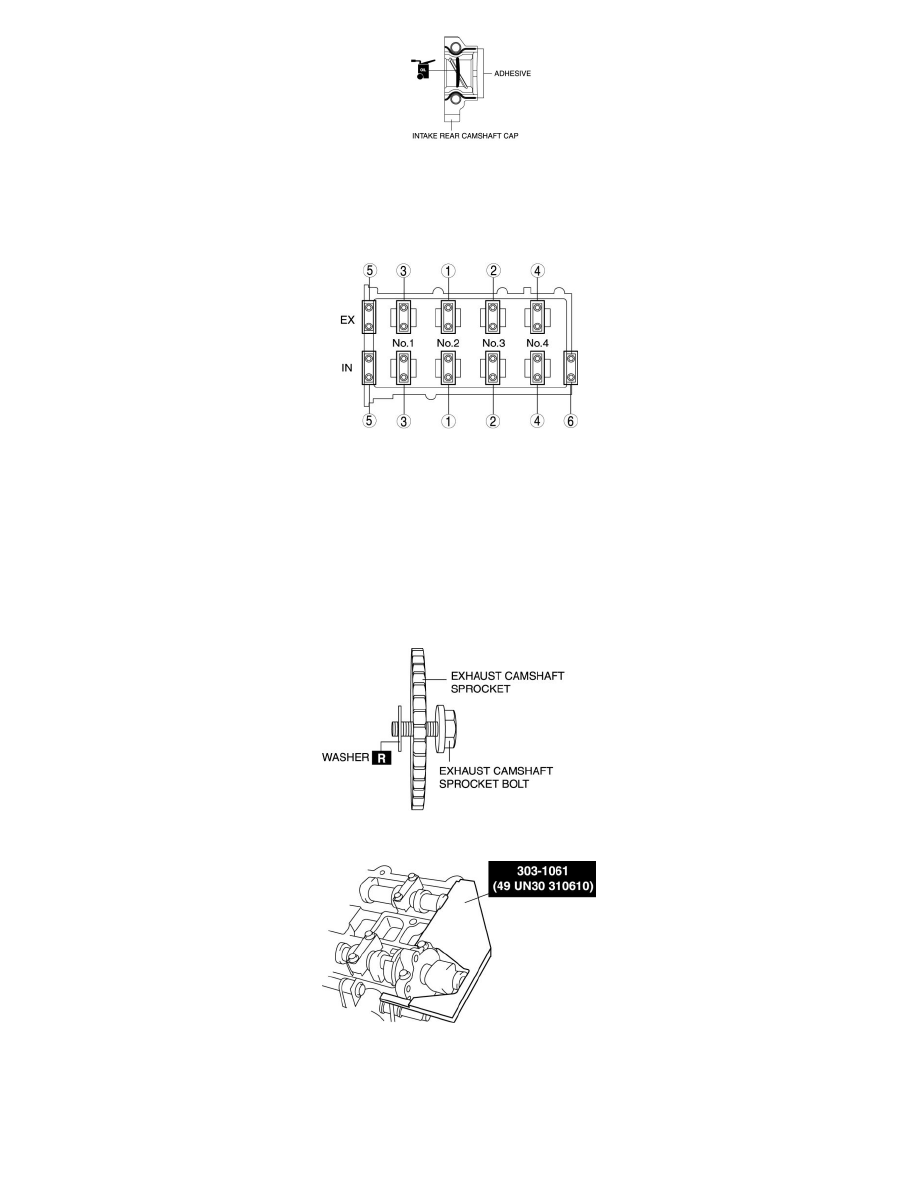
27. Install the camshaft caps and temporarily tighten the camshaft cap bolts evenly in two or three passes, and then tighten the camshaft cap bolts in
two passes, using the following two steps and in the order shown in the figure.
Tightening procedure
-
5.0-9.0 Nm {51-91 kgf-cm, 45-79 in-lbf}
-
14.0-17.0 Nm {1.5-1.7 kgf-m, 10.4-12.5 ft-lbf
28. Install the OCV. (See See: Engine, Cooling and Exhaust/Engine/Engine Lubrication/Engine Oil Control Valve/Service and Repair.)
CAUTION:
-
Install a washer to the fourth or fifth thread of the exhaust camshaft sprocket bolt being careful not to drop the washer.
-
Do not tighten the camshaft sprocket bolt at this stage. Verify the valve timing before performing the bolt tightening.
29. Install the exhaust camshaft sprocket bolt, exhaust camshaft sprocket, and a new washer as a single unit.
30. Install the SST on the camshaft as shown in the figure.
31. Remove the installation bolt for the engine front cover upper blind plug (M6 X 1.0 length 25-35mm {0.99-1.3 in}), and apply tension to the
timing chain.
32. Rotate the crankshaft clockwise and verify that the No.1 cylinder is at TDC of the compression stroke. (The position counter weight contacts the
SST.)