
Mazdaspeed3 L4-2.3L Turbo (2010)
Auxiliary Input / Output Jack: Service and Repair
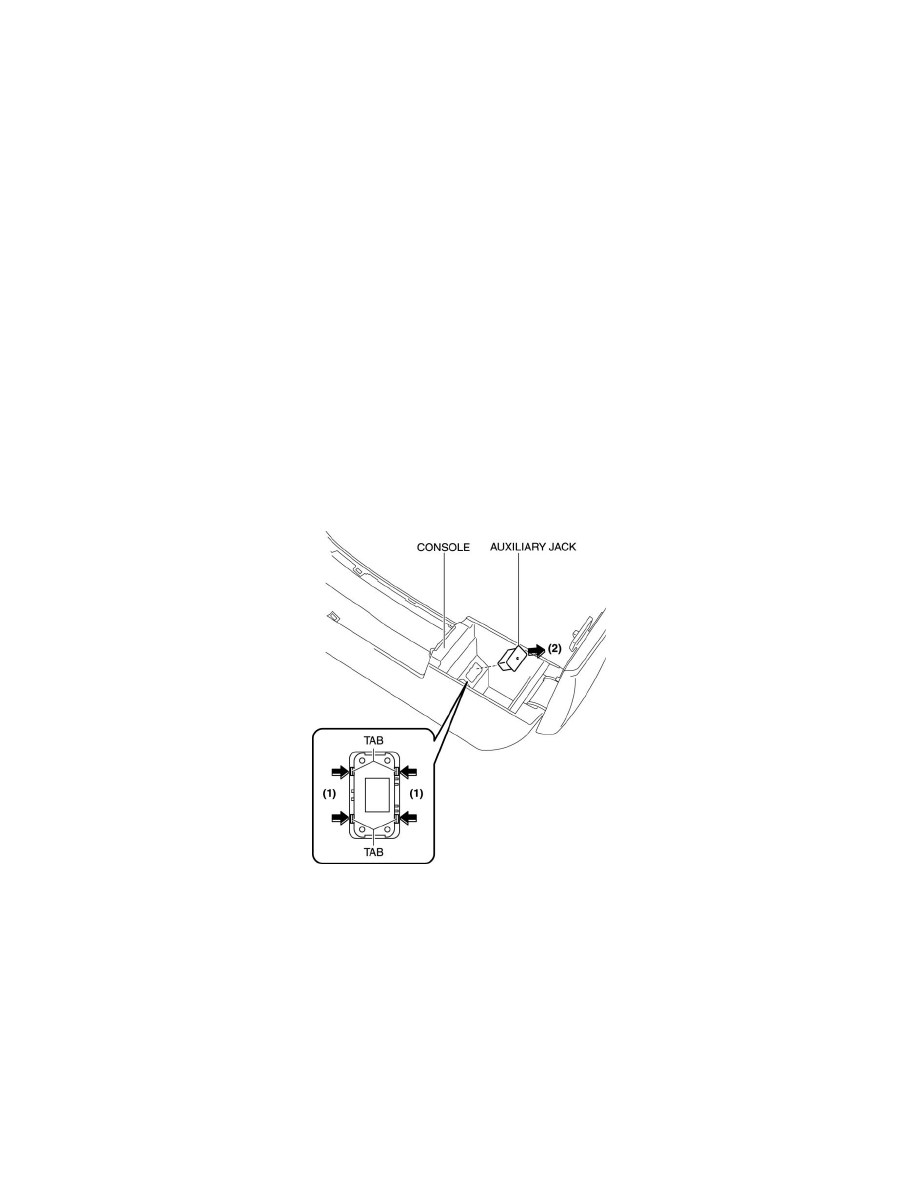
AUXILIARY JACK REMOVAL/INSTALLATION
1. Disconnect the negative battery cable.
2. Remove the following parts:
a. Upper panel See: Body and Frame/Interior Moulding / Trim/Console/Service and Repair/Upper Panel Removal/Installation
b. Shift knob (MTX) See: Transmission and Drivetrain/Manual Transmission/Transaxle/Shifter M/T/Service and Repair
c. Selector lever knob (ATX) See: Transmission and Drivetrain/Automatic Transmission/Transaxle/Shifter A/T/Service and Repair/Automatic
Transaxle Shift Mechanism Removal/Installation
d. Shift panel See: Body and Frame/Interior Moulding / Trim/Console/Service and Repair/Shift Panel Removal/Installation
e. Side wall See: Body and Frame/Interior Moulding / Trim/Dashboard / Instrument Panel/Service and Repair/Removal and Replacement/Side
Wall Removal/Installation
f.
Center panel See: Body and Frame/Interior Moulding / Trim/Dashboard / Instrument Panel/Service and Repair/Removal and
Replacement/Center Panel Removal/Installation
g. Audio unit See: Radio, Stereo, and Compact Disc/Service and Repair/Removal and Replacement/Audio Unit Removal/Installation
h. Console See: Body and Frame/Interior Moulding / Trim/Console/Service and Repair/Console Removal/Installation
3. Remove the auxiliary jack in the direction of the arrow (2) shown in the figure while pressing the auxiliary jack tabs in the direction of the arrow
(1).
4. Install in the reverse order of removal.