
MPV ES V6-2.5L DOHC (2001)
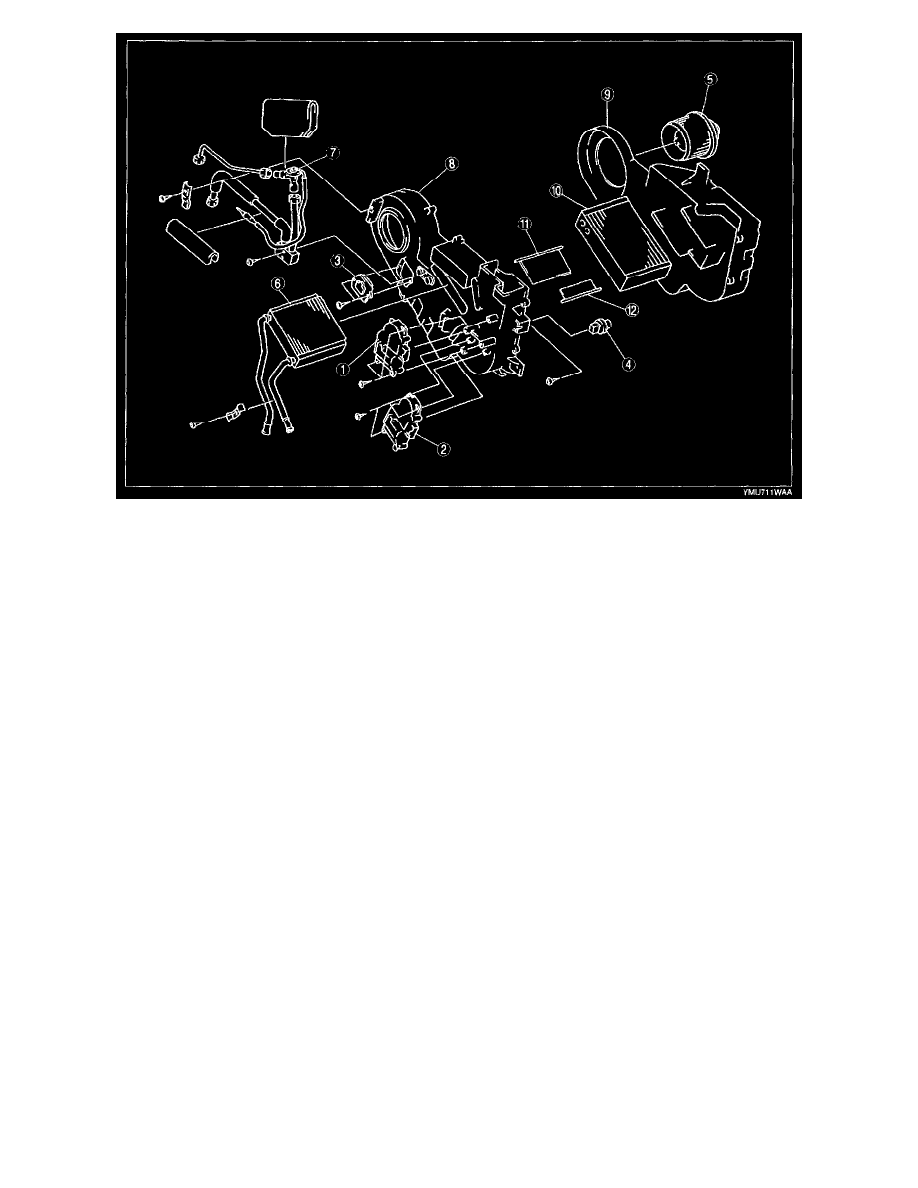
1. Disassemble in the order indicated below.
1. Rear airflow mode actuator (equipped with rear A/C and heater)
2. Rear air mix actuator (equipped with rear A/C and heater)
3. Rear resistor
4. Rear blower relay
5. Rear blower motor
6. Rear heater core (except rear A/C only)
7. Rear expansion valve (except rear heater only)
8. Case(left)
9. Case(right)
10. Rear evaporator (except rear heater only)
11. Airflow mode door
12. Air mix door
2. Assemble in the reverse order of disassembly.
Rear Evaporator Assembly Note
1. When installing a new rear evaporator, add ND-OIL8 compressor oil from the inlet.
Supplemental amount (approximate quantity): 40 ml {40 cc, 1.4 fl oz}
REAR EVAPORATOR INSPECTION
1. Inspect for cracks, damage, and oil leakage.
-
If any are found, replace the rear evaporator.
2. Inspect for bent fins.
-
If any are bent, use a flathead screwdriver to straighten them.