
MX-6 LS V6-2.5L DOHC (1997)
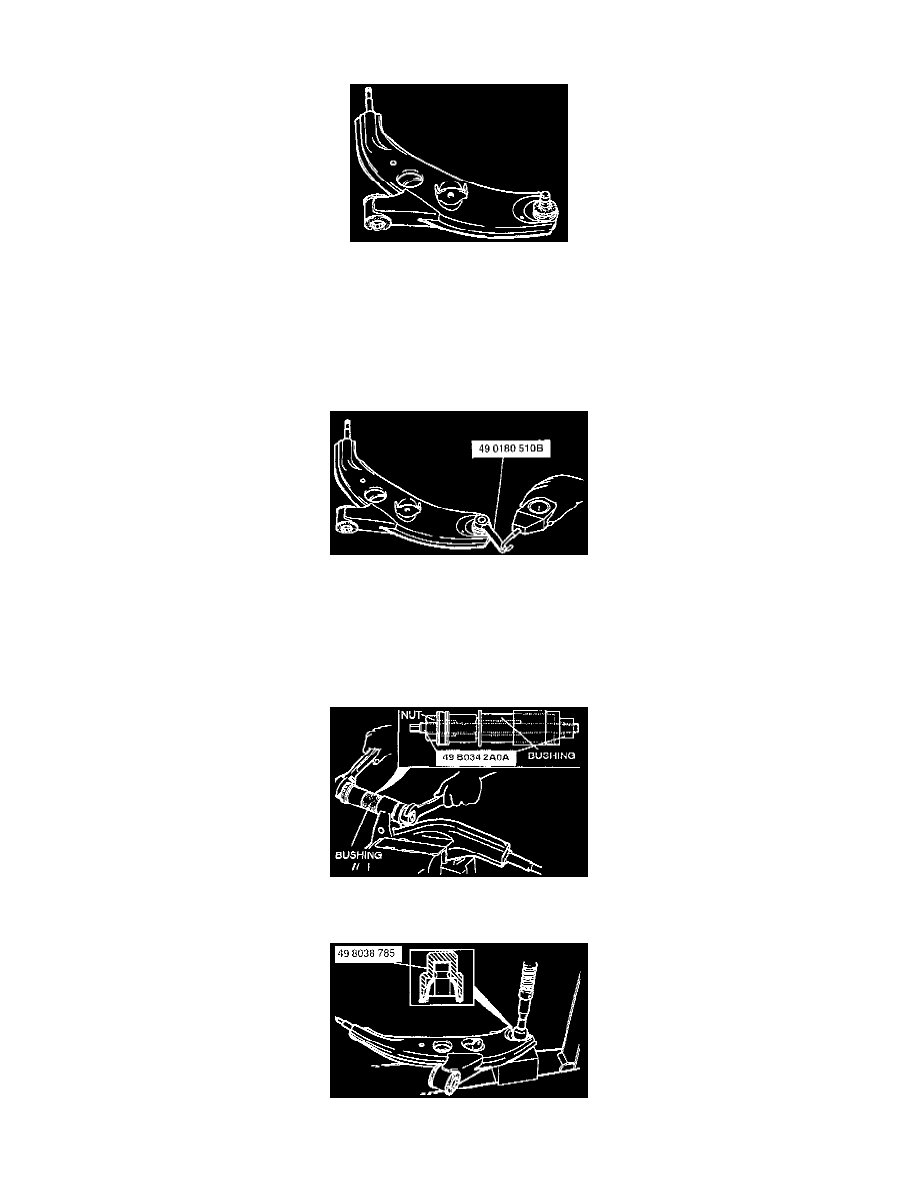
A. Cut away the projecting rubber of the lower arm bushing.
B. Set the Special Service Tool (SST) onto the lower arm, and remove the bushing.
INSPECTION
Lower Arm Assembly
Inspect all parts and repair or replace as necessary.
1. Lower arm for damage and cracks
2. Bushings for deterioration and wear
3. Dust boot for damage
4. Bail joint for looseness and damage If the ball joint needs to be replaced, replace the lower arm.
5. Ball joint preload. Move the ball joint back and forth 5 or 6 times, then attach the SST to the ball stud, and measure the preload with a pull
scale.
^
Ball joint preload: 1.0 - 4.9 Nm (8.6 - 43 inch lbs.)
^
Pull scale reading: 9.8 - 9 N (2.2 - 11.0 lbs.)
INSTALLATION
1. Install in the reverse order of removal, referring to the following notes:
Lower Arm Bushing (Front)
^
Install the new bushing, and pull it into the lower arm by using the SST.
Dust Boot
A. Wipe the grease off the ball stud.