
Protege ES L4-1839cc 1.8L DOHC (1997)
Hydraulic Control Assembly - Antilock Brakes: Testing and Inspection
Hydraulic Assembly
1. Verify that the battery is fully charged. With the ignition switch at ON, verify that the ABS warning light goes out after 2-4 seconds.
2. If the light stays ON after 2-4 seconds the control module detects a failure and will not activate the hydraulic unit. Follow the troubleshooting
procedures.
3. Turn the ignition switch to OFF.
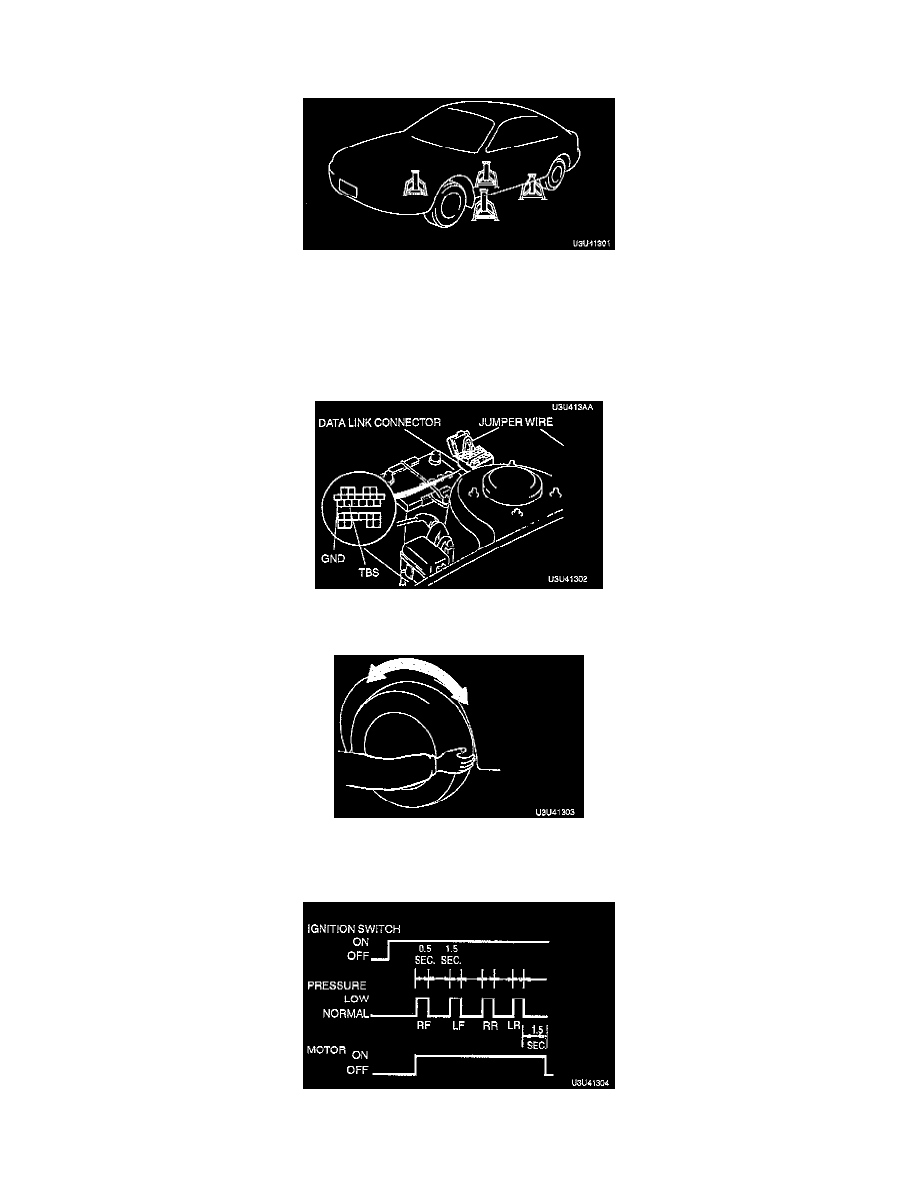
4. On level ground, jack up the vehicle and support it evenly on safety stands. Shift the transaxle to neutral or N range.
5. Release the parking brake.
6. Rotate the wheels by hand, and inspect for brake drag.
7. Using a jumper wire, connect the TBS and GND terminals of the data link connector.
8. Depress the brake pedal, and have an assistant verify that the right front wheel will not turn.
9. With the brake pedal still depressed, turn the ignition switch to ON and verify that the brake is released momentarily (approx. 0.5 sec.) and that the
wheel turns when pressure-reduction operates.
10. Check the operation of the remaining wheels in order: left front, right rear, left rear.
11. If steps 9 and 10 show correct operation, the following systems are OK:
-
Brake piping to ABS hydraulic unit