
RX7 2RTR-1146cc 70 (1982)
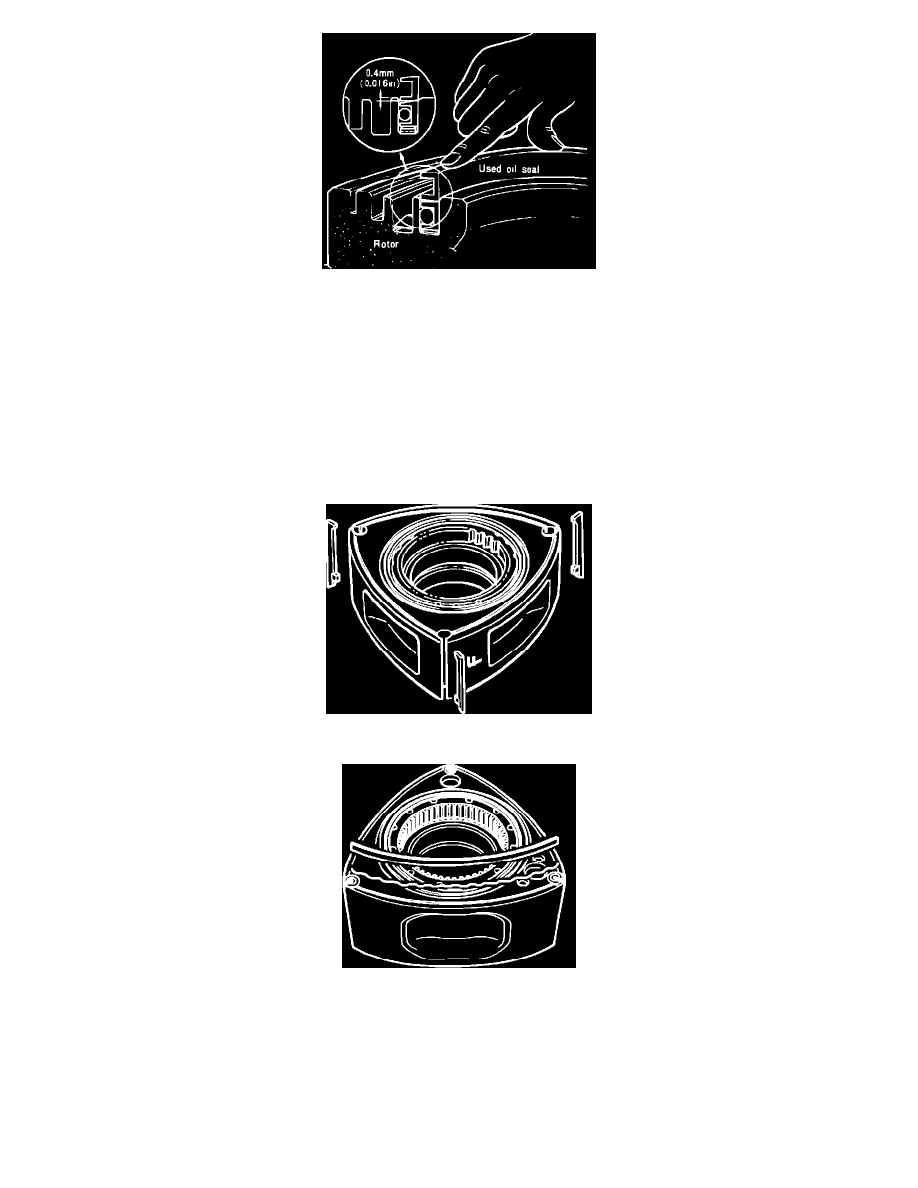
Fig. 30 Installing inner oil seal
5.
Press the inner oil seal by using a used inner oil seal so that the lip surface of the oil seal sinks into a position approximately 0.016 in. (0.4 mm)
below the surface of the rotor, as shown in
Fig. 30.
6.
Place the outer oil seal to the oil seal groove so that the square edge of the spring fits in the stopper notch of the oil seal.
7.
Push the oil seal slowly with fingers.
When replacing the oil seal, confirm the smooth movement of the oil seal by placing the oil seal on the
oil seal spring in the groove before inserting the O-ring. Be careful not to deform the lip of the oil seal.
8.
Apply sufficient engine oil onto each oil seal, and confirm the smooth movement of each oil seal by pressing the oil seal.
9.
Install the oil seal springs and oil seals on the other side of the rotor.
FRONT SIDE SEALS
1.
Place front rotor on rubber pad or cloth with internal gear upward.
Fig. 31 Installing apex seal
Fig. 32 Installing side seal
2.
Install apex seals without spring and side piece into their respective grooves so that side piece positions to the rear side of rotor,
Figs. 31 and 32.
3.
Apply engine oil onto each seal, and confirm the smooth movement of each seal by pressing its head.
FRONT HOUSING
1.
Mount the front housing on engine stand.
2.
Position thrust plate with chamfer facing toward front housing, then install needle bearing and plate, torquing to
12-17 ft.lbs.
3.
Apply petroleum jelly to new outer and inner sealing rubbers.