
Tribute 2WD L4-2.5L (2009)
Catalytic Converter: Service and Repair
Catalytic Converter - Underbody Removal/Installation
-
CATALYTIC CONVERTER - UNDERBODY REMOVAL/INSTALLATION
Removal
CAUTION:Do not use oil or grease-based lubricants on the insulators. They may cause deterioration of the rubber.
CAUTION:Oil or grease-based lubricants on the insulators may cause the exhaust hanger insulator to separate from the exhaust hanger bracket during
vehicle operation.
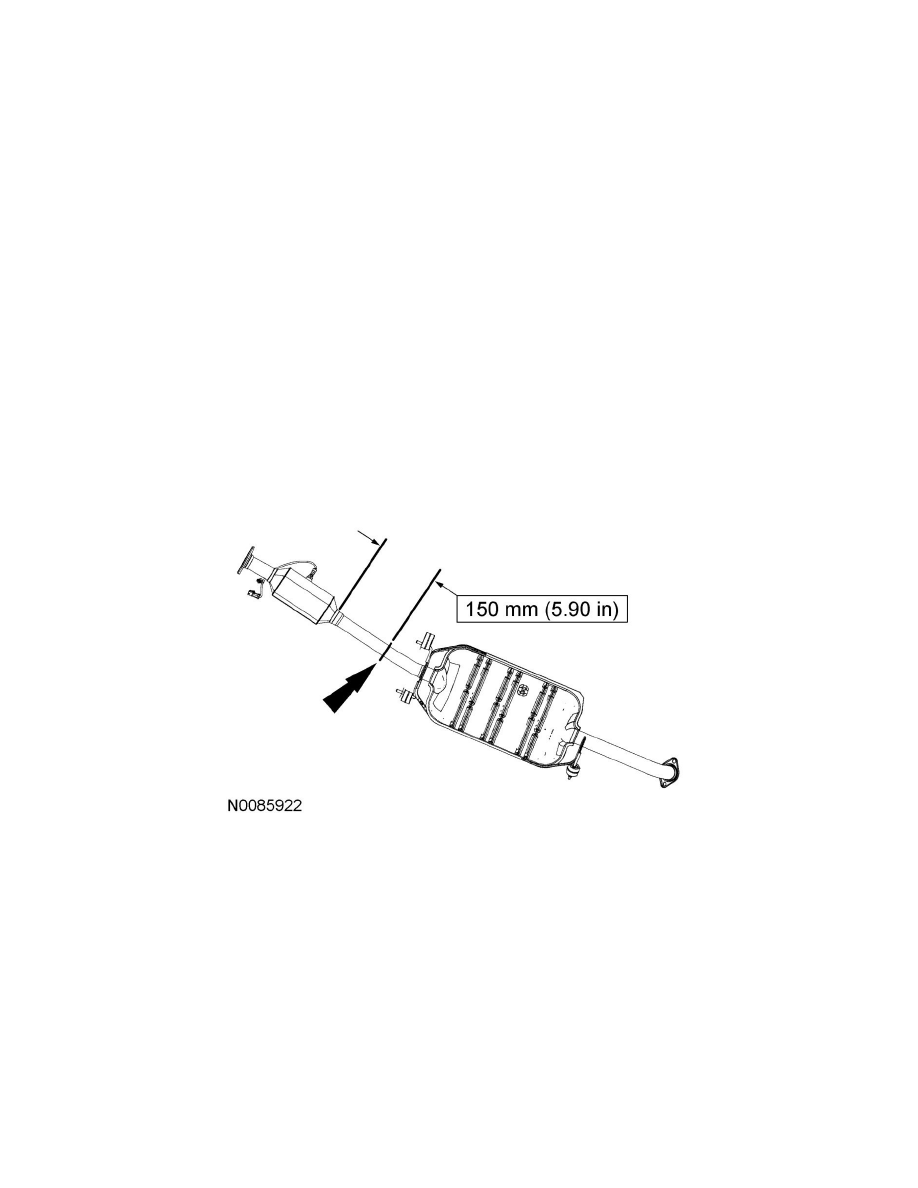
NOTE:The catalytic converter and muffler assembly is 1-piece construction. The service catalytic converter and muffler is a 2-piece construction. It is
necessary to cut the production exhaust to enable the service section to be fitted. Before cutting any part of the exhaust system, check that the position of
the cut is correct in comparison to the service section being installed.
1. With the vehicle in NEUTRAL, position it on a hoist. See See: Maintenance/Vehicle Lifting/Service and Repair/Lifting.
2. Disconnect the catalyst monitor sensor electrical connector.
3. Remove and discard the 2 exhaust catalytic converter-to-intermediate pipe spring nuts.
4. Remove and discard the 2 resonator-to-muffler spring nuts.
5. Detach the 3 exhaust hangers and remove the catalytic converter and muffler assembly.
-
Discard the gaskets.
6. Cut the exhaust system as indicated in illustration.
Installation
CAUTION:The exhaust hanger insulators are constructed of a special material. Use only the correct specification exhaust hanger insulator or damage to
the exhaust system may occur.
NOTE:Check the exhaust hanger insulators for damage and fatigue. Install new exhaust hanger insulators as required.
NOTE:Thoroughly clean the sealing surfaces of the flanges using an abrasive pad.