
Tribute 2WD L4-2.5L (2009)
Input Shaft: Service and Repair
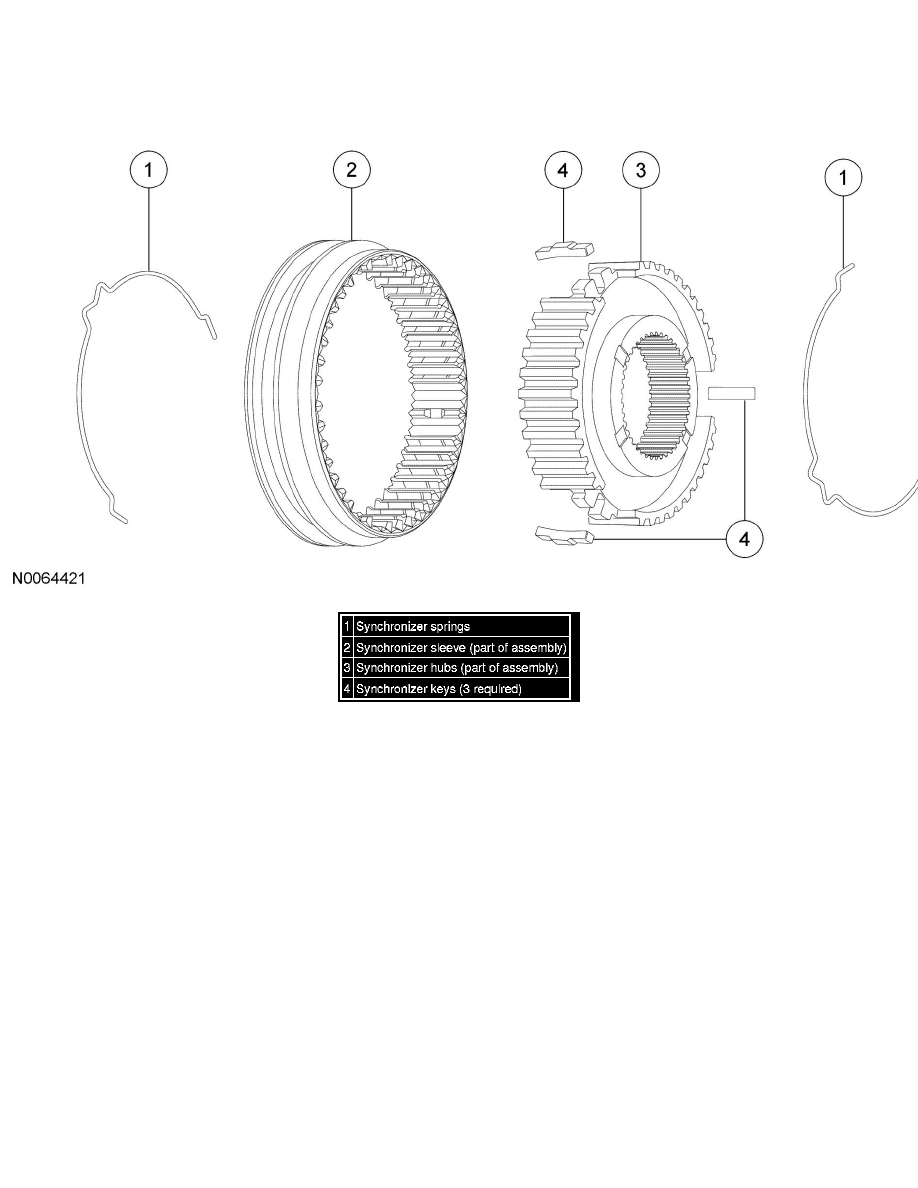
Synchronizers Disassembly/Assembly
SYNCHRONIZERS DISASSEMBLY/ASSEMBLY
Disassembly
NOTE:This procedure applies to all synchronizer assemblies.
1. Scribe an index mark on the sliding sleeve to the hub for assembly reference.
NOTE:During disassembly, mark each individual synchronizer for assembly. Synchronizer hubs and sleeves should be kept together as originally
assembled.
2. Remove the synchronizer spring. Turn the synchronizer over and remove the 2nd spring. Remove the sliding sleeve and the synchronizer keys
from the hub.
3. Inspect the synchronizer components.
-
Check for worn, nicked or broken teeth. Install a new synchronizer as necessary
-
Check keys for wear or distortion. Install a new synchronizer as necessary.
-
Check springs for distortion. Install a new synchronizer as necessary.
4. Inspect the synchronizer blocking rings.
-
Check for wear or damage. Install new synchronizer blocking rings as necessary.
Assembly