
Tribute 4WD L4-2.5L Hybrid (2009)
Tie Rod End: Service and Repair
Tie Rod End - Inner Removal/Installation
-
TIE ROD END - INNER REMOVAL/INSTALLATION
1. Remove the wheel and tire. See See: Wheels and Tires/Wheels/Service and Repair.
2. Turn the steering wheel fully in the direction of the inner tie-rod end that is being removed.
3. Loosen the tie-rod end jam nut.
-
To install, tighten to 40 Nm {4.0 kgf-m, 30 ft-lbf}.
4. Remove and discard the outer tie-rod end nut.
-
To install, tighten to 80 Nm {8.0 kgf-m, 59 ft-lbf}.
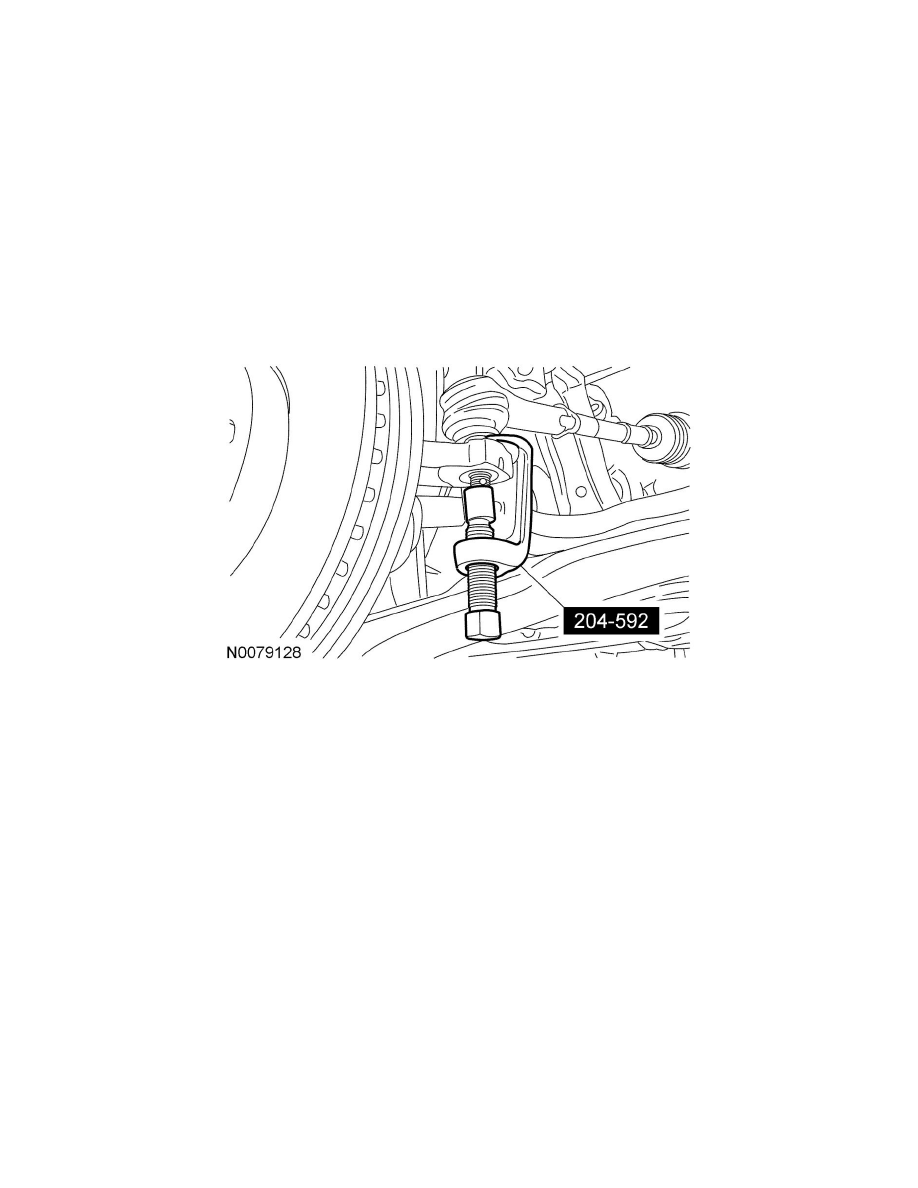
5. Using the special tool, separate the outer tie-rod end from the wheel knuckle and remove the tie-rod.
6. Remove the tie-rod end jam nut.
7. Remove and discard the boot clamps and the steering gear boot.
8. Using a suitable tool, hold the steering gear rack.
9. Using a suitable tool, remove the inner tie-rod end.
-
To install, tighten to 90 Nm {90.0 kgf-m, 66 ft-lbf}.
10. To install, reverse the removal procedure.
NOTE:Using a suitable tool, hold the steering gear rack while tightening the inner tie rod.
11. Check and, if necessary, adjust the front toe. See .