
Grand Marquis V8-4.6L Flex Fuel (2010)
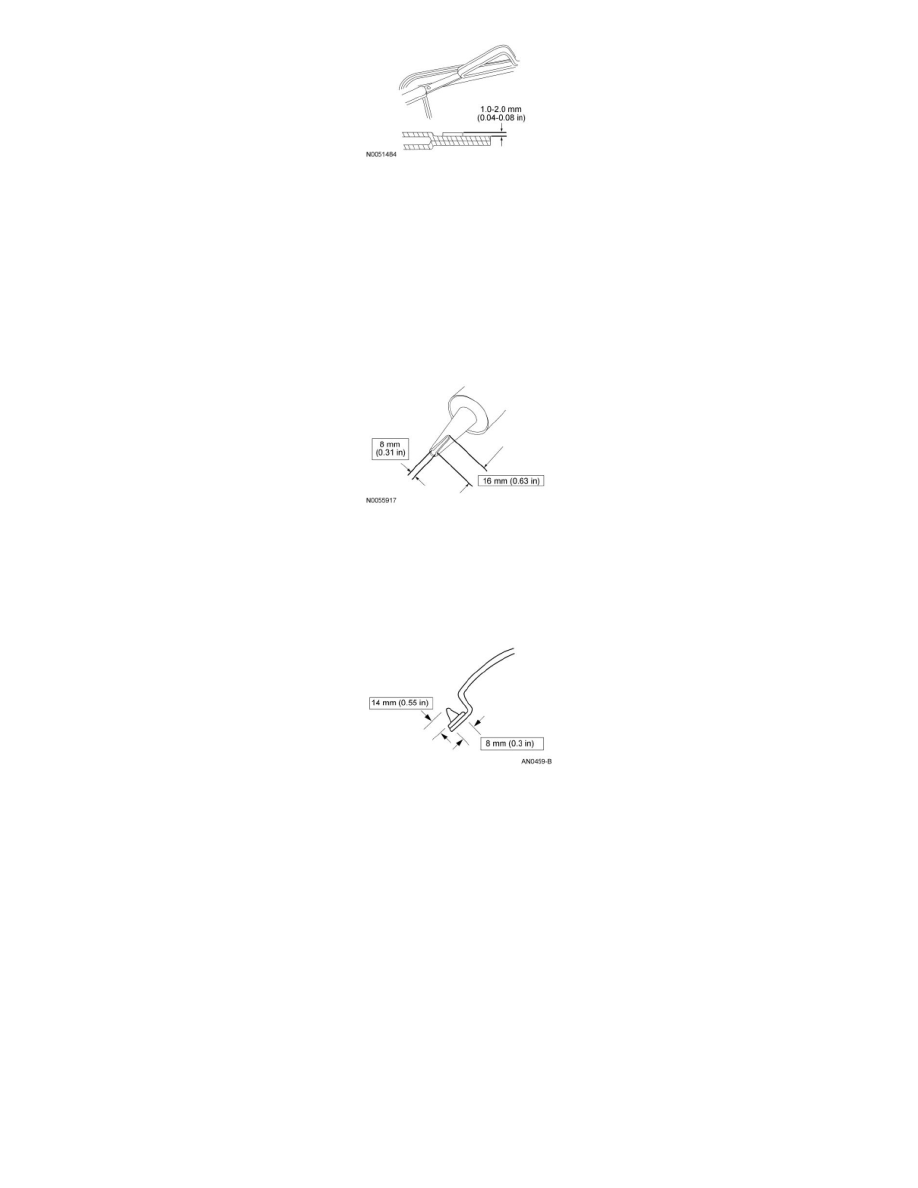
5. If reinstalling the same windshield glass, remove the remaining urethane adhesive from the glass leaving a thin layer to bond with the new urethane
adhesive bead.
6. Clean the inside of the new windshield glass with glass cleaner.
7. NOTE: Be sure to use the same brand and cure-rate products for the urethane adhesive and glass primer. Do not mix different brands of urethane
adhesive and glass primer. Refer to the Material Chart in this procedure.
If installing a new windshield glass, apply glass primer according to manufacturer's instructions. Allow at least 6 minutes to dry.
8. Cut the urethane adhesive applicator tip to specification.
9. NOTE: The windshield glass must be positioned within 10 minutes of applying the urethane adhesive.
NOTE: Use either a high-ratio, electric or battery-operated caulk gun that applies the urethane adhesive with less effort and a continuous bead.
Apply a bead of urethane adhesive on top of the existing trimmed urethane adhesive bead on the pinch weld, starting and ending at the bottom of
the windshield near the center, making sure there are no gaps in the bead.
10. WARNING: Do not drive vehicle until the urethane adhesive seal has cured. Follow urethane adhesive manufacturer's curing directions.
Inadequate or incorrect curing of the urethane adhesive seal will adversely affect glass retention. Failure to follow these instructions may
result in serious injury to vehicle occupant(s).
NOTICE: Before positioning the windshield glass, open vehicle windows to prevent the air pressure of closing doors from affecting the
adhesive bond.
Using the alignment marks made previously, position the windshield glass on the pinch weld.
11. NOTE: The urethane adhesive must cure for a minimum of one hour before testing for air or water leaks.
After the urethane adhesive cures, check the windshield glass seal for air or water leaks through the urethane adhesive bead and add urethane
adhesive as necessary.
12. Install the front portion of the headliner.
13. Install the interior rear view mirror. For additional information, refer to Mirrors.
14. If equipped, install the overhead console. For additional information, refer to Instrument Cluster / Carrier &/or Interior Moulding / Trim.
15. Remove the tape from the defroster housing.