
Sable V6-183 3.0L DOHC VIN S MFI (1997)
Rear Door Weatherstrip: Service and Repair
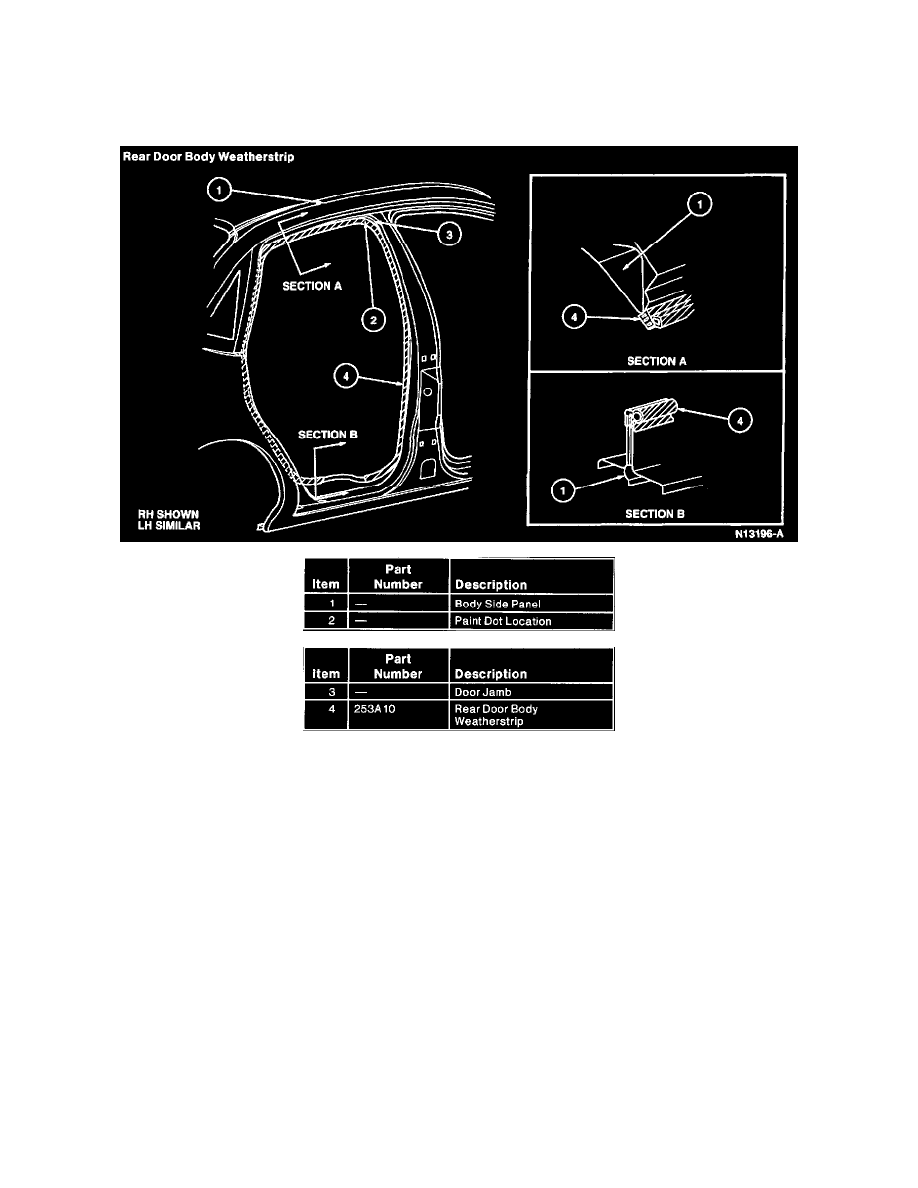
Rear Door-Opening Weatherstrip
Removal
1.
Open rear door.
2.
Remove center body pillar inside upper finish panel and rear door scuff plate.
3.
On Sedans, remove quarter trim lower panel.
4.
On Wagons, remove rear seat cushion and pull RH quarter trim panel or LH quarter trim panel out from vehicle far enough to remove rear
door body weatherstrip.
5.
Locate paint dot on rear door body weatherstrip at upper corner and mark a reference point on door jamb using a non-permanent removeable
marker or grease pencil.
6.
Starting at one end, carefully pull rear door body weatherstrip away from body until completely removed from vehicle. Do not stretch rear
door body weatherstrip to the point of damage.
Installation
1.
Locate paint dot on rear door body weatherstrip and install corner so paint dot aligns with reference mark on door jamb.
2.
Install each leg of rear door body weatherstrip by pressing with palm of hand until completely installed and seated.
3.
Install trim panels.