
Sable V6-183 3.0L DOHC VIN S MFI (1997)
8. Remove rear axle wheel hub retainer and discard.
9. Remove wheel hub from rear wheel spindle.
10. Disconnect rear brake tube from rear wheel cylinder.
11. Remove wheel cylinder retaining bolts and remove rear wheel cylinder.
12. Compress locking tangs and remove parking brake cable and conduit from brake backing plate.
13. Remove bolts retaining rear brake backing plate to rear wheel spindle. Discard bolts.
14. Remove rear brake backing plate and foam gasket.
INSTALLATION
1. Install new foam gasket on rear wheel spindle.
2. Install rear brake backing plate with new adhesive-coated retaining bolts. Tighten to 60-80 Nm (45-59 ft. lbs.).
REASSEMBLY
NOTE: Do not allow brake fluid to contact rear brake shoes and linings or they must be replaced.
1. Wipe the ends of the rear brake tubes with a clean cloth to remove any foreign matter before making connections.
2. Position rear wheel cylinder on rear brake backing plate and finger-tighten rear brake tube to rear wheel cylinder.
3. Secure rear wheel cylinder to rear brake backing plate by installing retaining bolts. Tighten bolts to 12-18 Nm (107-159 inch lbs.).
4. Using a tube nut wrench, tighten fitting nut to 16-20 Nm (12-14 ft. lbs.).
5. Apply a light coating of Silicone Brake Caliper Grease and Dielectric Compound to rear brake backing plate-brake shoe contact areas.
6. Check operation of adjuster. If it is binding, service adjuster. Refer to Brake Shoe Installation. See: Brake Shoe/Service and Repair/Installation
7. Place rear brake shoes and linings and adjuster assembly on rear brake backing plate and rear wheel cylinder assembly.
8. Install two brake shoe hold-down springs and brake shoe hold-down spring pins and secure shoes.
9. Insert parking brake cable and conduit through hole in rear brake backing plate until locking tangs are firmly engaged.
10. Connect parking brake rear cable and conduit to parking brake lever.
11. Position wheel hub on rear wheel spindle.
CAUTION:To prevent damage to threads, do not use power or impact-type tools to tighten the rear axle wheel hub retainer.
12. Install rear axle wheel hub retainer and tighten to 255-345 Nm (188-254 ft. lbs.).
13. Install new rear hub cap grease seal using a 1-7/8 inch x 3/4 inch drive socket.
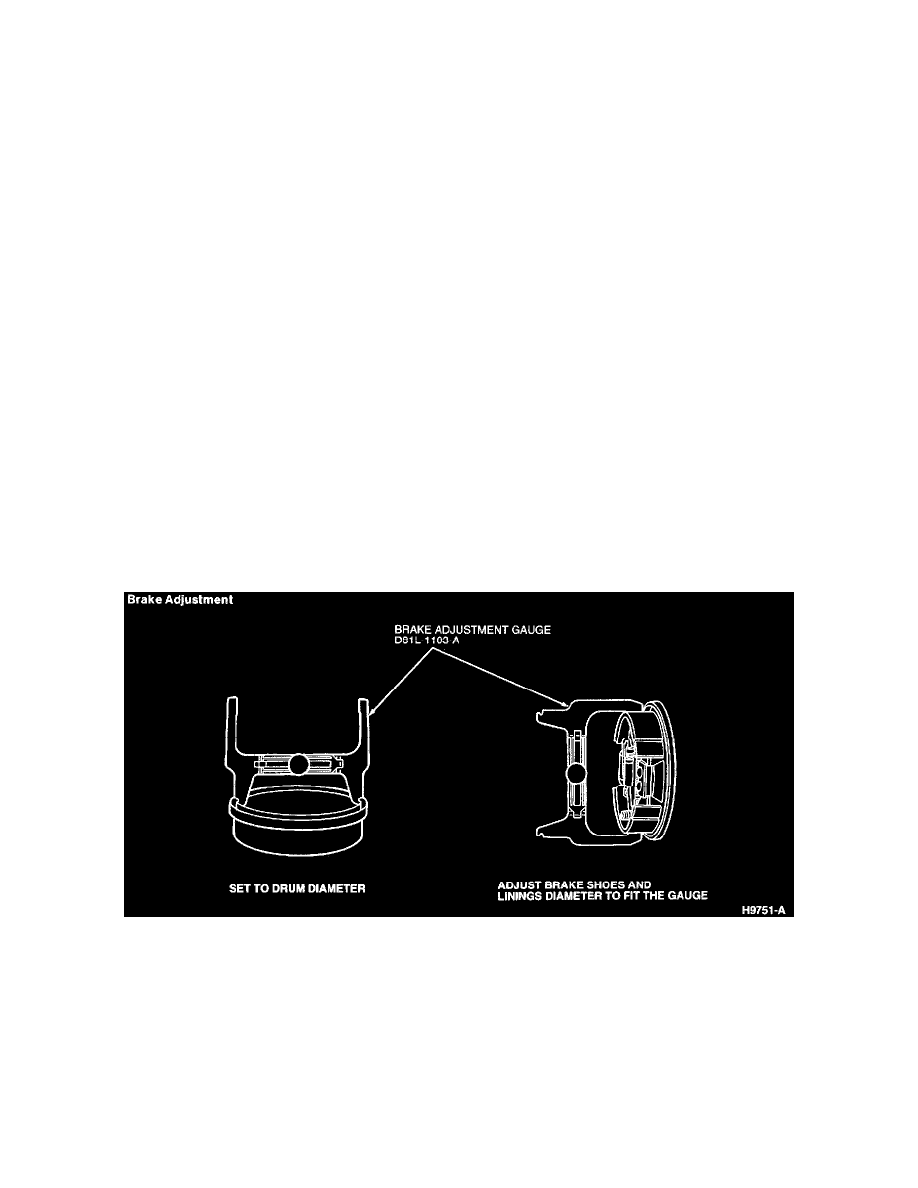
NOTE: The rear brake drum are self-adjusting and require a manual adjustment only after the brake shoes and linings have been replaced or when
the length of the brake adjuster screw has been changed while performing some other service operation. The manual adjustment is performed with
the brake drum removed, using a brake adjustment gauge. If adjustment is required, Refer to Brake Drum - Adjustments. See: Adjustments
NOTE: When the brake system is emptied or partially emptied, fluid may not flow from the bleeder screws during normal bleeding. It may be
necessary to prime the system by performing the Master Cylinder Bleeding procedure. See: Brake Bleeding/Service and Repair
NOTES:
-
The primary and secondary (diagonal split) hydraulic brake systems are individual systems and are bled separately. Bleed longest line first on
individual system being serviced, then the shorter of the two.
-
During the bleeding operation, do not allow brake master cylinder reservoir to run dry. Keep master cylinder reservoir filled with High
Performance DOT-3 Motor Vehicle Brake Fluid.