
Sable V6-183 3.0L DOHC VIN S MFI (1997)
Brake Drum: Service and Repair
Removal and Installation
REMOVAL
1. Raise vehicle and support.
2. Remove wheel cover and nut covers as required.
3. Remove tire and wheel assembly.
4. Remove drum retainers (two push nuts).
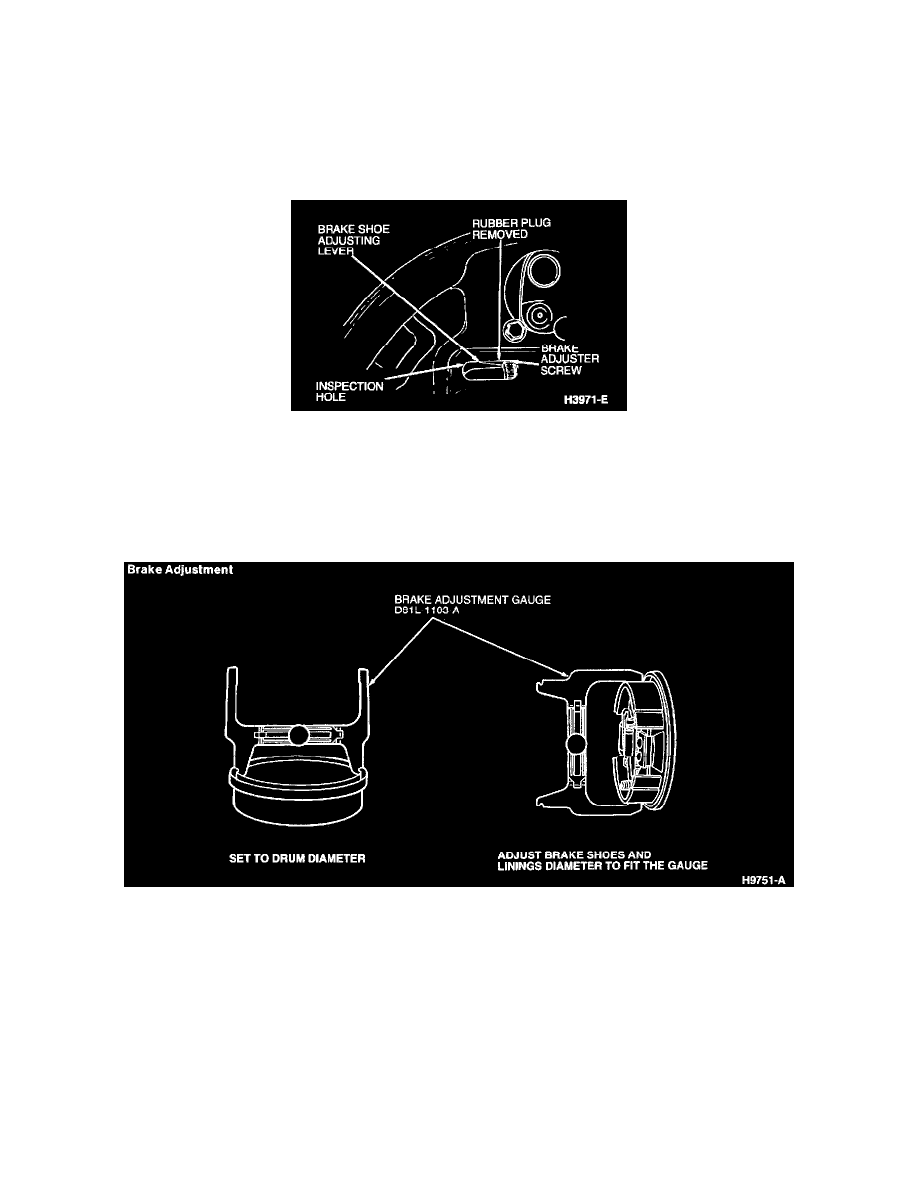
5. Remove drum. If drum will not come off, back off brake adjuster screw as follows:
-
Pry rubber plug from rear brake backing plate inspection hole.
-
Remove the brake tube-to-axle retention bracket. This will allow sufficient room for insertion of tools.
-
Use a screwdriver and brake tools to disengage brake shoe adjusting lever and back off the brake adjuster screw
6. Use an industrial vacuum cleaner such as Rotunda Brake/Clutch Service Vacuum or Rotunda Brake Parts Washer or equivalent, to remove all dust
from rear brake backing plate and interior of the brake drums.
INSTALLATION
NOTE: The rear brake drum are self-adjusting and require a manual adjustment only after the brake shoes and linings have been replaced or when the
length of the brake adjuster screw has been changed while performing some other service operation. The manual adjustment is performed with
the brake drum removed, using a brake adjustment gauge
PRE-CHECKS
-
When adjusting the rear brake shoe and lining, check the front parking brake cable and conduit and rear parking brake cables for proper
adjustment and freedom of movement.
-
Make sure the equalizer operates freely.
-
When adjusting the rear brake shoes and linings, check the parking brake lever for proper adjustment and freedom of movement.
-
If necessary Refer To Parking Brake for servicing. See: Parking Brake System
-
Make sure that the adjuster mechanism operates freely with the brake shoes and linings centered on the rear brake backing plate.
MANUAL ADJUSTMENTS