
Sable V6-183 3.0L DOHC VIN S MFI (1997)
Load Compensator: Service and Repair
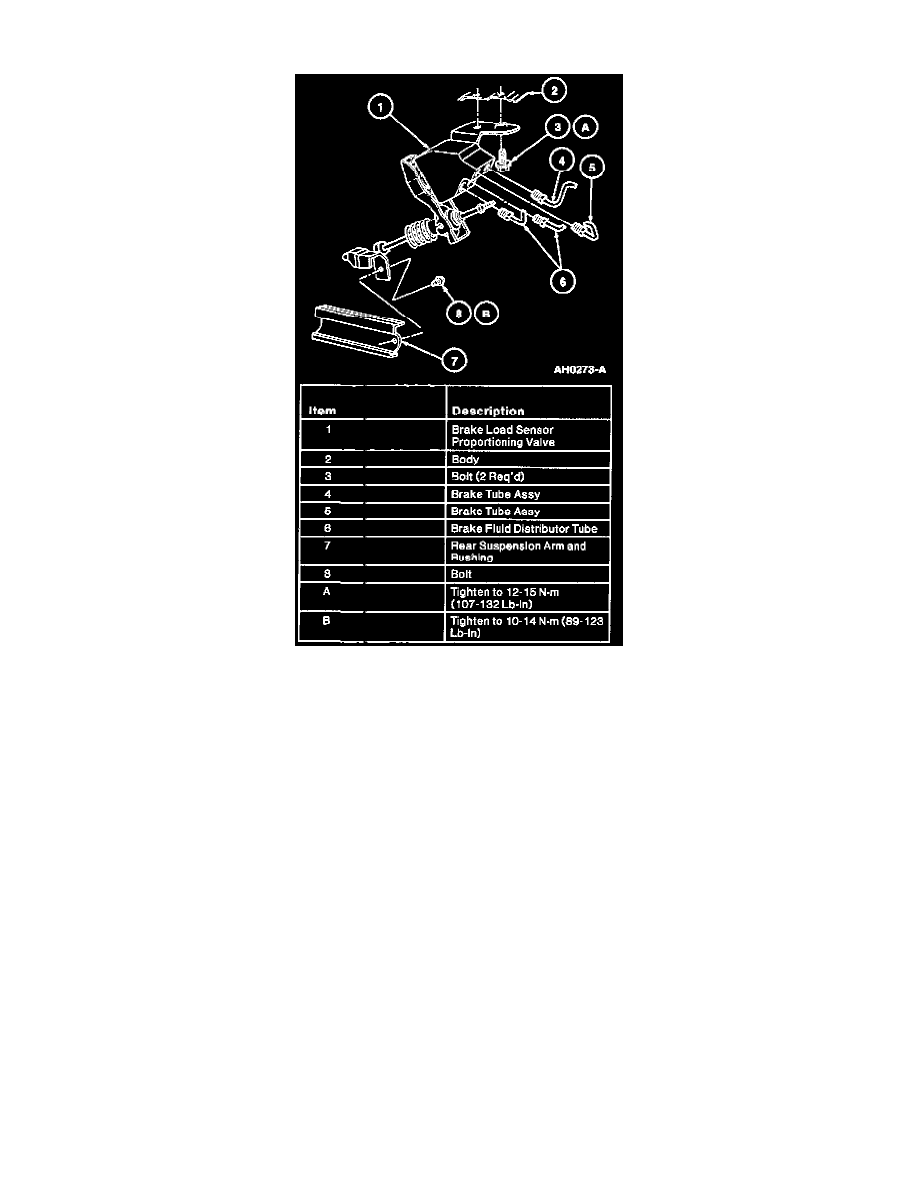
REMOVAL
1. Raise and support vehicle.
2. Disconnect four brake tubes from brake load sensor proportioning valve and note positions.
3. Remove screw retaining load sensing proportioning valve bracket to rear suspension arm and bushing.
4. Remove two screws retaining brake load sensor proportioning valve bracket to underbody and remove.
INSTALLATION
1. Make sure rear suspension is in full rebound (extended).
NOTE: The service replacement brake load sensor proportioning valve should have a red plastic gauge clip which must not be removed until
installation is completed.
2. Make sure red plastic gauge clip is in position on brake load sensor proportioning valve and operating rod lower adjustment set screw is loose. If
red gauge clip is missing, install then perform adjustment procedure. Refer to Adjustments. See: Adjustments
3. Position brake load sensor proportioning valve assembly to underbody and install two retaining bolts.
4. Position load sensing proportioning valve lower mounting bracket to rear suspension arm and bushing. Install one retaining screw. Tighten to
10-14 Nm (89-123 inch lbs.). Make sure the brake load proportioning valve adjuster sleeve is resting on lower bracket and tighten lower adjuster
setscrew.
5. Connect four brake tubes in the same position as removed.
6. Bleed brake load sensor proportioning valve through both rear disc brake calipers.
7. Remove red plastic gauge clip and lower vehicle.