
Sable V6-183 3.0L DOHC VIN S MFI (1997)
Piston: Service and Repair
Disassembly And Assembly
DISASSEMBLY
CAUTION:
Component Location/Orientation
The location and orientation of each precision machined component should be noted. When engine is assembled each component should be
installed in its original position. These components include:
-
Rocker arms, rocker arm seats and valve tappets.
-
Crankshaft main bearings and bearing caps.
-
Connecting rod bearings and bearing caps.
-
Pistons, piston rings and piston pins.
-
Camshafts and camshaft journals.
1. Remove pistons and connecting rods.
2. Remove piston rings from pistons.
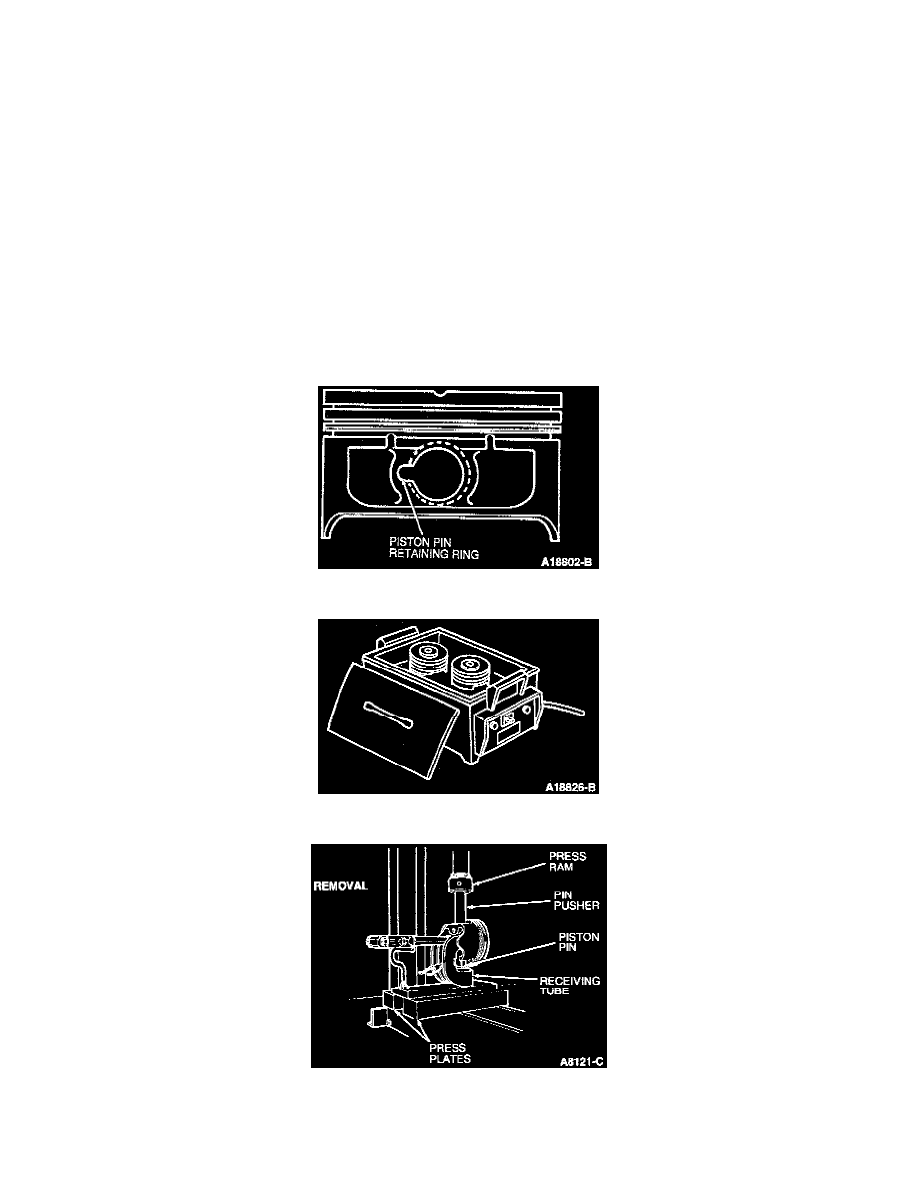
WARNING: COVER THE END OF THE PIN BORE WITH A HAND OR SHOP RAG WHEN REMOVING THE RETAINER RING
SINCE IT HAS A TENDENCY TO SPRING OUT. EYE PROTECTION SHOULD BE WORN.
3. Using O-ring Remover T71P-19703-C, remove the two piston pin retainer rings.
4. Gradually heat pistons to approximately 70-135°C (160-275°F).
5. Using Piston Pin Tool D81L-6135-A or equivalent, press piston pin from piston and connecting rod.
ASSEMBLY