
Sable V6-183 3.0L DOHC VIN S MFI (1997)
Valve Cover: Service and Repair
Right Side
REMOVAL
1. Remove upper intake manifold.
2. Remove ignition wires from ignition coil and spark plugs. Refer to Powertrain Management.
3. Remove ignition coil.
4. Remove crankcase ventilation tube from valve cover and remove from vehicle.
5. Remove retaining nuts for engine control sensor wiring and evaporative emission return tube from valve cover retaining stud bolts. Position
evaporative emission return tube out of the way.
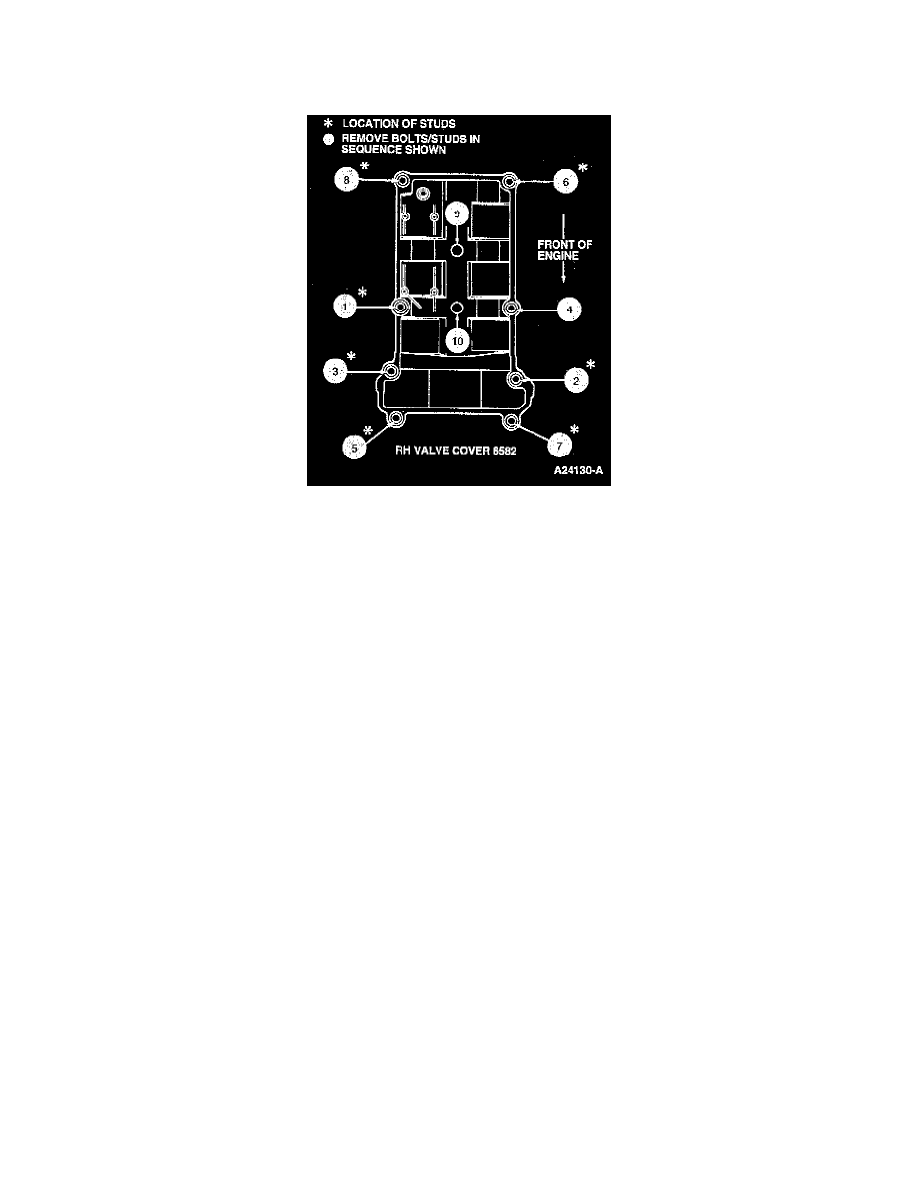
6. Loosen valve cover retaining bolts and stud bolts following the removal sequence shown.
7. Carefully remove valve cover from cylinder head. Remove integral valve cover gasket from valve cover.
INSTALLATION
CAUTION: Cleaning Aluminum Surfaces
Do not use abrasive grinding discs to remove gasket material; use only plastic manual scrapers. Do not scratch or gouge aluminum sealing
surfaces.
1. Clean valve cover sealing surfaces using a shop towel and Metal Surface Cleaner F4AZ-19A536-RA or equivalent meeting Ford specification
WSE-M5B392-A.
NOTE: Tighten all fasteners within six minutes of applying sealer or sealer will begin to cure and may not seal properly.
2. Install new valve cover gasket onto valve cover.