
Sable V6-183 3.0L DOHC VIN S MFI (1997)
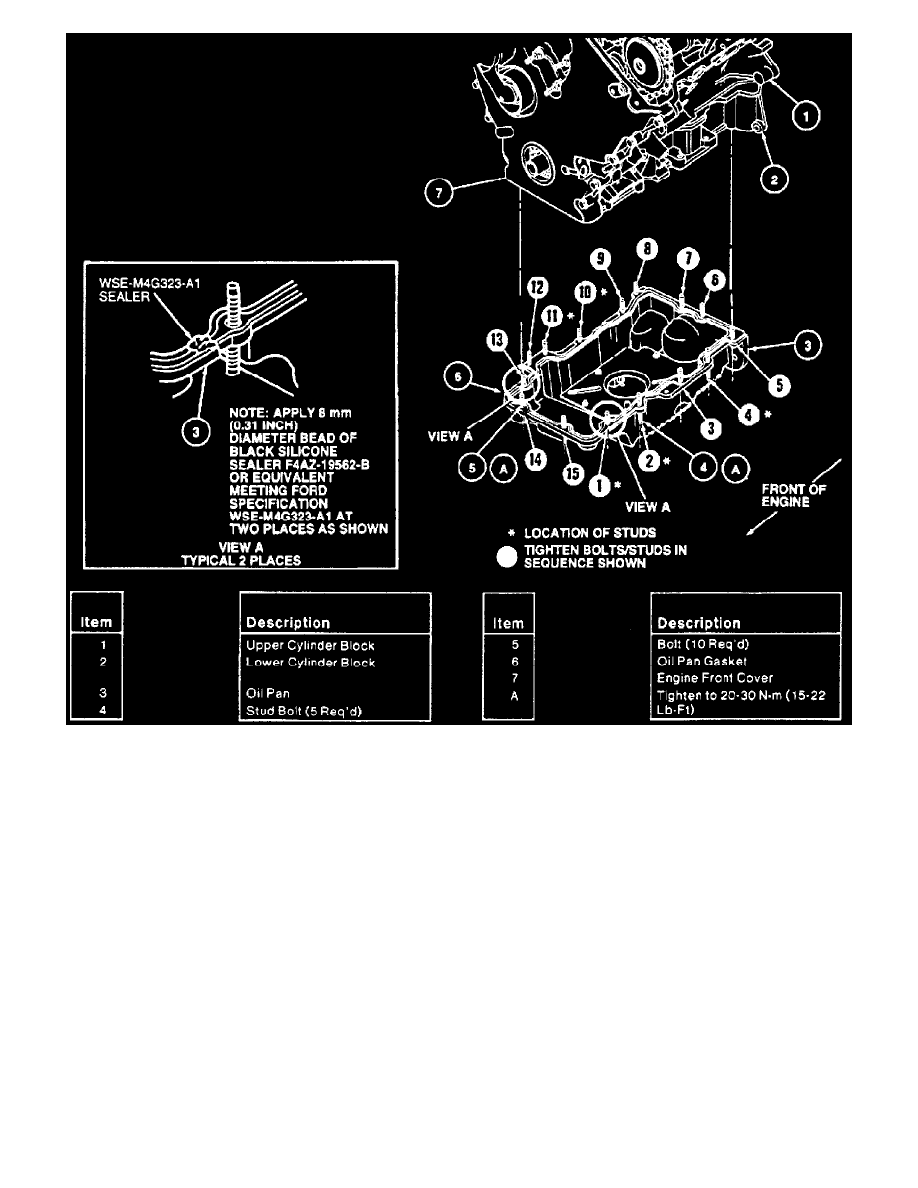
Fig. 33 Oil pan installation
6.
Install a new oil pan gasket, and apply an 8 mm (0.31 inch) diameter bead of Black Silicone Sealer F4AZ-19562-B or equivalent meeting Ford
specification WSE-M4G323-A1 on oil pan gasket as shown in the illustration.
7.
Install oil pan and oil pan retaining bolts and studs to lower cylinder block in locations shown.
8. Tighten bolts and nuts in three steps:
Step 1: Push the oil pan against the transaxle case and tighten oil pan to transaxle bolts finger tight.
Step 2: Tighten oil pan retaining bolts and studs in sequence shown to 20-30 Nm (15-22 ft. lbs.).
Step 3: Tighten oil pan to transaxle bolts to 34-46 Nm (25-33 ft. lbs.).
9. Install the transaxle support bracket to the oil pan retaining stud bolts and transaxle. Tighten retaining nuts to 8-12 Nm (71-106 inch lbs.). Tighten
retaining bolts to 20-30 Nm (15-22 ft. lbs.).
10.
Install access plug onto engine rear plate.
11.
Install dual converter Y pipe.
12.
Replace oil bypass filter.
13.
Lower vehicle.
14.
Fill crankcase to proper level with engine oil meeting Ford specification ESE-M2C153-E.
15.
Run engine and check for leaks.