
Sable V6-183 3.0L DOHC VIN S MFI (1997)
Fuel Line Coupler: Service and Repair
Push Connect Fittings
Steel Fittings
REMOVAL
1. Inspect visible internal portion of fitting for dirt accumulation. If more than a light coating of dust is present, clean the fitting before disassembly.
NOTE: This fitting consists of a body, spacers, O-rings and a retaining clip. The clip locks the fitting on to the fuel or vapor tube depending on the
application.
2. Some adhesion between the seals in the fittings and the tubes will occur with time. To separate, twist the fitting on the tube, then push and pull the
fitting until it moves freely on the tube.
NOTE: If necessary, drain fuel tank.
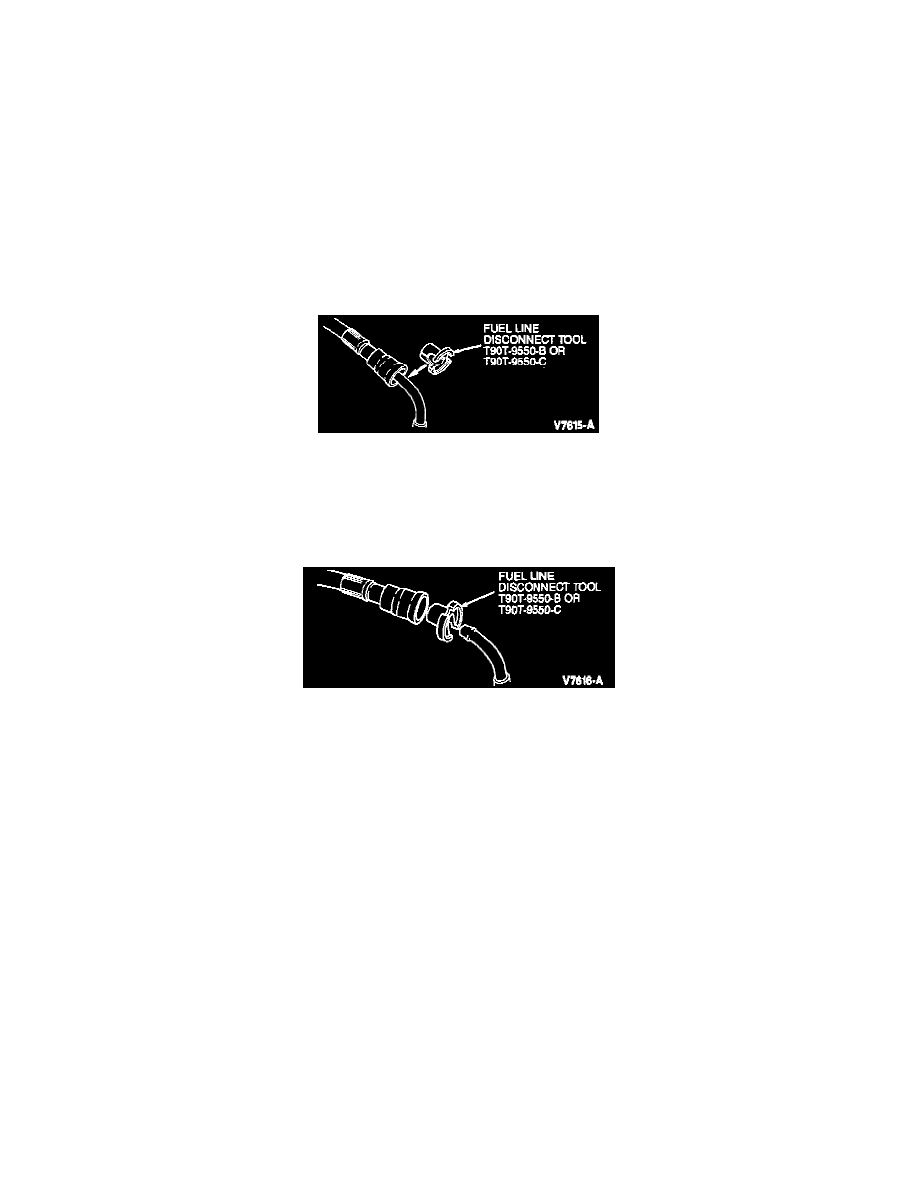
3. Push disconnect tool into the connector to release internal locking fingers.
NOTE: Some fuel tubes have a secondary bead which aligns with the outer surface of the clip. These beads can make tool insertion difficult. To
disengage the tube from the fitting, install Fuel Line Disconnect Tool T90T-9550-B (5/16 inch) or T90T-9550-C (3/8 inch) (Parts of
T90T-9550-S) onto the fuel line or vapor tube to be disconnected.
4. Separate fuel tube or vapor tube from connector. Remove disconnect tool.
NOTE: Only moderate effort is required if the tube has been properly disengaged. Use hands only.
5. After disassembly, inspect and clean tube end sealing surface. Tube end should be free of scratches and corrosion as they result in paths for fuel or
vapor leakage. Inspect the inside of the fitting for any internal parts such as O-rings and spacers that may have been dislodged from the fitting.
Replace any damaged connector.
INSTALLATION
1. Install new connector/hose tube assembly if original was found to be damaged.
CAUTION: The steel push connect and spring lock couplings used on the flexible fuel vehicles have special O-rings for methanol fuel and ethanol
fuel tube ends, steel compatibility.
2. Before installing fitting on tube, wipe tube end with a clean cloth. Inspect the inside of the fitting to ensure it is free of dirt and/or obstructions.
3. To install fitting onto the tube, align fitting and tube axially and push fitting onto tube end. When fitting is engaged, a definite click will be heard.
Pull on fitting to ensure it is fully engaged. Applying a light coat of engine oil to the tube end will ease assembly.
Nylon Fittings
REMOVAL
1. If necessary, drain fuel tank.
NOTE: Disconnect all push-connect fittings from components prior to component removal. The push-connect fittings that connect flexible fuel
lines to fuel pump module cannot be disconnected until fuel tank is partially lowered just before removing fuel tank completely.