
Sable V6-183 3.0L DOHC VIN S MFI (1997)
Alternator: Service and Repair
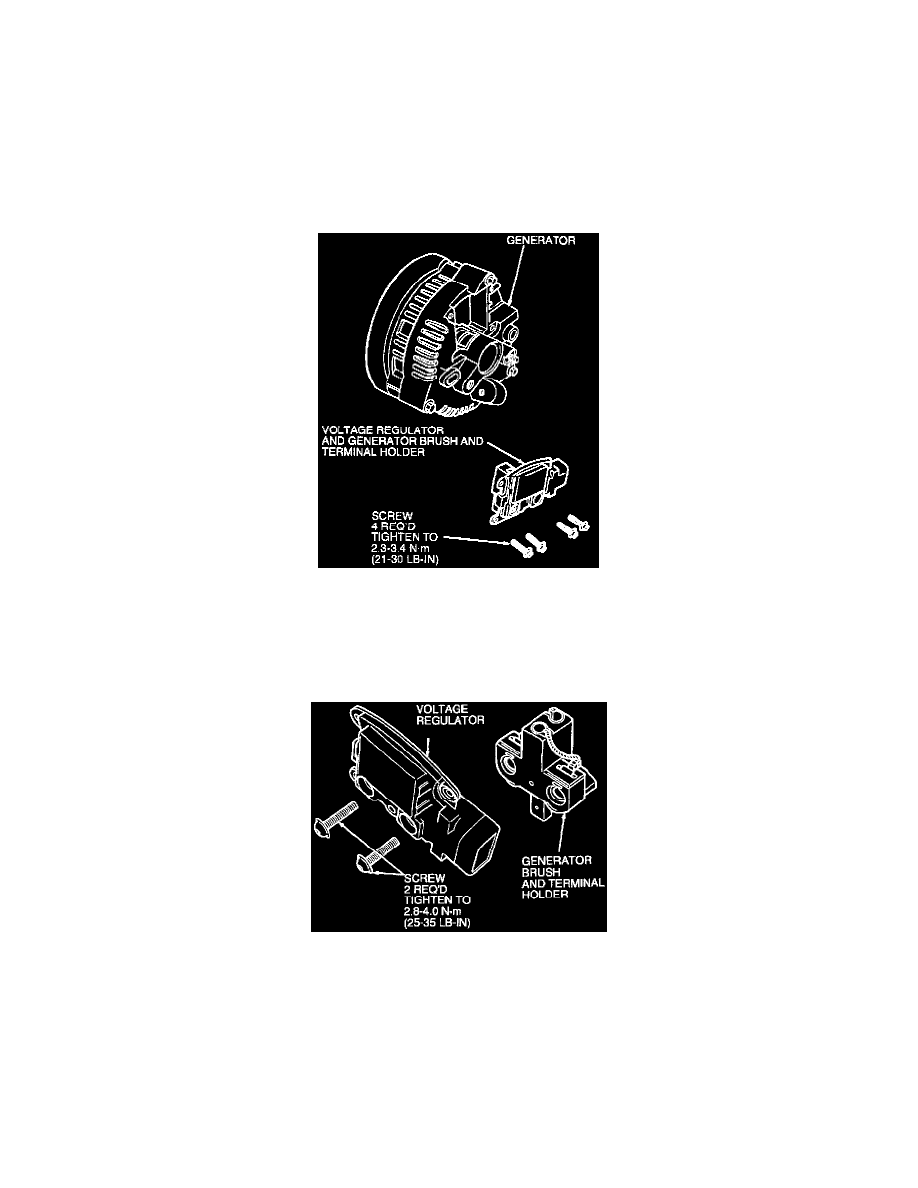
Disassembly and Assembly
DISASSEMBLY
NOTE: If the Generator (GEN) needs further service, replace as an assembly.
1. Remove four screws (T20 Torx(R) type head) retaining Voltage Regulator (VR) to generator rear housing and bearing.
2. Remove voltage regulator, with generator brush and terminal holder attached, from generator.
3. Hold the voltage regulator in one hand and pry off the cap covering the A screw head with a screwdriver.
4. Remove two screws (T20 TORX(R) type head) retaining the voltage regulator to the generator brush and terminal holder. Separate the voltage
regulator from generator brush and terminal holder.
ASSEMBLY
1. Position generator brush and terminal holder to voltage regulator and install retaining screws.
2. Replace cap on the head of the A terminal screw.
3. Depress the generator brushes into the generator brush and terminal holder and hold the generator brushes in position by inserting a standard
size paper clip or equivalent through both the location hole in the voltage regulator and through the holes in the generator brushes.
4. Install the voltage regulator and generator brush and terminal holder to the generator assembly with the retaining screws. Tighten screws to
2.3-3.4 N.m (21-30 Lb-In).
NOTE: Remove paper clip or equivalent from the voltage regulator.