
Sable V6-183 3.0L DOHC VIN S MFI (1997)
Part 2 Of 2
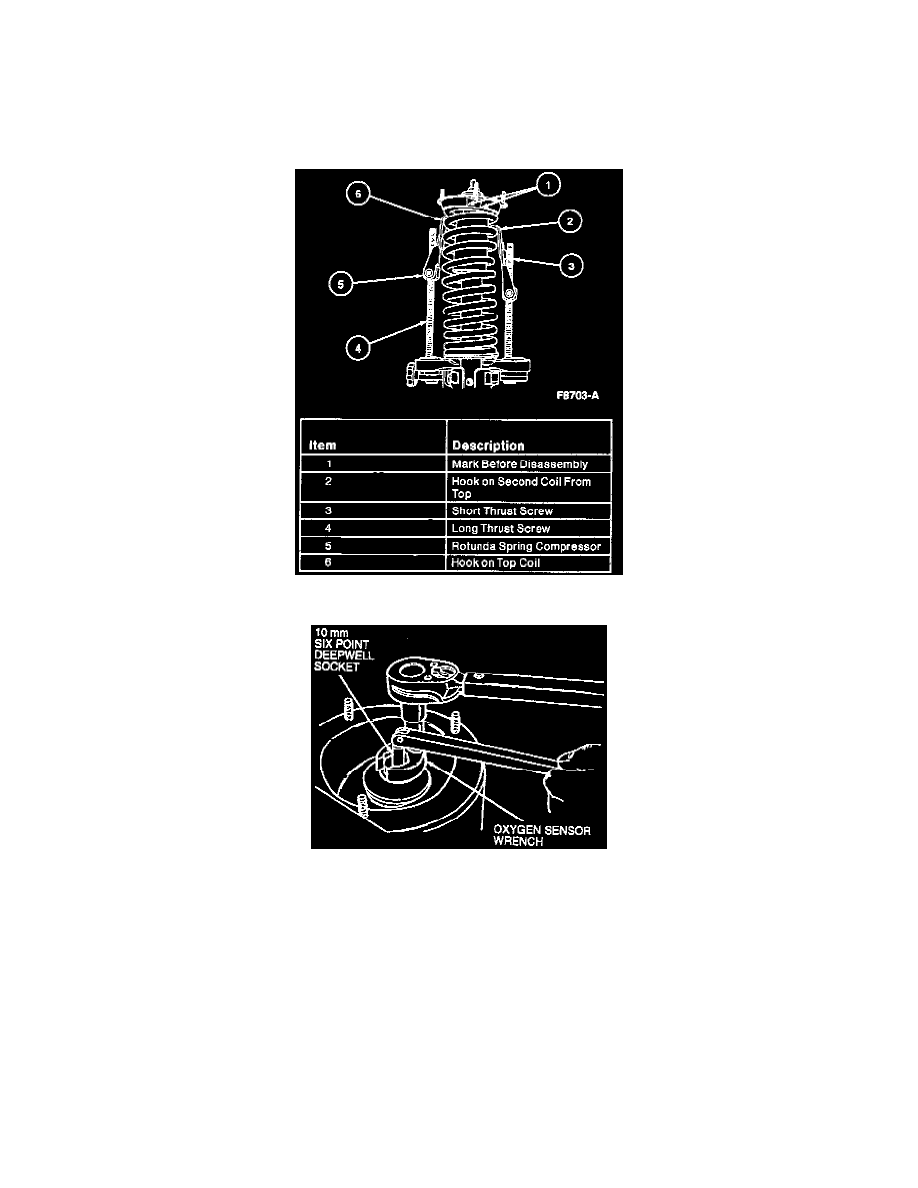
CAUTION: Never attempt to disassemble the front shock absorber strut without first compressing the front coil spring using Rotunda Spring
Compressor 164-R3571 or equivalent to prevent injury.
DISASSEMBLY
1. Remove front shock absorber strut assembly.
2. Compress front coil spring with rotunda spring compressor.
3. Place T-50 TORX Drive on top of shock shaft and hold while removing top shaft retaining nut with a 21 mm 6-point crow foot wrench and ratchet.
CAUTION: It is important that the retaining nut be turned and rod held still to prevent fracture of the rod at the base of the Torx socket.
4. Loosen rotunda spring compressor, then remove front shock absorber mounting bracket, bearing plate assembly and front coil spring.
ASSEMBLY
CAUTION: Make sure the correct assembly sequence and proper positioning of bearing and seat assembly are followed. The bearing and seat
assembly is press-fit onto the front shock absorber mounting bracket.
NOTE: When servicing, check the front spring insulator for damage before assembly.
1. Install rotunda spring compressor.
2. Install front coil spring, lower washer and front shock absorber mounting bracket assembly on shock absorber strut assembly.
3. Compress front coil spring with rotunda spring compressor.