
Sable V6-183 3.0L DOHC VIN S MFI (1997)
Shift Control Linkage - Floor Shift (Part 2 Of 2)
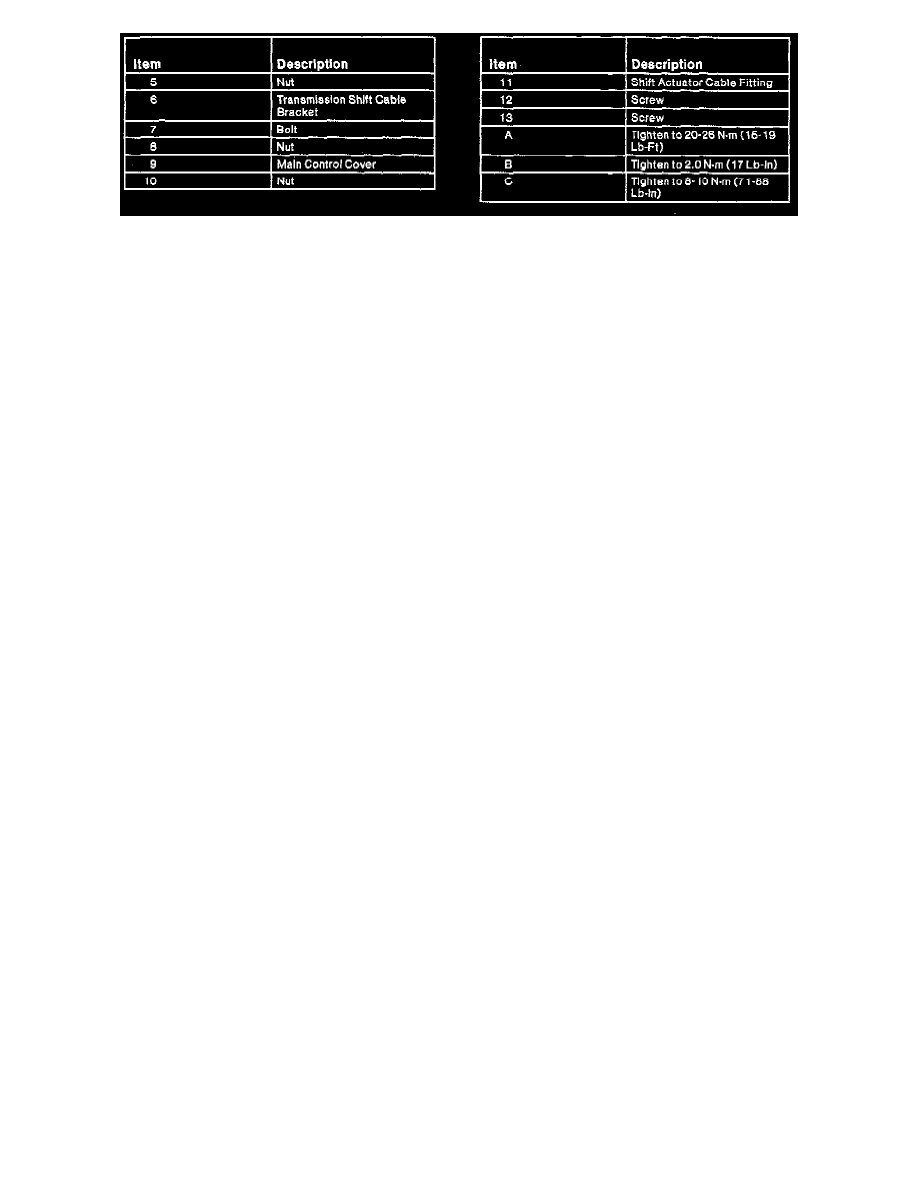
7. Remove one nut and disconnect shift cable from manual control lever.
8. Remove shift cable from shift cable bracket.
9. Dislodge transmission shift cable grommet from dash panel and gently pull transmission shift cable through dash panel from engine compartment
side being careful not to pull mechanics wire completely through dash panel.
10. Remove two bolts, one nut and shift cable bracket from transaxle.
INSTALLATION
1. Install shift cable bracket to transaxle and secure with two bolts and one nut. Tighten bolts and nut to 20-25 Nm (15-18 ft. lbs.).
2. Attach mechanic's wire to shift selector lever end of shift cable and thread opposite end of mechanics wire through dash panel and into passenger
compartment.
3. Gently pull shift cable through dash panel and into passenger compartment side until shift cable grommet can be seated into dash panel.
4. Install shift cable into shift cable bracket and secure with shift actuator cable fitting.
5. Connect shift cable to manual control lever and secure with shift cable-to-manual control lever nut. Do not tighten nut until shift cable has been
adjusted.
6. Connect shift cable to transaxle range selector lever.
7. Adjust shift cable. Place transaxle range selector lever in OD position. Tighten shift cable-to-manual control lever nut to 17-23 Nm (13-17 ft. lbs.)
.
8. Install center console assembly.
9. Install speed control actuator cable (if equipped).
10. Install air cleaner assembly.
11. Connect battery ground cable.
12. Check transaxle operation in each range. Make sure park mechanism and Transmission Range (TR) sensor are functioning properly.