
Villager V6-181 3.0L SOHC VIN 1 EFI (1997)
Seat Track: Service and Repair
Rear Seat Track
REMOVAL
1. Remove the center seat(s) from the vehicle.
2. Remove the rear bench seat.
3. Remove the interior trim:
a. LH quarter trim panel
b. RH quarter trim panel
c. Liftgate opening scuff plate
d. Rear door scuff plate
e. RH center body pillar inside lower finish panel
4. Roll up the floor carpet over the front seats to expose the rear seat tracks.
NOTE: Cover the front seats with plastic to prevent them from being soiled.
5. Remove the six rear seat track bolts from each rear seat track.
6. Remove the rear seat tracks from the vehicle.
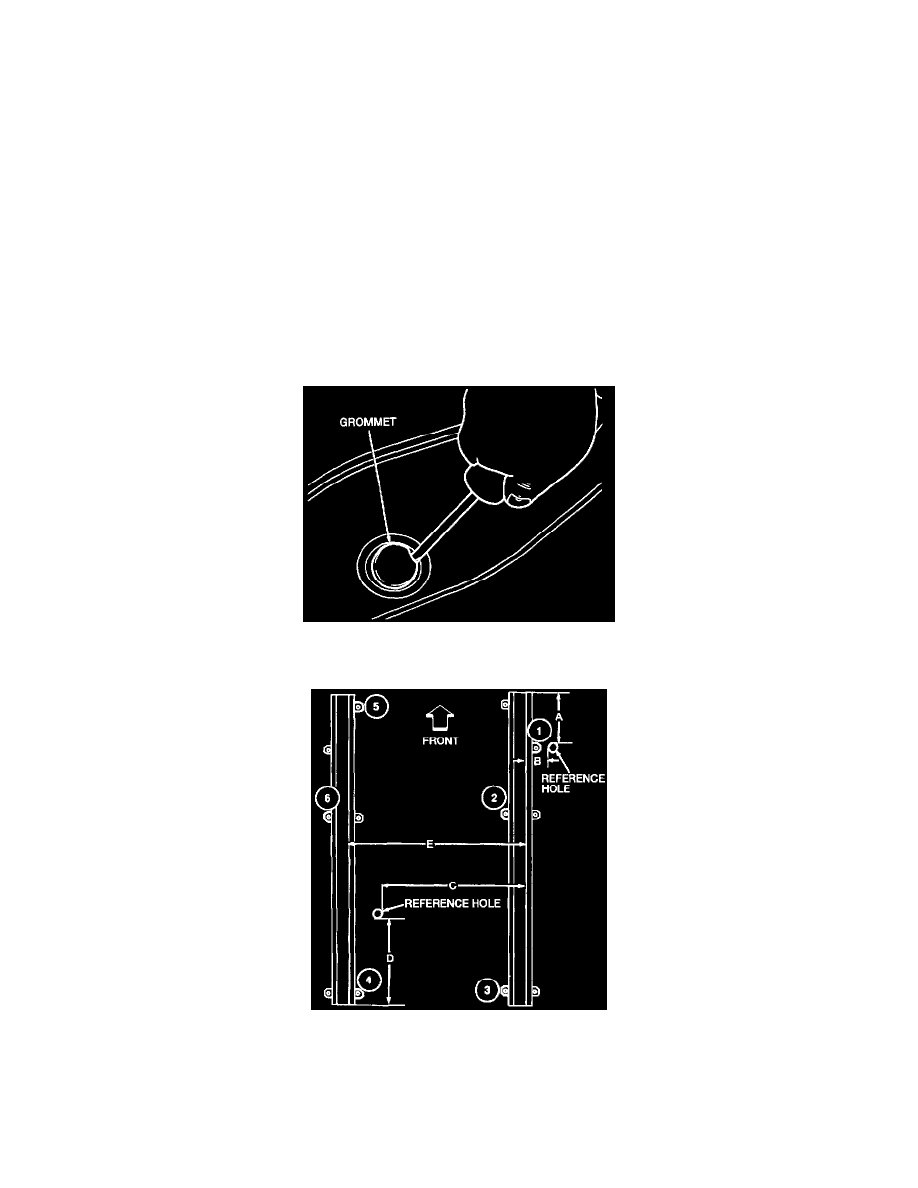
INSTALLATION
1. Remove the grommets from the two reference holes in the floor.
2. Position the RH rear seat track with the rear seat roller assembly in the center seating position in the vehicle.
NOTE: The dimensions should be followed as closely as possible. However, they may vary more than 0.5 mm (0.020 inch) on the vehicle to
obtain minimum effort to slide the rear bench seat.
3. Loosely install rear seat track bolts 1, 2 and 3.
4. Measure distance (A) to establish the RH rear seat track front-to-rear position.
(A) = 413.5 mm (16.28 inches).
5. Establish the RH rear seat track side-to-side position.