
Remote handset, button damage
- Make
- Mini
- Model
- Mini Technical Bulletins
- Section
- Remote handset, button damage › Remote handset, button damage
REMOTE HANDSET, BUTTON DAMAGE
- Model
- Mini, 100, 200/400, New 200, New 400
- Affected vehicles
- Mini - XN 117711 onwards 100 - XP 066946 200/400 - XW 235024 New 200 - All New 400 - All
- Date
- 1996-09-25
- Reference
- R6957BU
Bulletin text
Mini, 100, 200/400, New 200, New 400
AFFECTED RANGE:
Mini - XN 117711 onwards 100 - XP 066946 200/400 - XW 235024 New 200 - All New 400 - All
PROBLEM:
REMOTE HANDSET, BUTTON DAMAGE
CAUSE:
Either:
Buttons split (damage by finger nail). Buttons stuck down (displaced and trapped under casing).
ACTION:
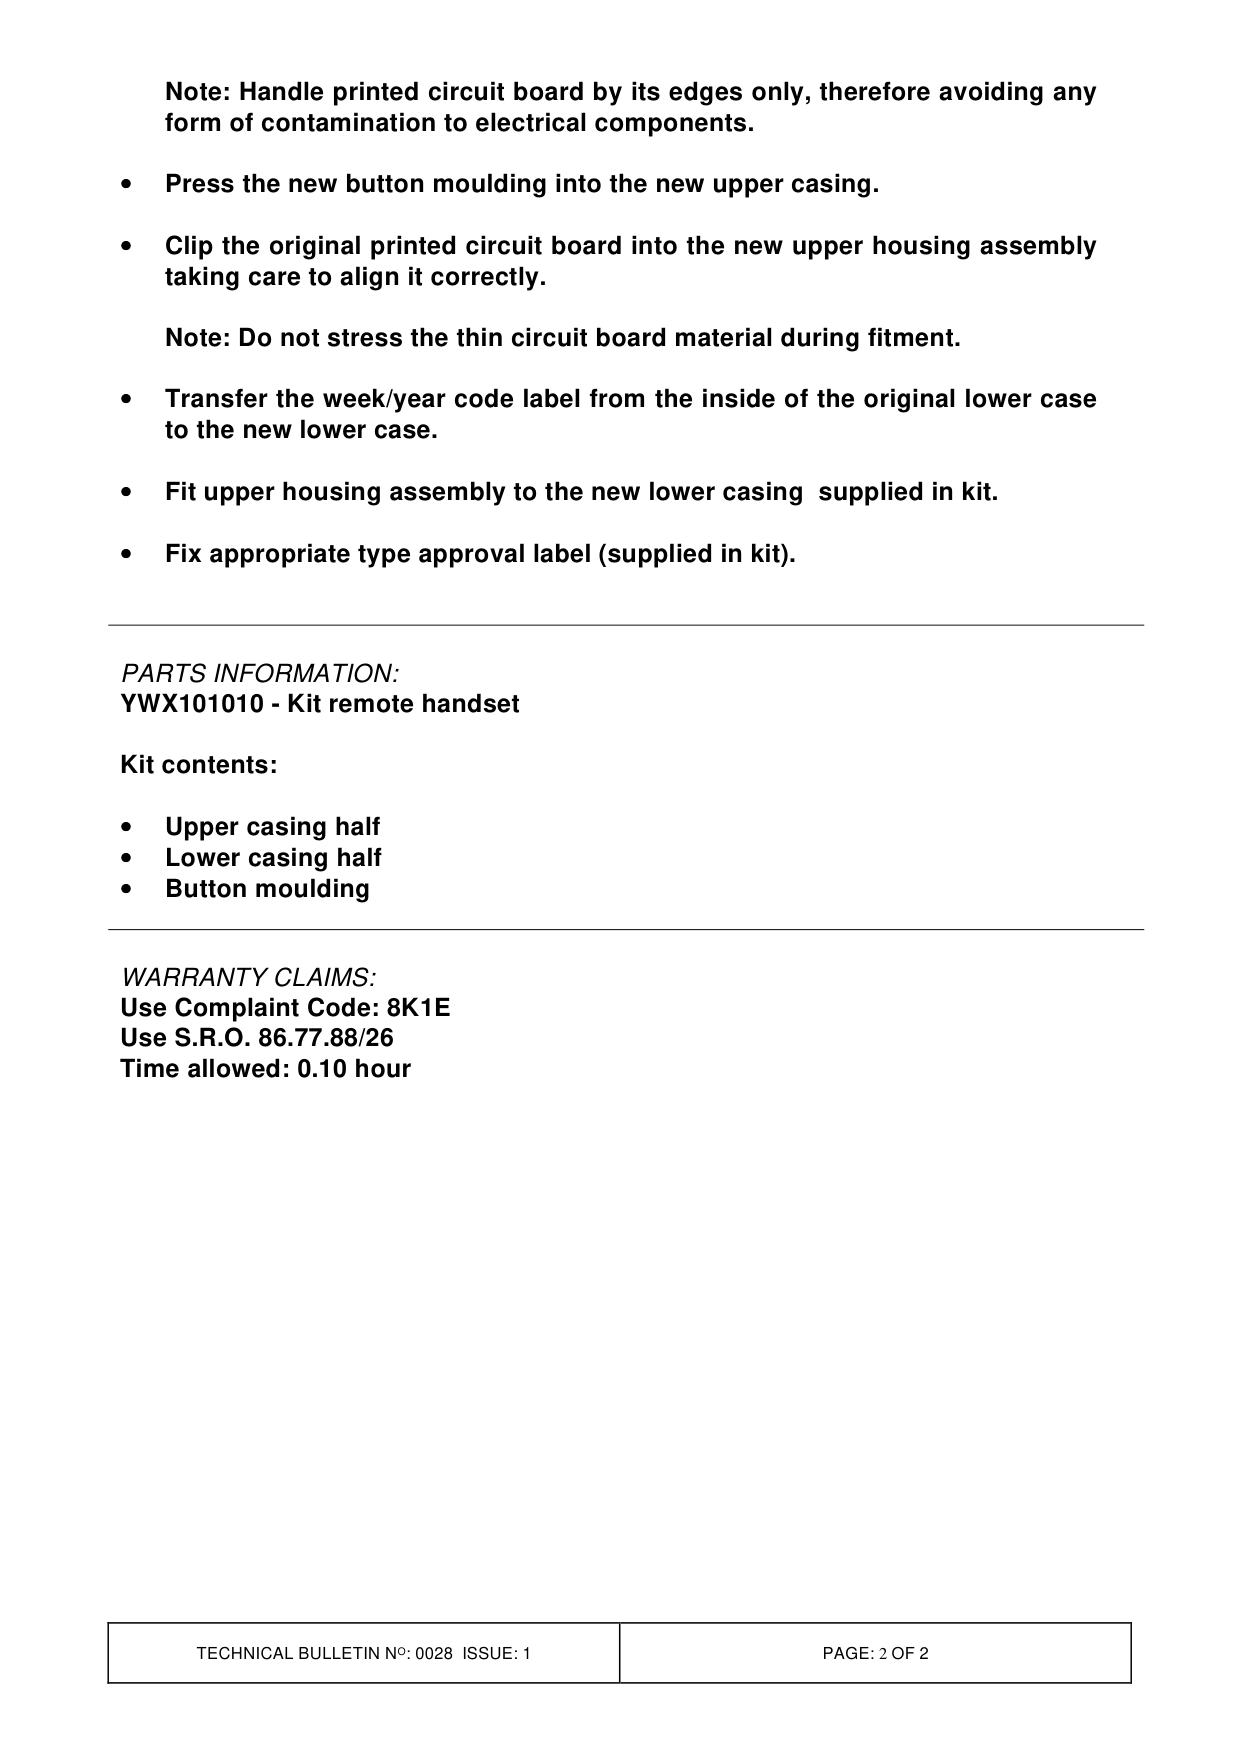
Remote handset service kit, part YWX101010 introduced to enable button and casing replacement whilst retaining the original transmitter component. This improved housing is supplied with modified rubber buttons to prevent reoccurrence of the above problems.
Note: Anti-static precautions must be observed when performing the procedure.
Replacement procedure:
• • Prise original handset apart, with a small screwdriver, inserted into the cut-out at the rear (key ring end) of the remote handset.
• • Using finger pressure only, prise apart the two clips holding the printed circuit board and remove it from the remote handset.
0028 Bull. No:
1 25.09.96
number
Note: Handle printed circuit board by its edges only, therefore avoiding any form of contamination to electrical components.
• • Press the new button moulding into the new upper casing.
• • Clip the original printed circuit board into the new upper housing assembly taking care to align it correctly.
Note: Do not stress the thin circuit board material during fitment.
• • Transfer the week/year code label from the inside of the original lower case to the new lower case.
• • Fit upper housing assembly to the new lower casing supplied in kit.
• • Fix appropriate type approval label (supplied in kit).
PARTS INFORMATION:
YWX101010 - Kit remote handset
Kit contents:
• • Upper casing half • • Lower casing half • • Button moulding
WARRANTY CLAIMS: Use Complaint Code: 8K1E Use S.R.O. 86.77.88/26 Time allowed: 0.10 hour
Parts & tools for this job For Mini Mini
- TOOLDigital multimeterSearch: automotive digital multimeter
- PARTAssorted fuse kitSearch: car fuse assortment kit
- TOOLWire crimper and connector kitSearch: wire crimper connector kit
Links open Amazon search results in a new tab. As an Amazon Associate I earn from qualifying purchases.