
3000GT V6-2972cc 3.0L DOHC (1993)
Starter Motor: Service and Repair
Manual Transaxle
1. Raise and support vehicle.
2. Drain transmission fluid into appropriate container.
3. Remove engine lower cover.
4. Remove battery and battery tray, then the washer tank.
5. Remove air cleaner cover and air intake hose.
6. Remove clutch release cylinder and oil line bracket without disconnecting oil coupling, then secure to body using suitable wire.
7. Disconnect transaxle control and speedometer cables.
8. Raise transaxle with suitable jack to release pressure on transaxle mount bracket, then disconnect transaxle mount.
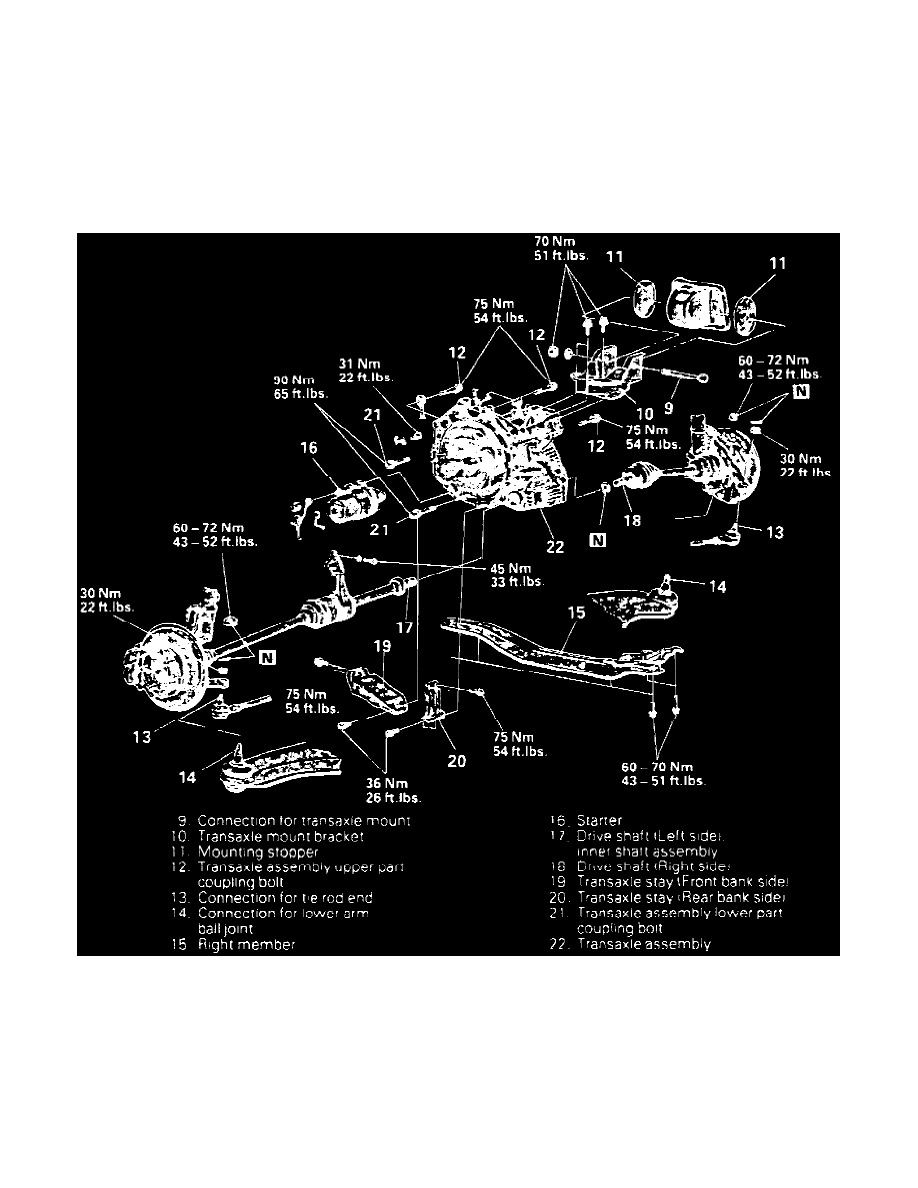
Fig. 1 Starter Replacement
9. Remove transaxle mounting stopper, Fig. 1.
10. Loosen tie rod end nut then disconnect tie rod from knuckle using steering linkage puller tool No. MB991113-01, or equivalent. Ensure tie cord
of tool is tied off correctly.
11. Repeat step 10 on lower ball joint.
12. With transaxle properly supported, remove right-hand crossmember.
13. Remove starter electrical connections, then the starter assembly.
14. Reverse procedure to install, noting the following: