
3000GT V6-3.0L SOHC (1998)
<A> Moving Low-Pressure Hose.
Remove the nuts and bolts securing low-pressure hose shown in the illustration, and using a wire, suspend the hose from the hood to a position
where it does not hamper the removal and installation of the brake booster.
CAUTION: Move the hose slowly with care not to bend it.
INSTALLATION
Installation in reverse order as removal.
Installation Service Points
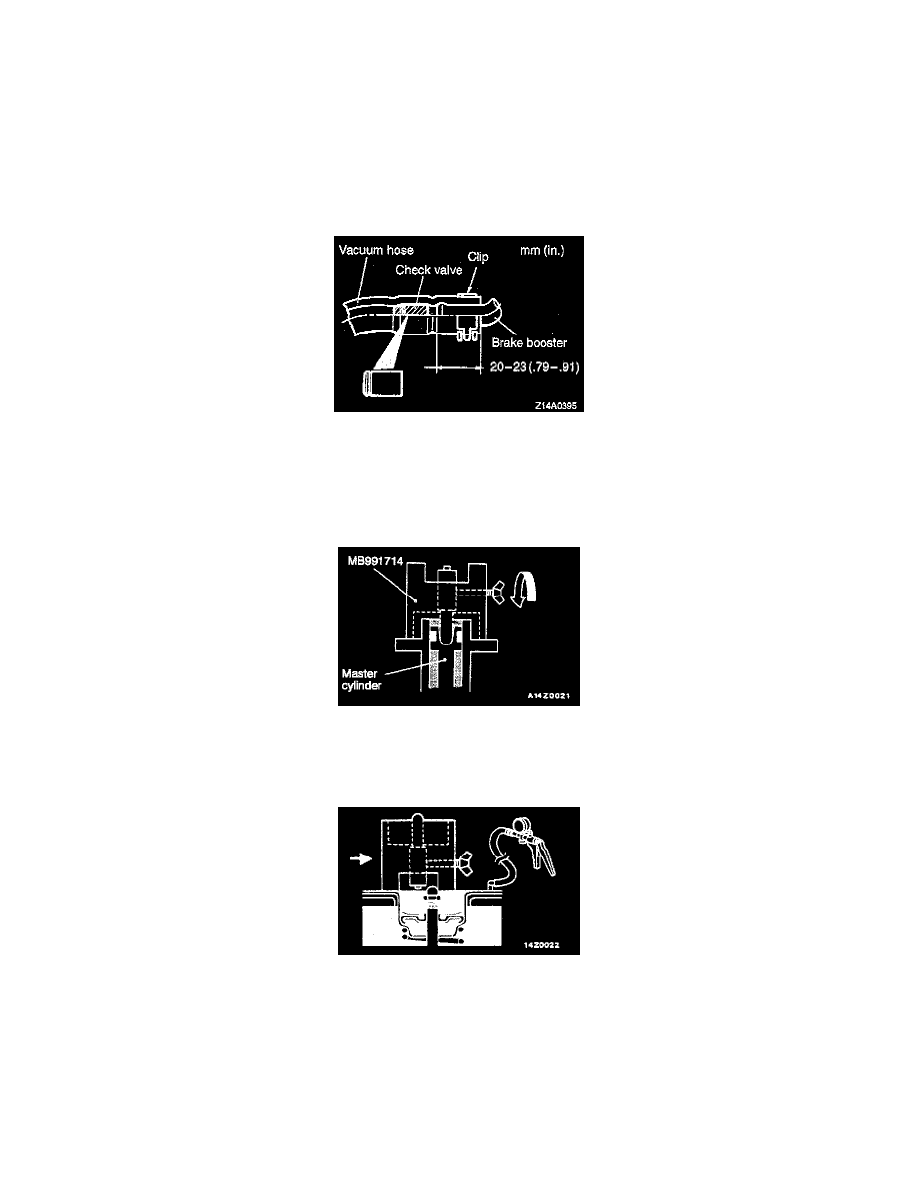
>A< Vacuum Hose With Check Valve Installation.
1) In the case of AWD, install the vacuum hose to the brake booster nipple as shown in the figure. Secure the hose with the hose clip.
CAUTION: The check valve and the pipe part of the brake booster must not contact each other.
2) Install the other end of the vacuum hose fully onto its port on the engine. Secure the hose using the hose clip.
>B< Clearance Adjustment Between Brake Booster Push Rod And Primary Piston.
1) Set up the special tool on the master cylinder.
2) Bring the shaft of the special tool to a position where it lightly contacts the piston of the master cylinder.
3) Turn the wing nut to lock the shaft.
4) Apply a negative pressure of -66.7 kPa (9.7 psi) to the brake booster using a hand vacuum pump.
5) Turn the special tool upside down and place it off-center on the brake booster.