
3000GT V6-3.0L SOHC (1998)
Parking Brake Lever: Testing and Inspection
PARKING BRAKE LEVER STROKE CHECK
1. Pull the parking brake lever with a force of approximately 200 N (45 lbs.), and count the number of notches.
CAUTION: The 200 N (45 lbs.) force of the parking brake lever must be strictly observed.
Standard value: 3-5 notches
2. If the parking brake lever stroke is not the standard value, adjust as described below.
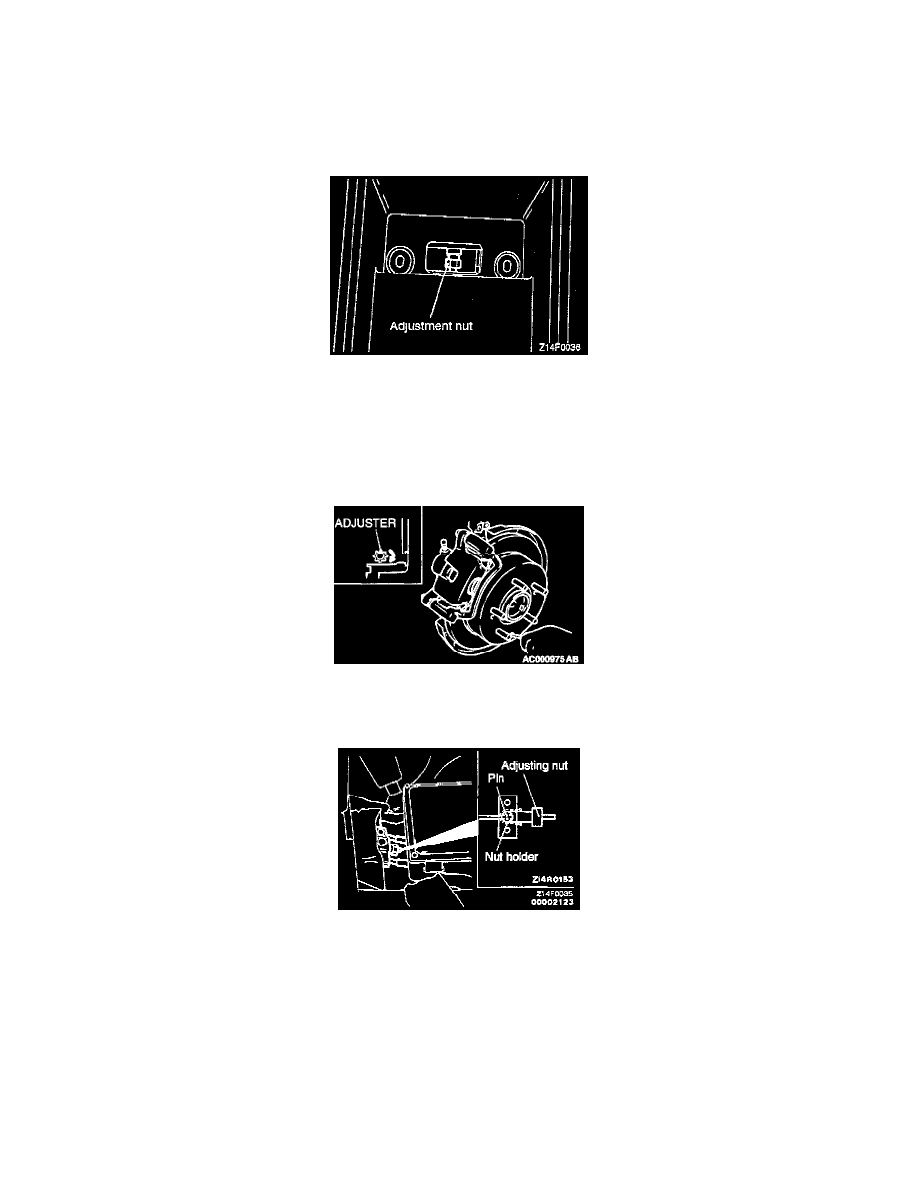
1) Remove the cup holder and plug and loosen the adjustment nut to the cable end so that the cable becomes free.
2) Repeat depressing the brake pedal until the pedal stroke becomes stable.
NOTE: When the brake pedal is repeatedly depressed, shoe clearance is adjusted properly.
3) Disengage the drive shaft and companion flange.
4) Remove the adjusting hole plug. Using a screwdriver, turn the adjuster in the direction of the arrow (to expand the shoe) until brake is lightly
applied [where the disc cannot be turned with both hands: approximately 2.7 Nm (23 in.lbs.)]. Then, turn the adjuster five notches in the
direction opposite the arrow.
5) Turn the adjusting nut to obtain specified parking brake lever stroke. After the adjustment, check that there is no play between the adjusting nut
and pin.
CAUTION: Do not adjust parking brake lever stroke too tight, less than the standard value, or brake drag could result.
6) After the parking brake lever stroke has been adjusted, jack up the rear part of the vehicle. Loosen the parking brake and turn the rear wheel to
check that the parking brake does not drag.