
3000GT VR-4 AWD V6-2972cc 3.0L DOHC MFI Twin Turbo (1998)
-
Do not use an air tool to tighten the bolt of the special tool and to remove the self-locking nut.
REASSEMBLY
Assembly in reverse order as Disassembly.
Reassembly Service Points
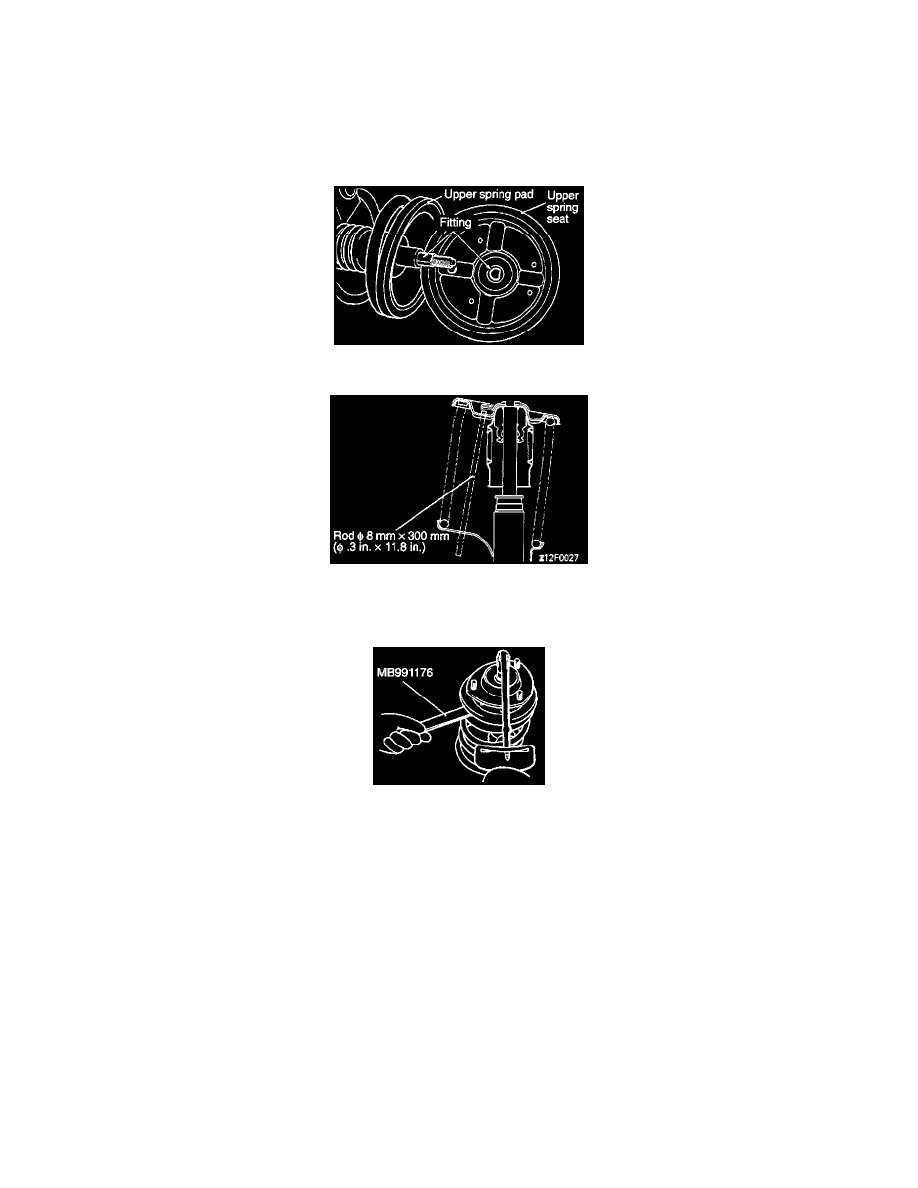
>A< Spring Upper Seat Assembly Installation (4)
1. Assemble the spring upper seat to the piston rod, fitting the notch in the rod to the shaped hole in spring seat.
2. Using a rod, line up the holes in the strut assembly spring lower seat with the hole in the spring upper seat.
NOTE: The alignment is easily accomplished with a rod [Diameter x Length: 8 mm x 300 mm (0.3 inch x 11.8 inch)].
>B< Self-Locking Nut Installation (2)
1. With the coil spring held compressed by the special tools (MB991237 and MB991238), provisionally tighten the self-locking nut.
CAUTION: Do not use an air tool to tighten the bolt of the special tool.
2. Correctly align both ends of the coil spring with the grooves in the spring seat, and then loosen the special tools (MB991237 and MB991238).
3. Using the special tool, tighten the strut insulator at the specified torque.
CAUTION: Do not use an air tool.