
Cordia L4-1795cc 1.8L SOHC (1983)
1.
Using a scraper, remove the old or damaged foam tape from the louver.
2.
Clean off all adhesive with solvent such as mineral spirits.
3.
Install new foam tape from the kit.
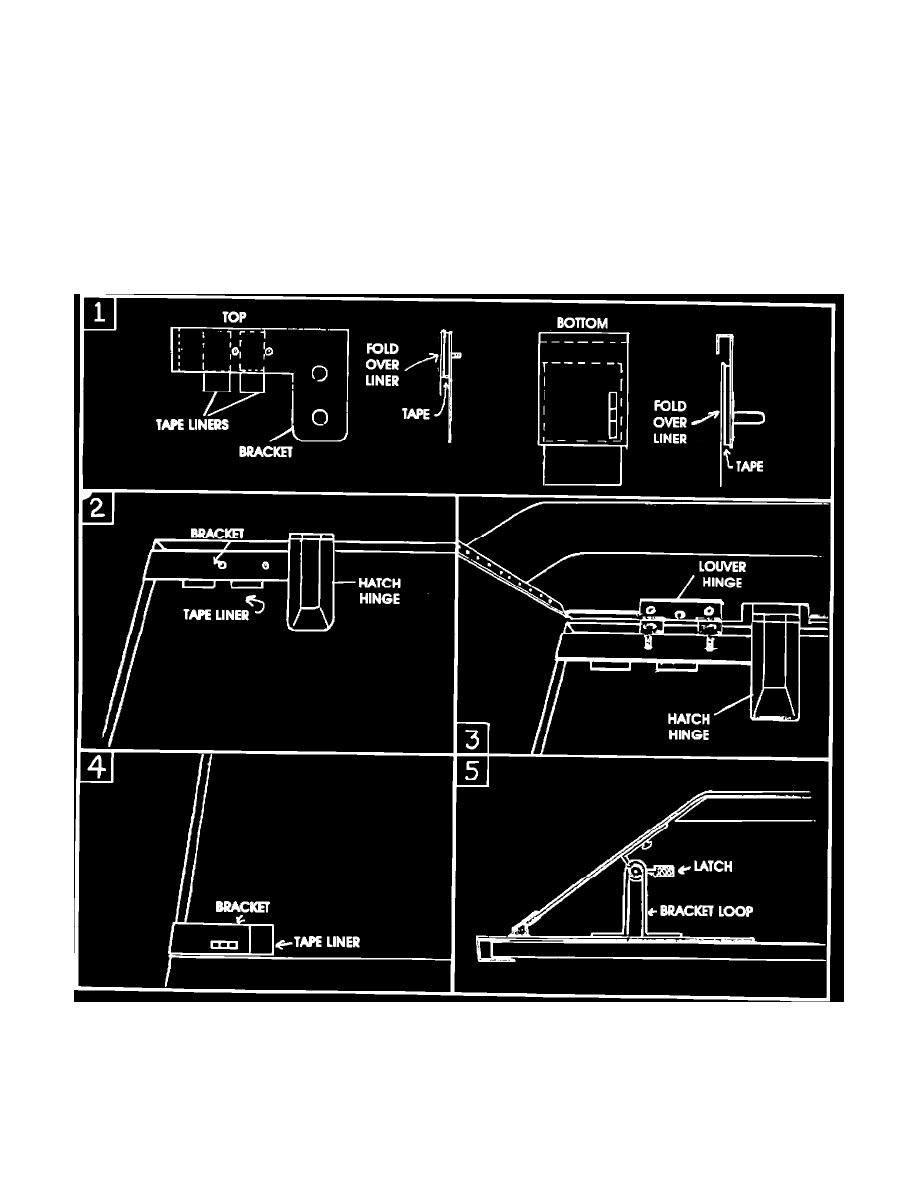
Installation Instructions:Mitsubishi Starion
PARTS LIST:
1 - louver Assy.
2 - Mounting Brackets-Top
2 - Mounting Brackets-Bottom
4 - Hex Nuts
6 - Double Faced Tape
TOOLS REQUIRED: Phillips Screwdriver 3/8" Open End Wrench Glass Cleaner
NOTE:
The rear window and the enclosed mounting brackets MUST be clean and dry to insure proper tape adhesion. Also, the glass should be at a
temperature of 75~ or above for optimum performance. A hair dryer may be used to heat cold windows. (See Illus. 1 for application of tape to
mounting brackets.)
1.
With the rear door in the raised position, remove the two phillips head screws from the hinge assembly on one side only.
IMPORTANT:
AT THIS POINT THE DOOR WILL BE UNDER PRESSURE FROM THE GAS SPRINGS AND SHOULD BE