
Cordia L4-2.0L SOHC (1984)
Brake Pad: Service and Repair
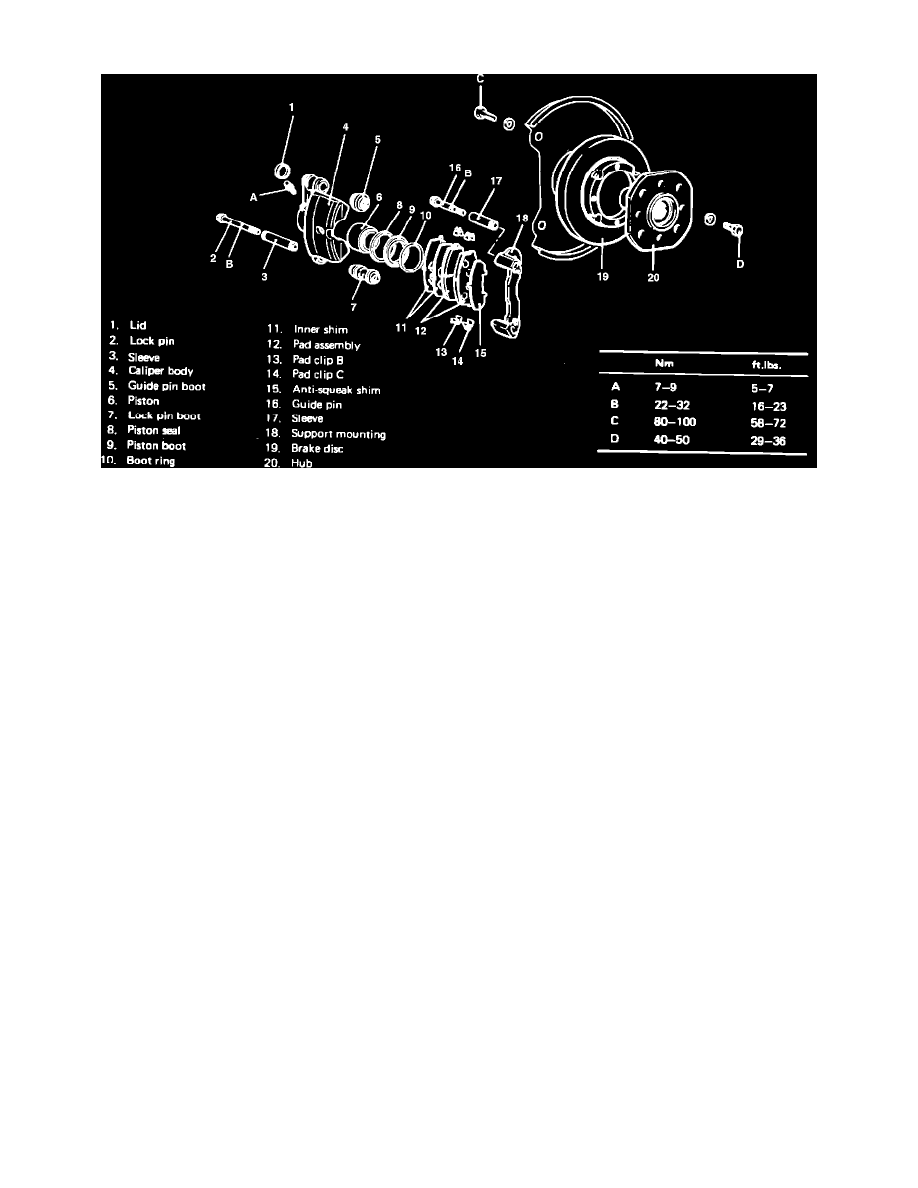
Fig. 1 Exploded view of disc brake assembly.
1.
Raise and support vehicle.
2.
Remove wheel.
3.
Remove lock pin, Fig. 1, and lift caliper body upward, then support caliper with wire. Lock pin is coated with special grease. Be careful not to
remove grease and ensure that no dirt adheres to pin.
4.
Remove inner shim(s), anti-squeak shim, and pad assembly from support mounting.
5.
Remove pad clips ``B'' and ``C''.
6.
Press piston into cylinder.
7.
Install pad clip ``B'', pad clip ``C'', pad assembly, inner shim(s), and anti-squeak shim onto support mounting.
8.
Lower caliper body and install lower lock pin, torquing to 16-23 ft. lbs.
9.
Install wheel.