
Diamante V6-2972cc 3.0L SOHC (1992)
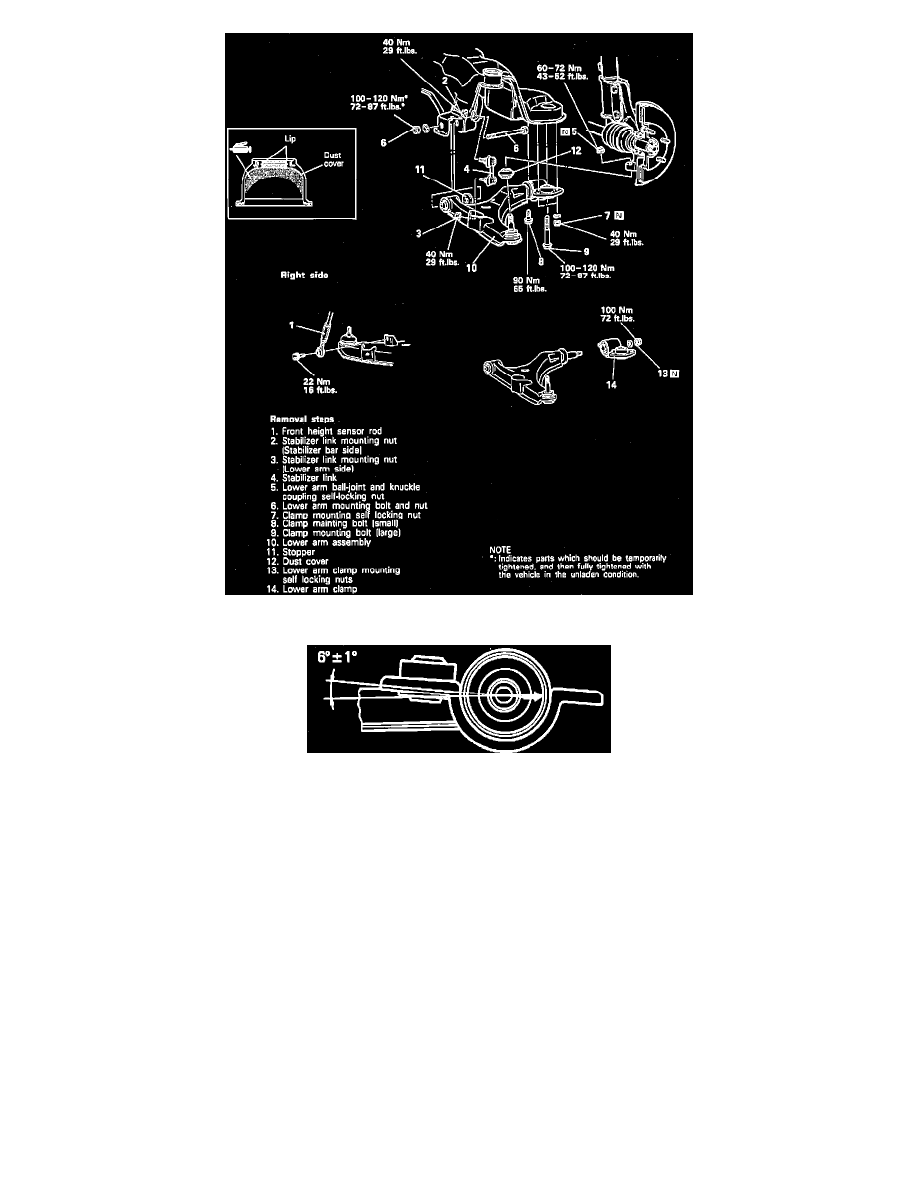
Fig. 2 Replacing Lower Ocntrol Arm & Ball Joint (Models W/Active ECS)
Fig. 3 Installing Lower Arm Clamp Nut
1.
Replace lower control arm and ball joint in numbered sequence shown in Figs. 1 and 2, noting the following:
a. Remove ball joint using ball joint remover tool No. MB991113 or equivalent. Loosen but do not remove ball joint nut until lower control
arm is ready to be removed.
b. Place lower arm bushing bracket so that its mounting surface tilts 5-7° with respect to bottom surface of lower arm, then install self-locking
nut, Fig. 3.