
Eclipse L4-1997cc 2.0L DOHC (1991)
Stabilizer Bar: Service and Repair
FWD
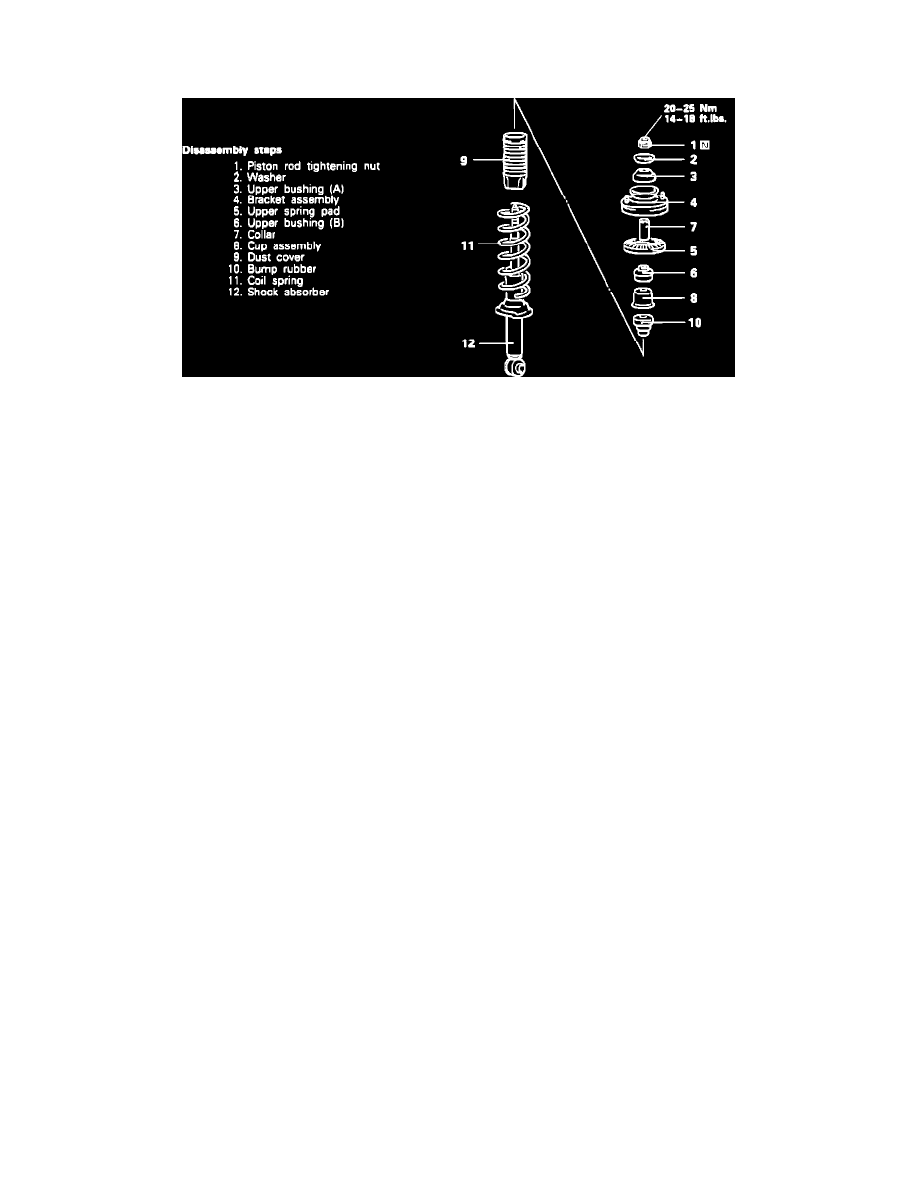
Fig. 5 Disassembling Shock Absorber Assembly. Eclipse
1.
Remove stabilizer in numbered sequence, Fig. 6, noting the following:
2.
Remove front exhaust pipe assembly, wire front exhaust pipe flexible joint down, to prevent damage.
3.
Remove stabilizer link mounting nut, using a wrench to secure the ball studs at both ends of the stabilizer link, remove the mounting nuts.
4.
Remove stabilizer bar:
a. Pull out both ends of the stabilizer bar to the rear of the driveshaft.
b. Move the right stabilizer bar until the end of the bar clears the lower arm.
c. With the end that has cleared the lower arm, pull out the stabilizer bar diagonally.
5.
Reverse procedure to install, noting the following:
6.
Install and temporarily tighten the stabilizer bar bracket. Align the bushing end with the marked part of the stabilizer bar and fully tighten.
7.
Install stabilizer link mounting nut, using a spanner wrench to secure the ball studs at both ends of the stabilizer link.
8.
Install the stabilizer bar mounting nut. Tighten nut on the stabilizer bar to specified distance .63-.70 inch.