
Eclipse GS L4-2350cc 2.4L SOHC MFI (2002)
2. Use special tool MB991176 to secure the strut, and then remove the jam nut.
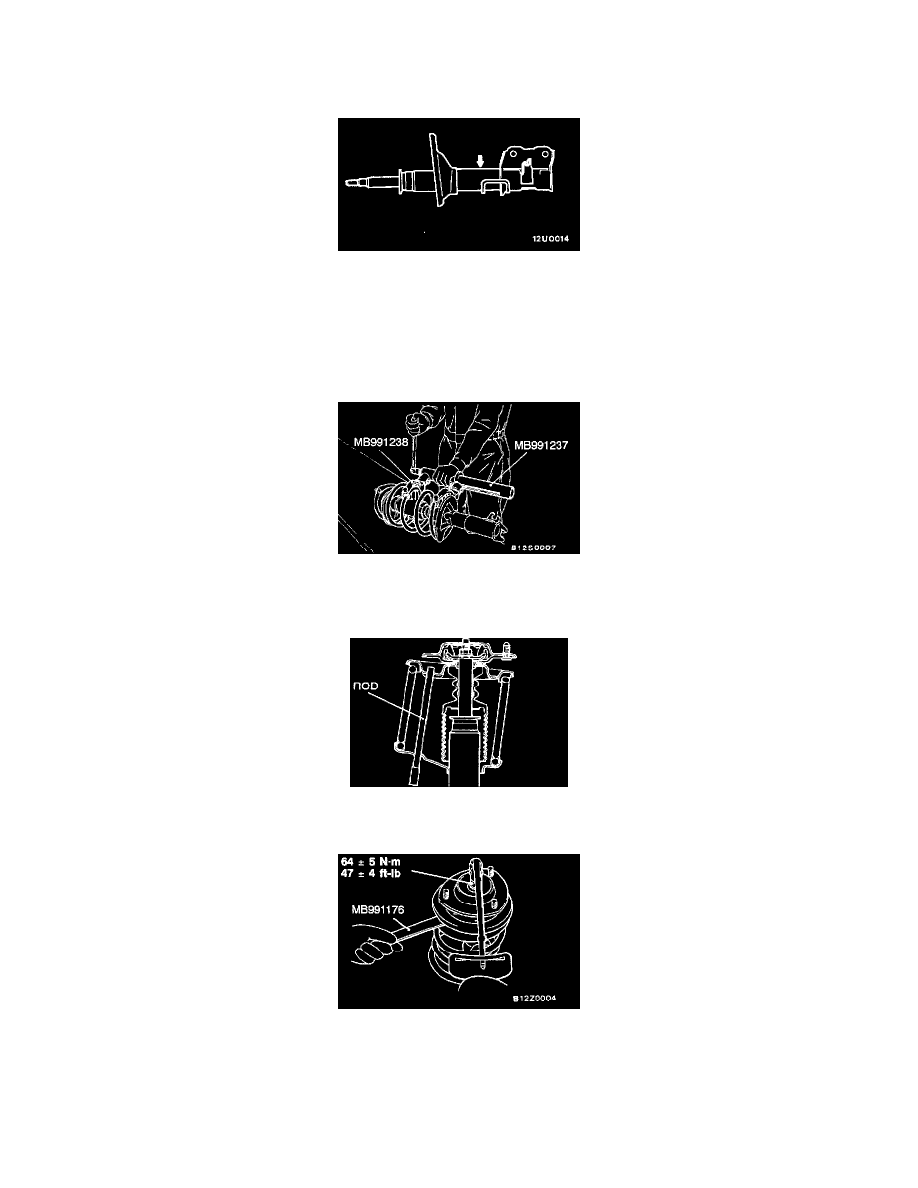
>>B<< STRUT ASSEMBLY REMOVAL
WARNING: Wear goggles when drilling to protect your eyes from flying metal debris.
The gas must be discharged from the strut assembly before discarding it. Place the assembly horizontally with its piston rod extended. Then drill a
hole of approximately 3 mm (0.1 inch) in diameter at the location shown in the illustration and discharge the gas.
REASSEMBLY SERVICE POINT
>>A<< JAM NUT INSTALLATION
CAUTION: Do not use an impact wrench to tighten the bolt of special tool MB991237, otherwise the special tool will break.
1. With the coil spring held compressed by special tools MB991237 and MB991238, temporarily tighten the jam nut.
2. Using a rod as shown, line up the holes in the strut assembly spring lower seat with the hole in the spring upper seat.
3. Align both ends of the coil spring with the grooves in spring seat, and then loosen special tools MB991237 and MB991238.
CAUTION: Do not use an impact wrench to tighten the jam nut, otherwise the jam nut will not be tightened securely.
4. Using special tool MB991176, tighten the jam nut to 64 ± 5 Nm (47 ± 4 ft. lbs.).
INSPECTION
^
Check the bearing for wear or rust.
^
Check the rubber parts for damage or deterioration.