
Eclipse GT V6-3.0L SOHC (2000)
Clutch Pedal Assembly: Adjustments
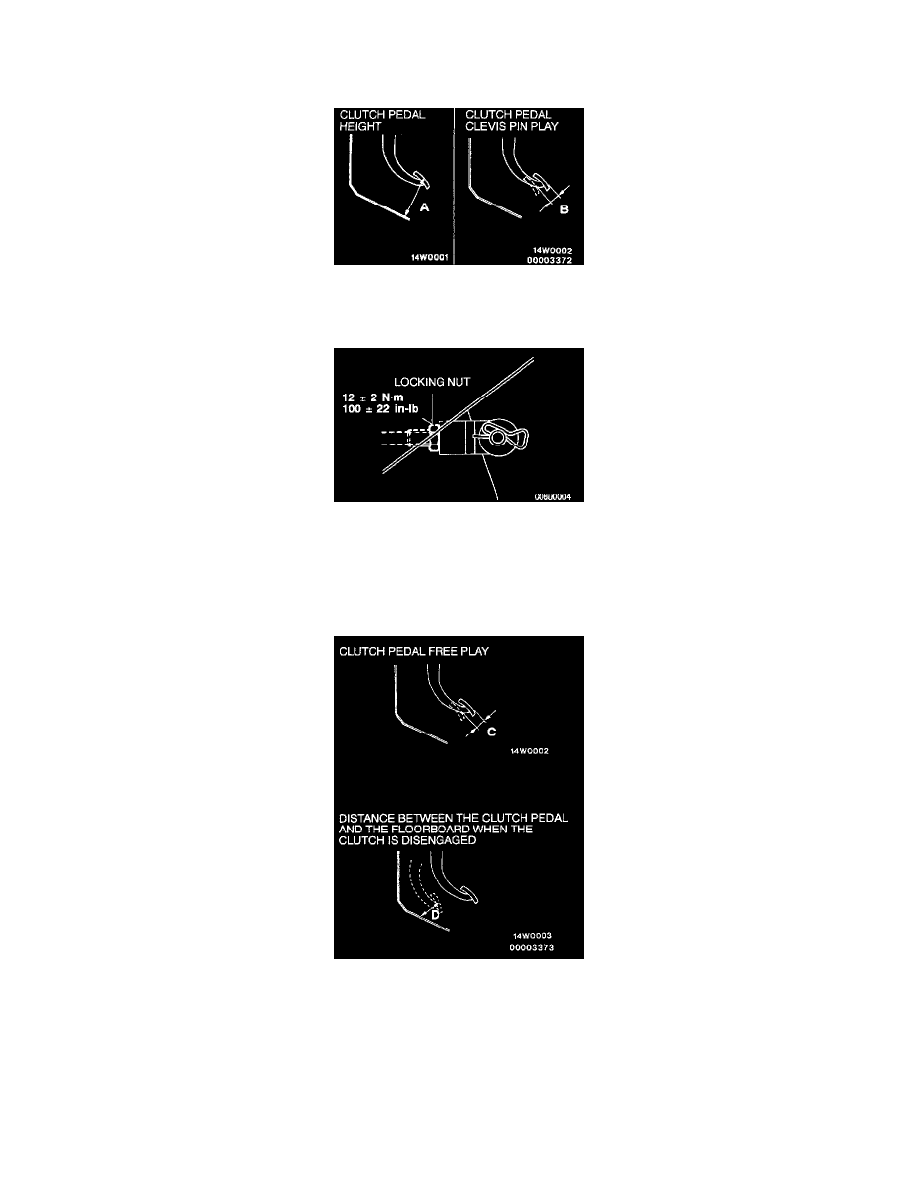
CLUTCH PEDAL CHECK AND ADJUSTMENT
1. Turn back the carpet etc. under the clutch pedal.
2. Measure the clutch pedal height and the clutch pedal clevis pin play.
Standard value (A): 163.5 - 166.5 mm (6.44 - 6.56 inches) [From the surface of melting sheet (Floor board shield) to the face of pedal pad]
Standard value (B): 1 - 3 mm (0.04 - 0.12 inch)
3. If the height of the clutch pedal is not within the standard value, loosen the locking nut and adjust the pedal height to the standard value using the
adjusting bolt or pushrod.
CAUTION: Do not push in the master cylinder pushrod at this time.
4. If the clutch pedal play is not within the standard value, loosen the locking nut and move the pushrod to adjust.
5. After the adjustments, confirm that the clutch pedal free play (measured at the face of the pedal pad) and the distance between the clutch pedal (the
face of the pedal pad) and the floorboard when the clutch is disengaged are within the standard value ranges.
Standard value (C): 6 - 13 mm (0.2 - 0.5 inch)
Standard value (D): 60 mm (2.4 inches) or more
6. If the measured free play and distance do not agree with the standard value ranges, it is probably the result of either air in the hydraulic system or a
faulty master cylinder or clutch. Bleed the air, or disassemble and inspect the master cylinder or clutch.
7. Reinstall the carpet, etc.