
Eclipse RS L4-2350cc 2.4L SOHC MFI (2002)
Parking Brake Lever: Testing and Inspection
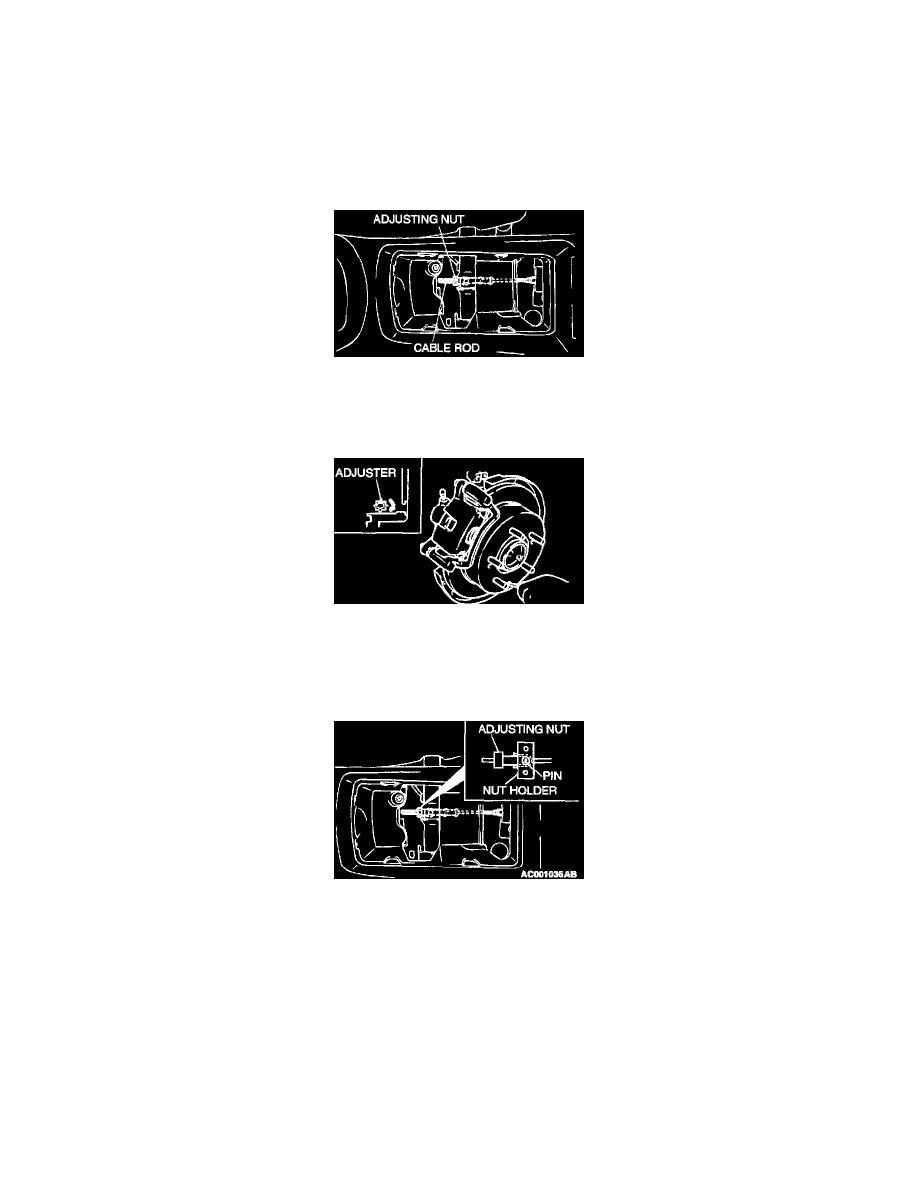
PARKING BRAKE LEVER STROKE CHECK AND ADJUSTMENT
1. Pull the parking brake lever with a force of approximately 196 N (44 pounds) and count the number of notches.
Standard value:
5 - 7 notches <Vehicles with drum brake>
3 - 5 notches <Vehicles with drum-in-disc brake>
2. If the parking brake lever stroke is not the standard value, adjust as described.
3. Remove the floor console cup tray or arm rest assembly, loosen the adjusting nut as far as the end of the cable rod to release the cable, and then
adjust by the following procedure:
1. <Vehicles with drum brake>
Depress the brake pedal repeatedly until the stroke no longer changes.
NOTE: Depressing the brake pedal repeatedly will automatically adjust the shoe clearance to the normal setting.
2. <Vehicles with drum-in-disc brake>
Remove the adjustment hole plug, and then use a flat-tip screwdriver to turn the adjuster in the direction of the arrow (the direction which
expands the shoe) so that the disc will not rotate. Return the adjuster five notches in the direction opposite to the direction of the arrow.
CAUTION: If the parking brake lever stroke is below the standard value and the braking is too firm, the rear brakes may drag.
4. Turn the adjusting nut to adjust the parking brake lever stroke to the standard value. After adjusting, check that there is no space between the
adjusting nut and the parking brake lever.
After adjusting the parking brake lever stroke, jack up the rear of the vehicle. Release the parking brake and turn the rear wheels to check that the
rear brakes are not dragging.