
Eclipse RS L4-2350cc 2.4L SOHC MFI (2002)
>>A<< TIMING BELT B INSTALLATION
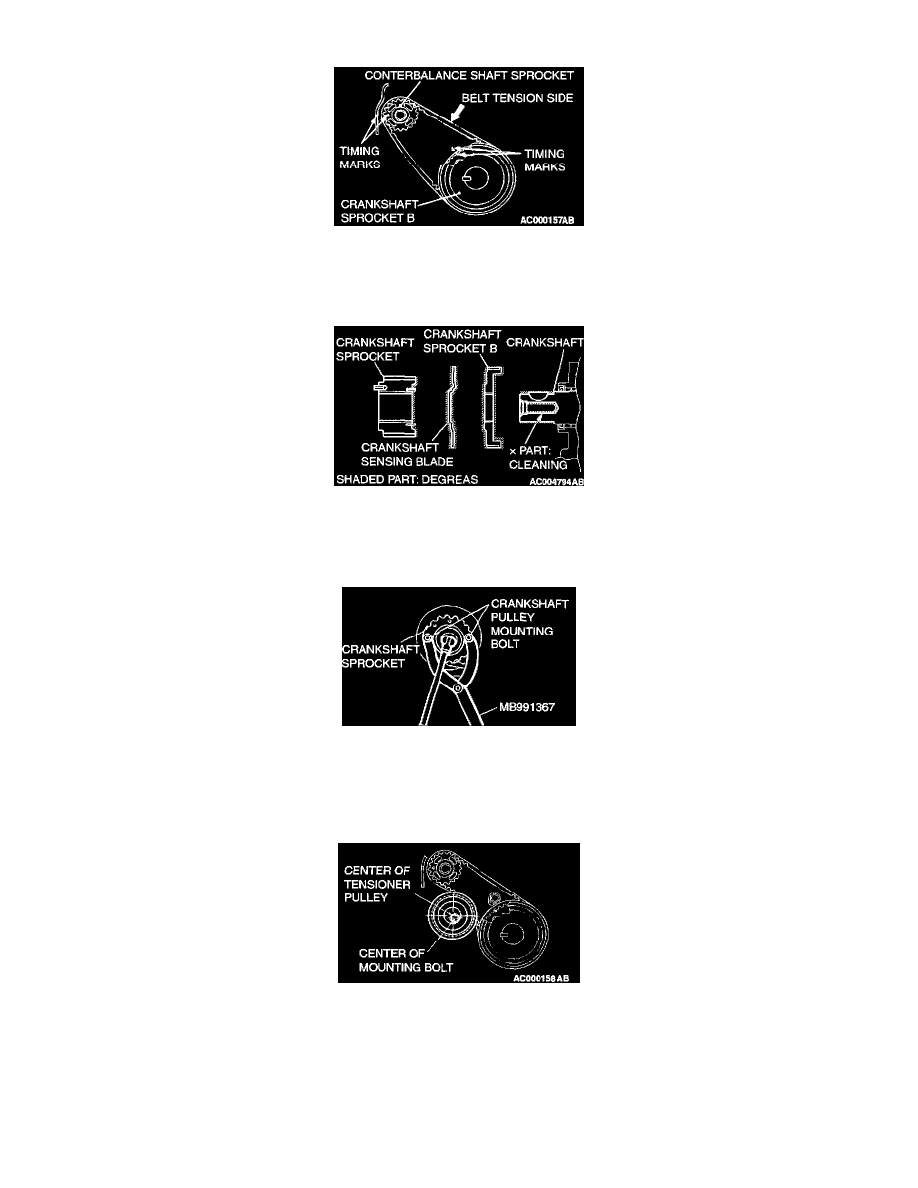
1. Ensure that crankshaft sprocket B timing marks and the counterbalance shaft sprocket timing marks are aligned.
2. Fit timing belt B over crankshaft sprocket B and the counterbalance shaft sprocket. Ensure that there is no slack in the belt.
>>B<< CRANKSHAFT SENSING BLADE/CRANKSHAFT SPROCKET INSTALLATION
1. To prevent the crankshaft bolt from loosening, degrease or clean the seating surfaces of the crankshaft, crankshaft sprocket B. crankshaft
sensing blade and crankshaft at the shown positions.
2. Install the crankshaft sensing blade so that they face as shown in the illustration.
3. Apply the minimum amount of engine oil to the seat surface and thread of the crankshaft bolt.
4. Use the crankshaft pulley mounting bolt to secure special tool MB991367.
5. Tighten the crankshaft sprocket bolt to the specified torque.
Tightening torque: 118 ± 9 Nm (87 ± 7 ft. lbs.)
>>C<< TIMING BELT B TENSION ADJUSTMENT
1. Temporarily fix the timing belt B tensioner so the center of the tensioner pulley is to the left and above the center of the mounting bolt.
Temporarily attach the tensioner pulley so the flange is toward the front of the engine.
CAUTION: When tightening the bolt, ensure that the tensioner pulley shaft does not rotate with the bolt. Allowing it to rotate with the bolt
can cause excessive tension of the bolt.