
Eclipse Spyder FWD L4-2350cc 2.4L SOHC 16 Valve (1996)
a.
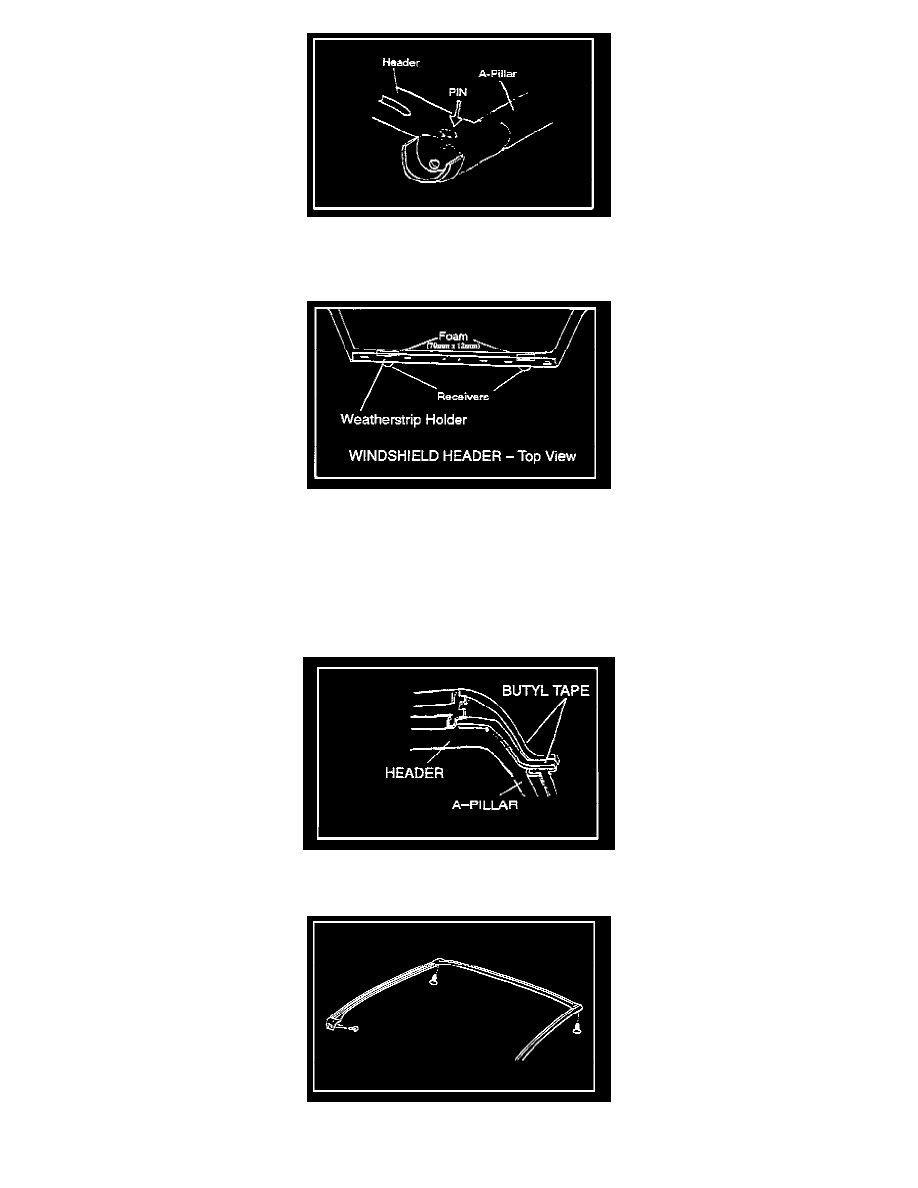
Carefully and thoroughly inspect the header weatherstrip for damage and compression which may leave gaps or cause leaks. Make sure it is
properly seated in the holder bracket. Make sure the comer push pin is completely engaged. If the weatherstrip is damaged, replace it and
water test.
b.
If there is no weatherstrip damage, detach the comer of the header weatherstrip to access the holder bracket and butyl application.
c.
On vehicles produced before 10/96, check for foam pads on the edge of the header weatherstrip holder bracket, just forward of the top latch
J-hook receivers on the windshield header. If there is no foam visible, remove the header weatherstrip and holder, add a 70 mm x 12 mm x 5
mm foam pad on each side, aligning each with the J-hook receiver.
Note:
If foam under the header weatherstrip holder was damaged on removal, replace it with new foam to prevent any new water leak.
d.
Remove the old butyl tape from the end of the header weatherstrip holder bracket and apply new tape as shown. You may want to wrap the
ends of the butyl tape around the corner push pin.
e.
Reinstall the windshield header weatherstrip and holder. Make sure to apply pressure to the weatherstrip at the location of the new butyl tape