
Endeavor V6-3.8L SOHC (2004)
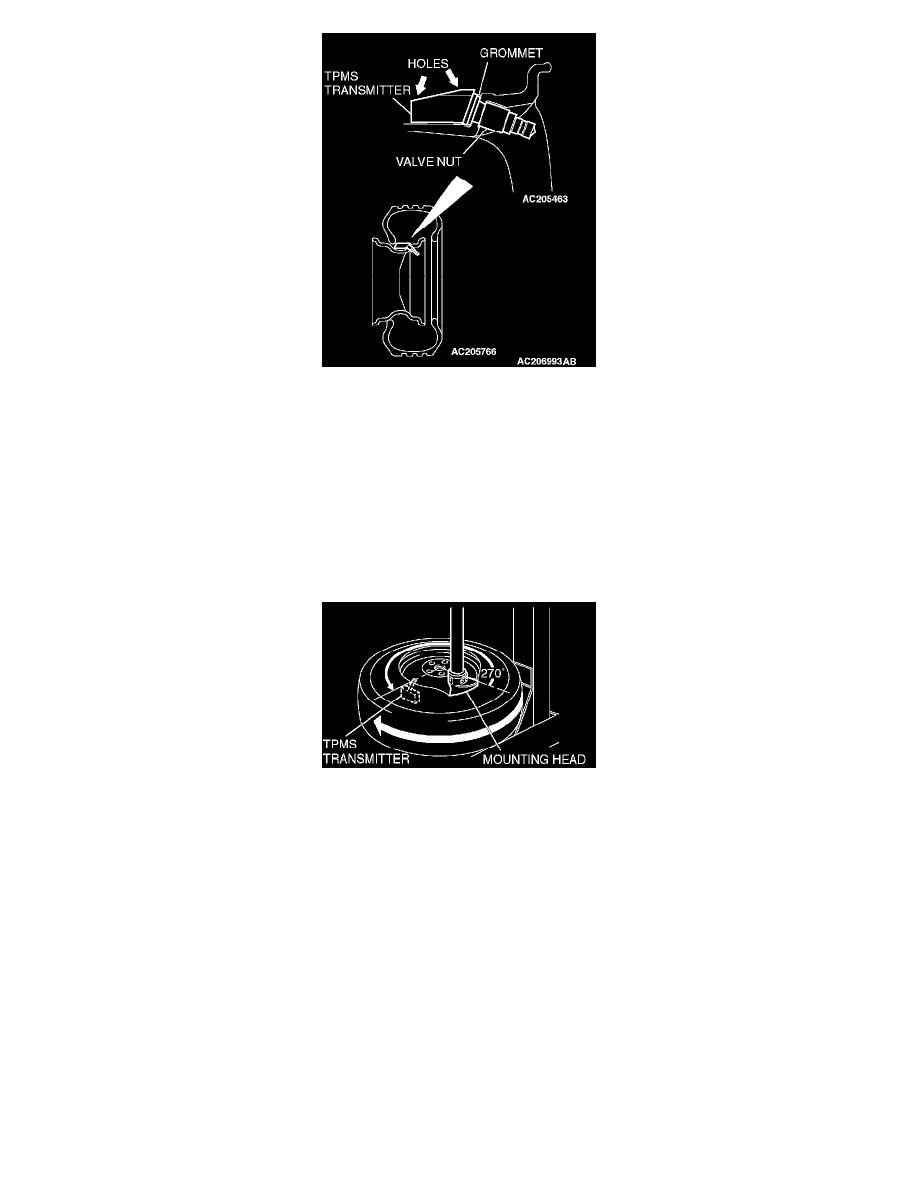
3. Mount TPMS transmitter valve through rim hole as illustrated. Both holes in the transmitter case should face away from center of rim. Tighten
valve nut finger tight, then slowly torque the valve nut to 5.5 Nm (49 inch pounds).
CAUTION: Install the TPMS transmitter correctly. If the TPMS transmitter is installed incorrectly, it may not work correctly, or become
damaged when the tire is installed.
4. Check that the TPMS transmitter is correctly assembled (Refer to illustration).
^
One side of lower lip of the TPMS transmitter case can touch the rim after torquing.
^
Except for the grommet, valve nut and lower lip of the TPMS transmitter, no other part of the front of the TPMS transmitter case should be
touching the rim.
>>B<< TIRE BEAD MOUNTING
1. Place wheel and tire on turntable of tire mounting machine. Ensure that transmitter is 270 degrees (3 o'clock position) from mounting head
when the outer tire bead is mounted as illustrated.
2. Lubricate tire well and mount outer tire bead as normal. Ensure that tire does not rotate during mounting.
>>C<< TIRE PRESSURE INFLATION/VALVE NUT RETIGHTENING
CAUTION: After tire inflation, retighten the valve nut 5.5 Nm (49 inch pounds). This is necessary, because the TPMS transmitter is secured to
the wheel with the valve nut and rubber grommet. The rubber grommet will be depressed by tire pressure or deteriorate over a period of time,
which requires the valve nut to be retightened.
Inflate tire to required pressure, then retorque the valve nut to 5.5 Nm (49 inch pounds).