
Galant L4-1997cc 2.0L SOHC 16 Valve (1993)
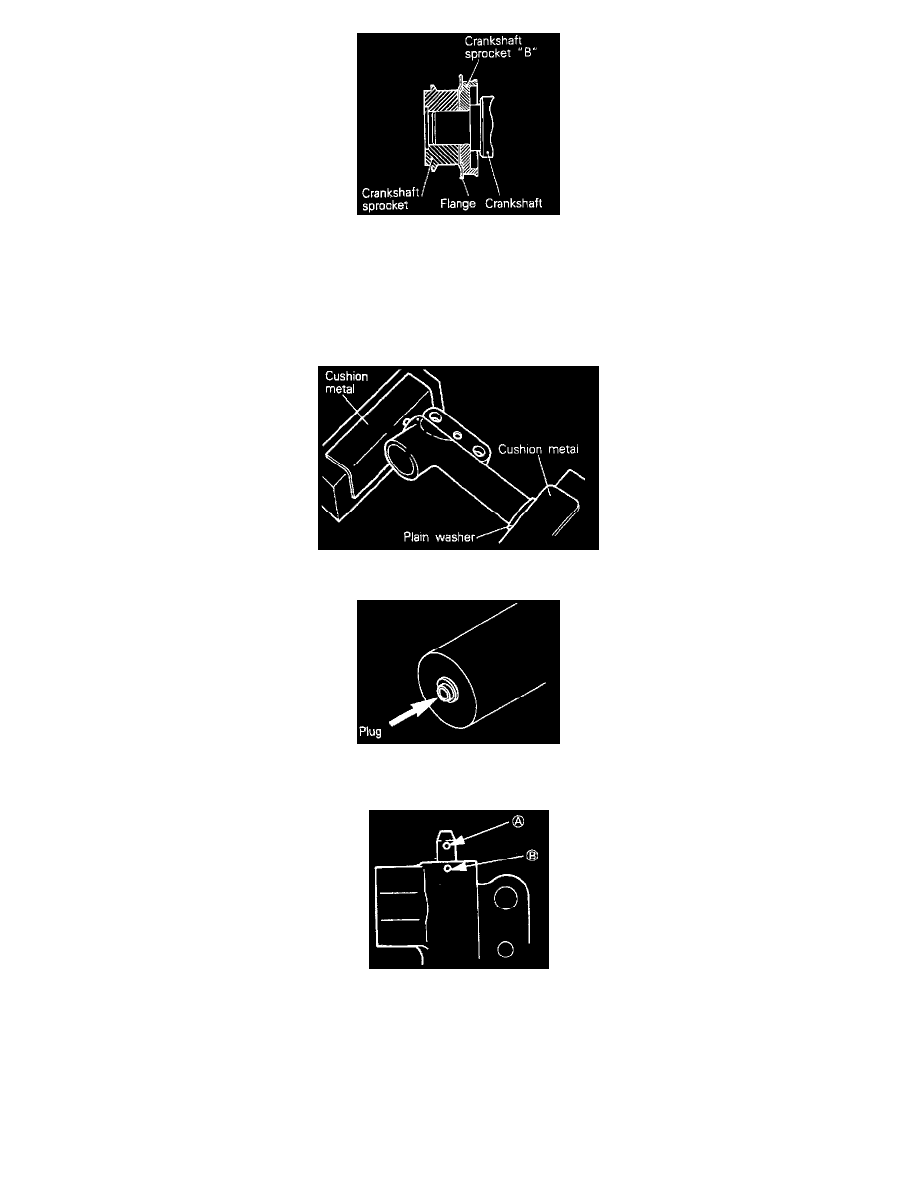
Install the flange in correct direction as shown in image. Install the crankshaft sprocket in the correct direction as shown in image.
CAUTION: Pay special attention to the direction of the flange. If it is installed in the wrong direction, a broken timing belt could result.
11. INSTALLATION OF AUTO TENSIONER
(1) If the auto tensioner rod is in its fully extended position, reset it as follows.
(a) Keep the auto tensioner level and, in that position, clamp it in the vise with soft jaws.
NOTE: If the plug at the bottom of the auto tensioner protrudes surround it with a plain washer, as shown in image, to prevent the plug
from being in direct contact with the vise.
(b) Push in the rod little by little with the vise until the set hole "A" in the rod is aligned with "B" in the cylinder.
(c) Insert a wire 1.4 mm (0.055 in) in diameter, into the set holes.
(d) Unclamp the auto tensioner from the vise.