
Galant DE L4-2350cc 2.4L SOHC MFI (2000)
PROCEDURE
1.
Squeeze then slide each of the 4 hose clamps off the hose fitting, moving it toward the center of the hose.
NOTE:
For easier clamp removal, use needle-nose pliers with a 3 inch long jaw to squeeze the clamps.
2.
Place a drain pan under the transmission oil cooler hose assembly to catch any fluid that may be lost when the hoses are removed.
3.
Carefully twist and pull the hoses from the fittings. For 1999 Galant only, go to Step 4. For all other vehicles, go to Step 5.
4.
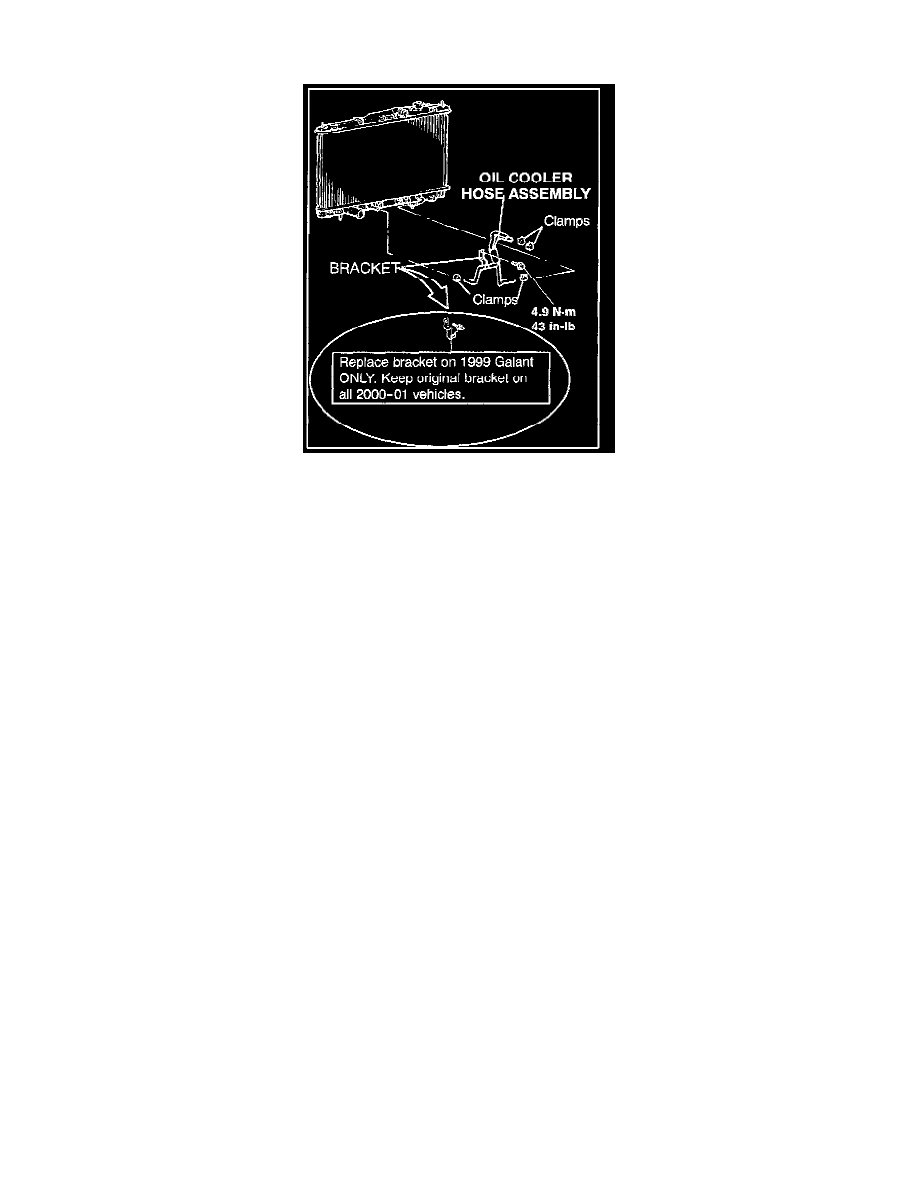
Bracket Removal - 1999 Galant ONLY (All 2000-01 vehicles use existing bracket) Remove the oil cooler hose bracket from the lower edge of the
radiator. It will be replaced with a new bracket included in the parts kit.
5.
In preparation for installation, position a new clamp from the hose kit onto each of the 4 ends of the new hose assembly.
6.
Install the hose assembly making sure that each of the 4 ends is secure on its fitting.
7.
Squeeze and slide each of the new clamps into its proper position. Make sure each clamp is tight on the hose and fitting.
8.
Bracket Installation - 1999 Galant ONLY (All 2000-01 vehicles use existing bracket) Install the new bracket from the kit onto the lower edge of
the radiator using the existing bolt from the original bracket. Bolt torque is 4.9 Nm (43 in-lb).
9.
Secure the new hose into the bracket (existing bracket on 2000-01 vehicles, new bracket on 1999 Galant).
10.
Add ATF to replace fluid lost when the old hose assembly was removed. Test drive the vehicle, then check the hose connections to make sure
there are no leaks before returning the vehicle to the customer.
11.
Check the ATF level again, adding ATF if necessary.
PARTS INFORMATION