
Lancer L4-2.4L SOHC (2005)
8. Turn the ignition switch to the "LOCK" (OFF) position.
9. Remove the thickness gauge and then install the accelerator pedal position sensor assembly.
10. Remove the scan tool MB991958.
<When not using the scan tool MB991958>
1. Remove the two accelerator pedal position sensor assembly mounting bolts.
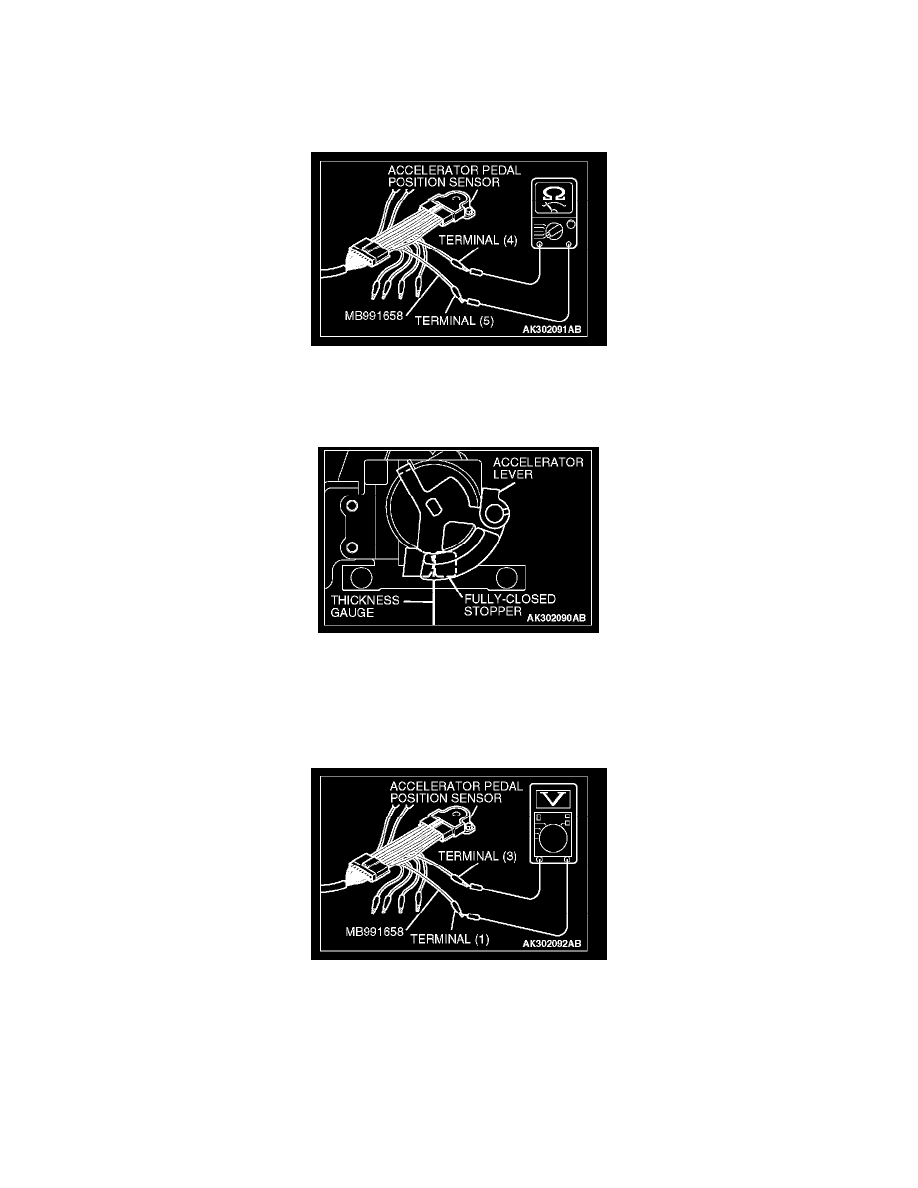
2. Disconnect the accelerator pedal position sensor connector. Connect the special tool (test harness: MB991658) between the disconnected
connectors. (All the terminals should be connected. Pay attention to the terminal numbers to avoid wrong connection.)
3. Connect the ohm meter between terminal No.4 and No.5 of the accelerator pedal position sensor.
4. Insert a thickness gauge with a thickness of 0.60 mm (0.024 in.) in between the accelerator lever and the fully closed stopper.
5. Loosen the accelerator pedal position sensor mounting bolt and then turn the accelerator pedal position sensor anti-clockwise as far as it will go.
6. Check at this time that continuity is present.
7. Turn the accelerator pedal position sensor clockwise until the points is found where the accelerator pedal position switch turns off. Securely
tighten the accelerator pedal position sensor mounting bolt at this point.
8. Remove the ohm meter.
9. Connect the digital voltmeter between terminal No.3 [accelerator pedal position sensor (main) output] and terminal No.1 [accelerator pedal
position sensor (main) earth].
10. Turn the ignition switch to the "ON" position. (without starting the engine)
11. Check that the accelerator pedal position sensor (main) output meets the standard value.
Standard value: 0.5 - 0.9 volt
12. Turn the ignition switch to the "LOCK" (OFF) position.
13. Remove the thickness gauge and the special tool and install the accelerator pedal position sensor assembly.