
Mirage L4-1468cc 1.5L SOHC 12 Valve (1996)
Oxygen Sensor: Component Tests and General Diagnostics
Front
SENSOR INSPECTION
<Heated Oxygen Sensor (front)>
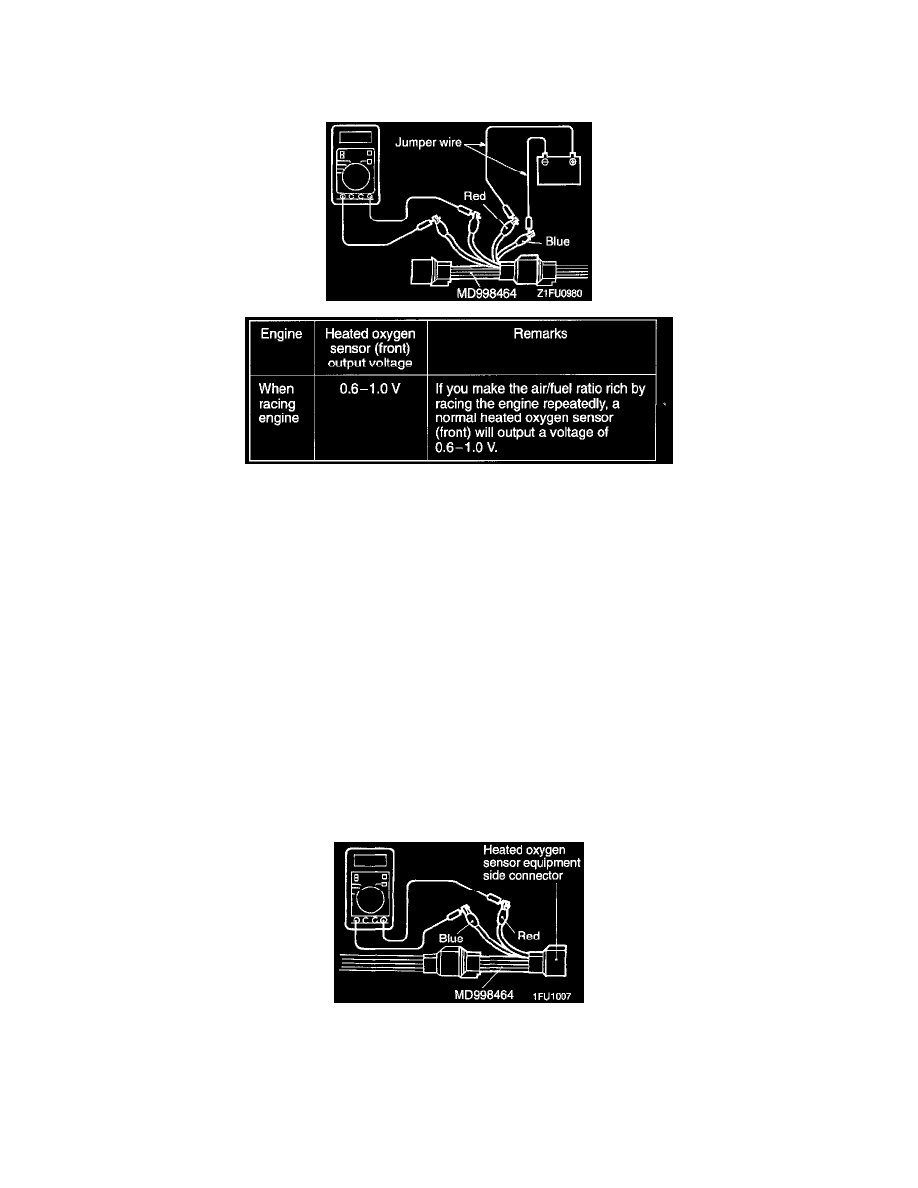
1. Disconnect the heated oxygen sensor (front) connector and connect the special tool (test harness) to the connector on the heated oxygen sensor
(front) side.
2. Make sure that there is continuity [Approx. 20 ohms at 20°C (68°F)] between terminals 1 (red clip of the special tool) and terminal 3 (blue
clip) on the heated oxygen sensor (front) connector.
3. If there is no continuity, replace the heated oxygen sensor (front).
4. Warm up the engine until the engine coolant is 80°C (176°F) or higher.
5. Use jumper wires to connect heated oxygen sensor (front) terminal 1 (connect to (+) terminal) and terminal 3 (connect to (-) terminal) with the
battery (+) terminal and (-) terminal.
Caution:
Be very careful when connecting the jumper wires; incorrect connection can damage the heated oxygen sensor (front).
6. Connect a digital voltage meter between terminal 2 (black clip) and terminal 4 (white clip).
7. While repeatedly racing the engine, measure the heated oxygen sensor (front) output voltage.
8. If the sensor does not generate 0.6-1.0 V, replace the heated oxygen sensor (front).
Rear
<Heated Oxygen Sensor (rear)>
1. Disconnect the heated oxygen sensor (rear) connector and connect the special tool (test harness) to the connector on the heated oxygen sensor
(rear) side.
2. Make sure that there is continuity [Approx. 20 ohms at 20°C (68°F)] between terminals 2 (red clip of the special tool) and terminal 4 (blue
clip) on the heated oxygen sensor (rear) connector.
3. If there is no continuity, replace the heated oxygen sensor (rear).