
Montero Sport V6-3.5L SOHC (2004)
INSTALLATION SERVICE POINTS
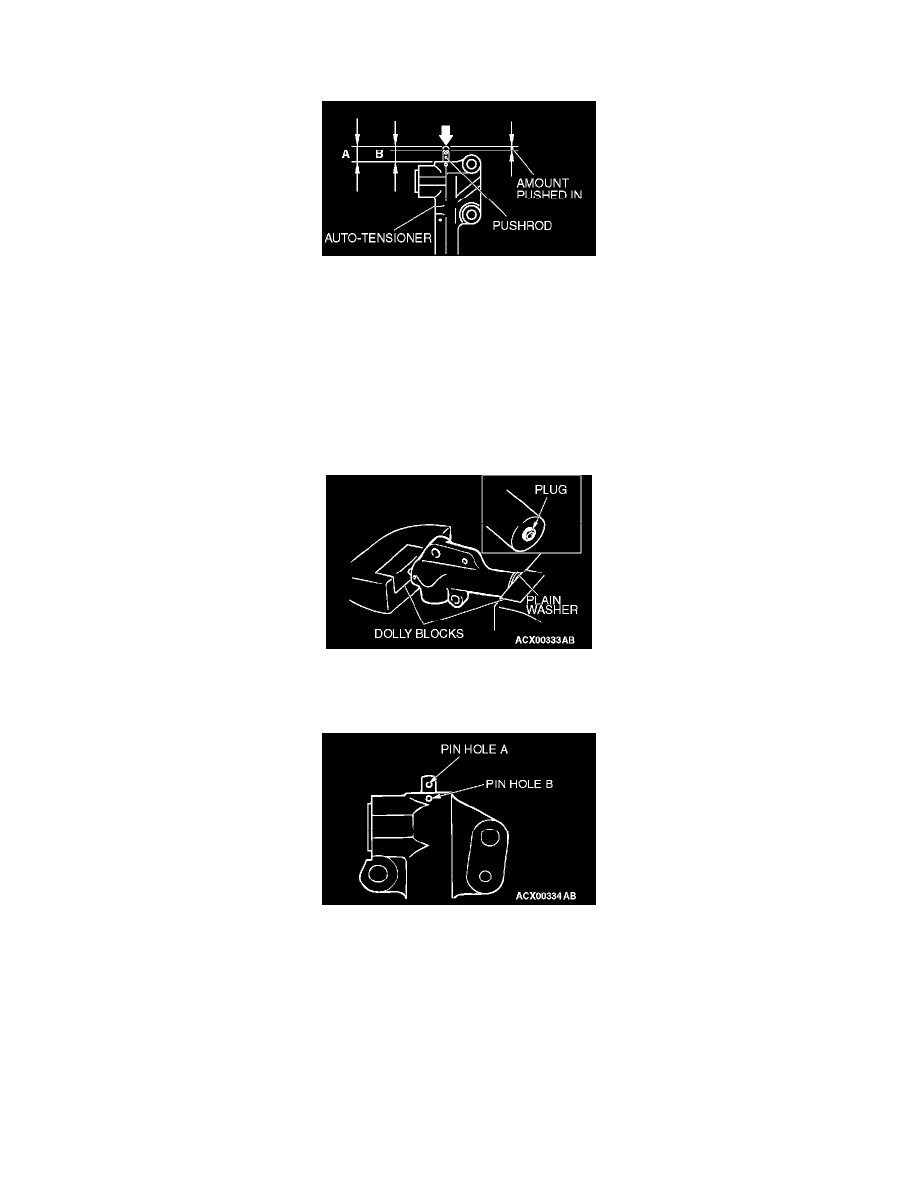
>>A<< AUTO-TENSIONER INSTALLATION
1. While holding the auto-tensioner by hand, press the end of the pushrod against a metal surface (such as the cylinder block) with a force of 98 -
196 Nm (72 - 145 ft. lbs.) and measure how far the pushrod is pushed in.
Standard value: Within 1 mm (0.04 inch)
A: Length when no force is applied
B: Length when force is applied
A - B: Amount pushed in
2. If it is not within the standard value, replace the auto-tensioner.
CAUTION:
^
Place the auto-tensioner perpendicular to the jaws of the vice.
^
If there is a plug at the base of the auto-tensioner, insert a plain washer onto the end of the auto-tensioner to protect the plug.
3. Place two dolly blocks in a vice as shown in the illustration, and then place the auto-tensioner in the vice.
CAUTION: Never compress the pushrod too fast, or the pushrod may be damaged.
4. Slowly compress the pushrod of the auto-tensioner until pin hole A in the pushrod is aligned with pin hole B in the cylinder.
5. Insert the setting pin into the pin holes once they are aligned.
NOTE: If replacing the auto-tensioner, the pin will already be inserted into the pin holes of the new part.
CAUTION: Do not remove the setting pin from the auto-tensioner.
6. Install the auto-tensioner to the engine.
>>B<< TIMING BELT INSTALLATION
1. Align the timing marks of the camshaft sprocket with those of crankshaft sprocket.
CAUTION: The camshaft sprocket (right side) can turn easily due to the spring force applied, so be careful not to get your fingers caught.