
Montero Sport 2WD V6-3.0L SOHC (1997)
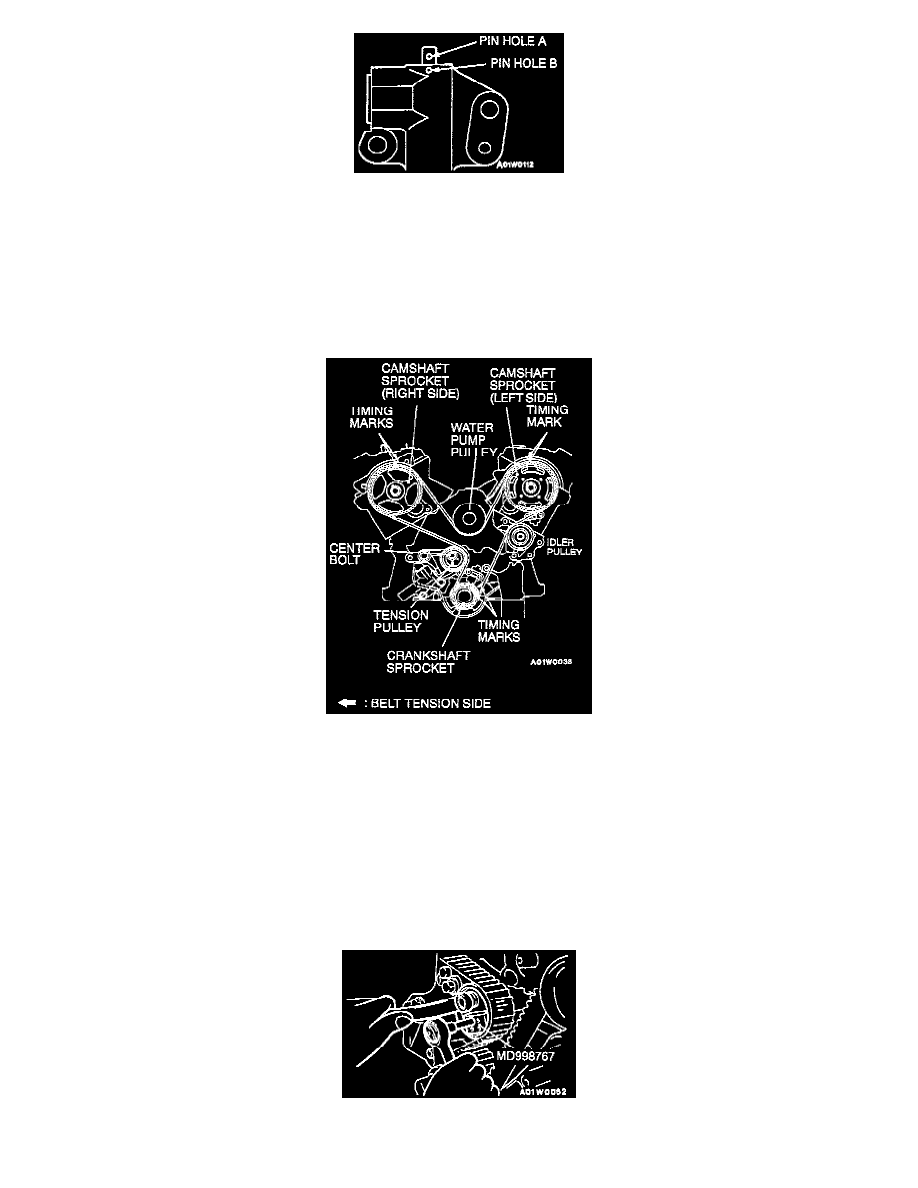
4. Slowly compress the pushrod of the auto tensioner until pin hole A in the pushrod is aligned with pin hole B in the cylinder.
NOTE: If replacing the auto tensioner, the pin will already be inserted into the pin holes of the new part.
5. Insert the setting pin into the pin holes once they are aligned.
NOTE: Do not remove the setting pin from the auto tensioner.
6. Install the auto tensioner to the engine.
7. Align the timing marks of the camshaft sprocket with those of crankshaft sprocket.
CAUTION: The camshaft sprocket (right side) can turn easily due to the spring force applied, so be careful not to get your fingers caught
.
8. Install the timing belt by the following procedure so that there is no deflection in the timing belt between each sprocket and pulley.
a. Crankshaft sprocket
b. Idler pulley
c. Camshaft sprocket (left side)
d. Water pump pulley
e. Camshaft sprocket (right side)
f.
Tension pulley
9. Turn the camshaft sprocket counterclockwise until the tension side of the timing belt is firmly stretched. Check all timing marks again.
10. Use tension pulley socket wrench MD998767, or equivalent, to push the tensioner pulley into the timing belt, and then temporarily tighten the
center bolt.