
Montero Sport 2WD V6-3.0L SOHC (1997)
Fluid - A/T: Testing and Inspection
INSPECTION
1. Place the vehicle on a level surface.
2. Before removing the dipstick, wipe all dirt from the area around the dipstick.
3. With the selector lever in the "P" range and the parking brake applied, start the engine.
4. The engine should be running at idle and the transmission should be warmed up sufficiently. [fluid temperature 70 - 80° C (158 - 176° F)].
5. Move the selector lever through all positions to fill the torque converter and hydraulic circuit with fluid. Then move the lever in the "N" range.
NOTE: Low fluid level can allow the oil pump to take in air together with fluid, leading to various troubles. Air trapped in hydraulic circuit forms
bubbles which make the fluid spongy. This lowers pressure and slows down pressure buildup. If the transmission has too much fluid, gears churn
up foam and cause same conditions as when the fluid level is low, resulting in premature deterioration of ATE In either case, air bubbles can cause
overheating and fluid oxidation and vanishing, which can interfere with normal valve, clutch and servo operation. Foaming can also result in fluid
escaping from the transmission vent where it may be mistaken for a fluid leak.
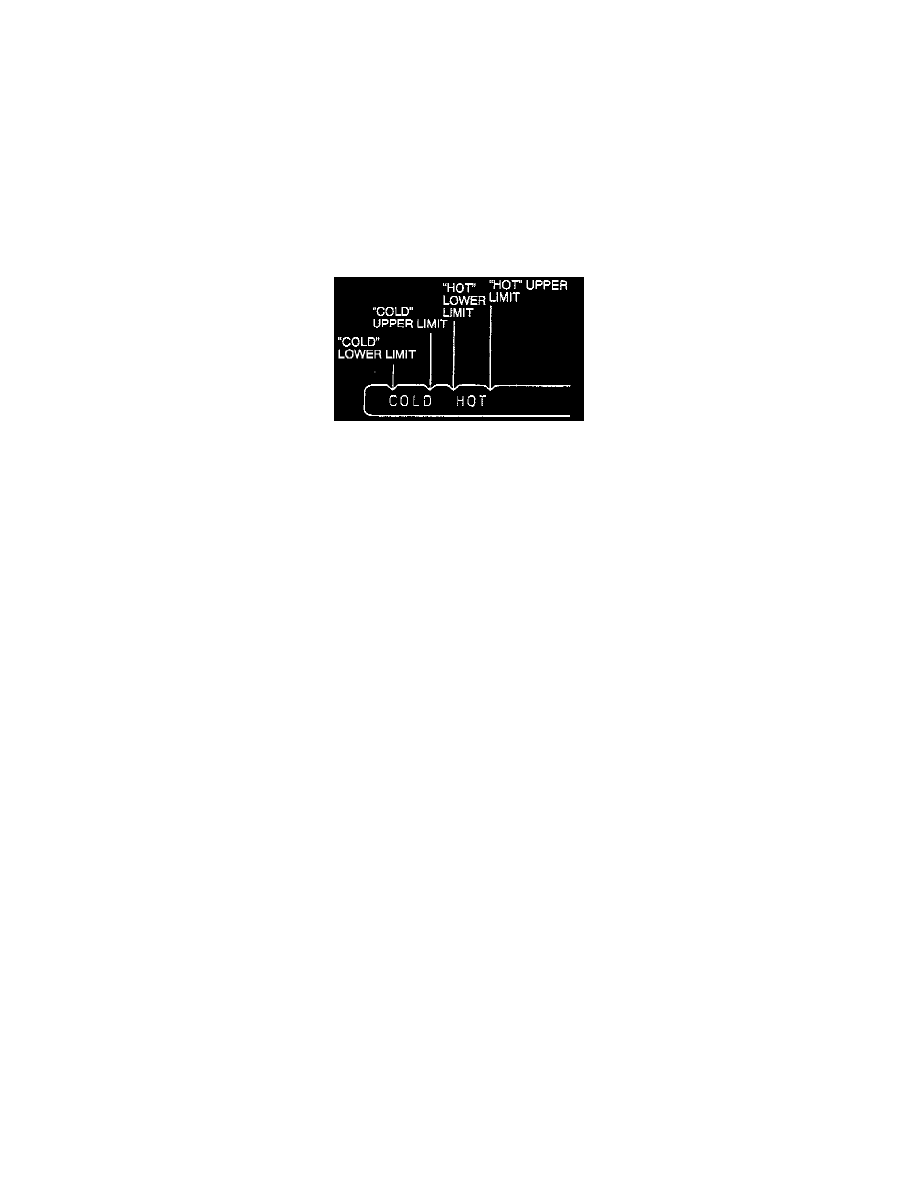
6. Check that fluid level is at oil dipstick "HOT." If fluid level is low, add fluid to "HOT" level.
Automatic Transmission Fluid: DEXRON II or equivalent
NOTE: When fluid smells burned and is contaminated with metal bushing or friction material particles, a complete transmission overhaul is
needed. Be sure to examine fluid on the dipstick closely.
7. Check fluid condition.
8. After fluid has been checked, insert the dipstick until it is seated fully to seal out water and dirt.