
Montero Sport 2WD V6-3.0L SOHC (1997)
motor to the square hole in the drum.
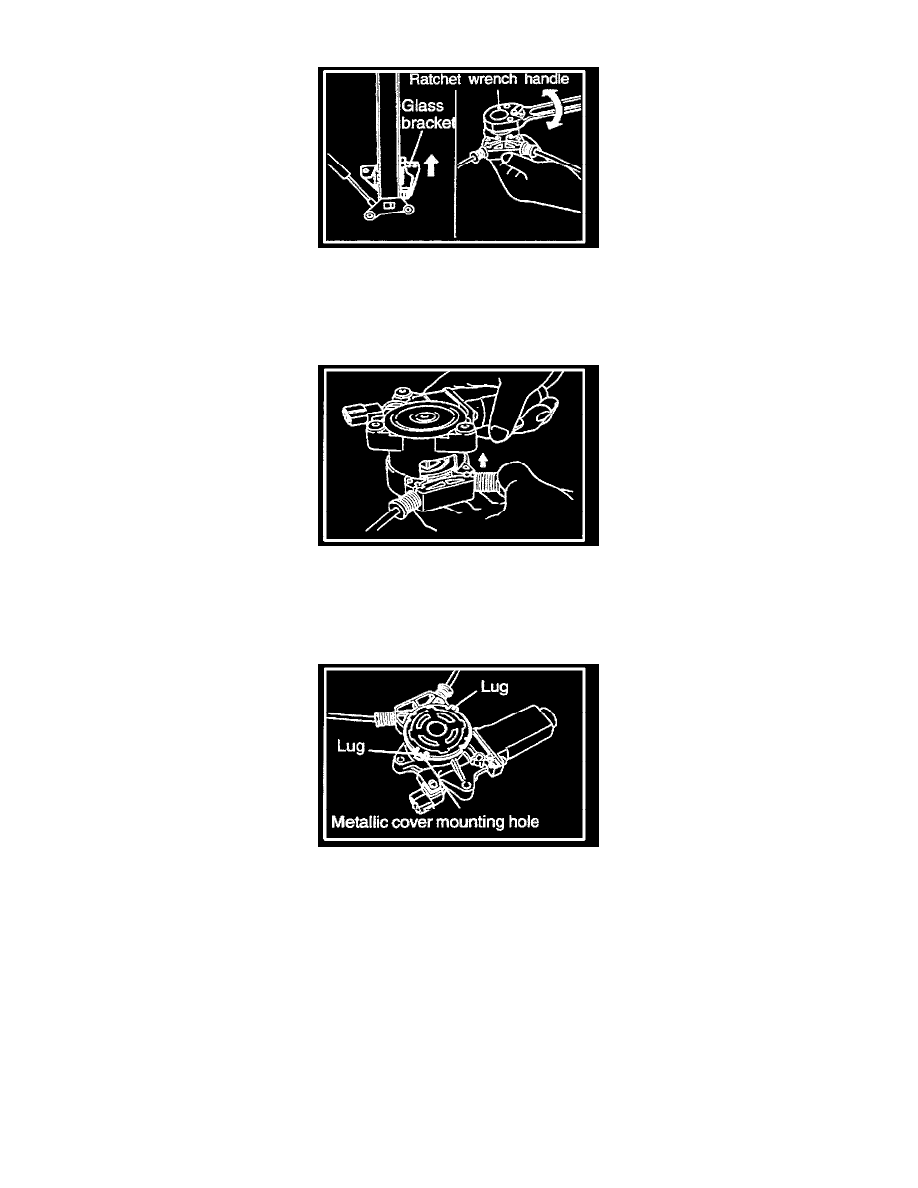
Note:
^
For regulator motor and regulator phase alignment, slide the glass bracket (glass mount) to a distance of 12.7mm or rotate the drum with a ratchet
wrench handle to achieve the same movement of the bracket.
^
Rotation of the drum may cause the wire to come off the drum. To prevent this, hold the drum and guide with your hands.
4.
Align the guide and the motor housing opening. While holding the guide and the drum, let it slide into the motor housing.
Note:
To prevent drum runout, bend the lugs so the metallic cover is not loose. If the drum has runout, the glass may not lower or lift smoothly (example:
may rattle when lowering).
5.
Align the metallic cover lug with the metallic cover mounting hole. Be sure to bend the lugs to secure the cover to the housing.
Note:
When replacing the regulator assembly (service part), use a new metallic cover that is in the set. When replacing only the motor, reuse the removed
metallic cover.
6.
Apply battery voltage to the power window motor to make sure the glass bracket moves smoothly.
DRUM AND REGULATOR WIRE ASSEMBLY