
Montero Sport XLS 4WD V6-3.0L SOHC (1999)
Installation Service Points
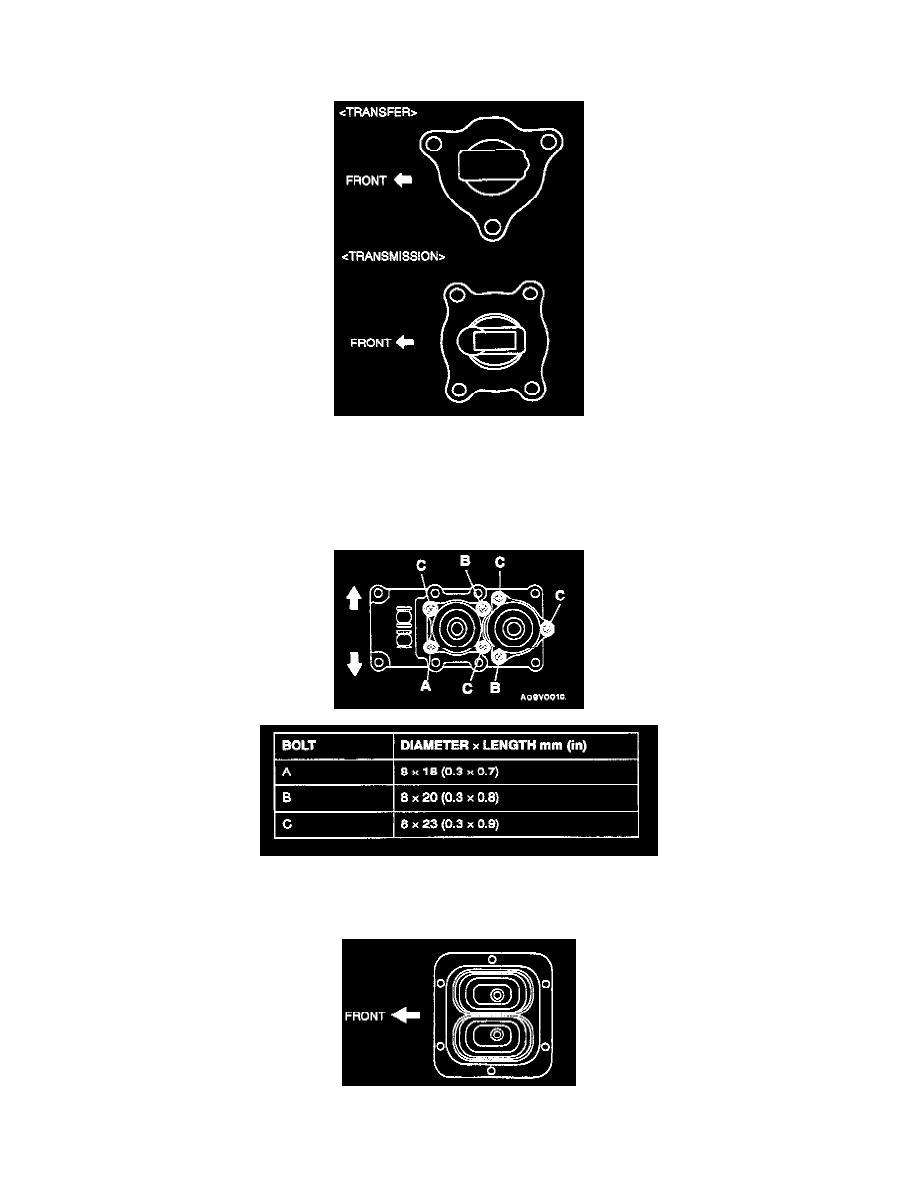
>A< Stopper Plate Installation
Install the stopper plate so that it faces as shown in the illustration.
>B< Transfer Control Lever Assembly/Transmission Control Lever Assembly Installation
1. Remove the adhesive sticking to the control lever assembly mounting bolt.
2. Use a tap (M8 x 1.25) to remove the adhesive sticking to the bolt holes in the control housing, and clean it by blowing in air.
3. Apply 3M(TM) Stud Locking number 4170 or equivalent to the threads of the control lever assembly mounting bolts.
4. The dimensions of the mounting bolts vary according to their mounting locations, so do not confuse them.
>C< Dust Cover Installation
Install the dust cover so that it faces as shown in the illustration.