
Montero XLS 4WD V6-3.5L SOHC (2001)
Brake Pad: Service and Repair
DISC BRAKE PAD CHECK AND REPLACEMENT
NOTE: The brake pads have indicators that contact the brake disc when the brake pad thickness becomes 2 mm (0.08 inch), and emit a squealing
sound to warn the driver.
CAUTION:
-
Whenever a pad must be replaced, replace both LH and RH wheel pads as a set to prevent the vehicle from pulling to one side when braking.
-
If there is a significant difference in the thicknesses of the pads on the left and right sides, check the sliding condition of the piston, lock pin and
guide pin.
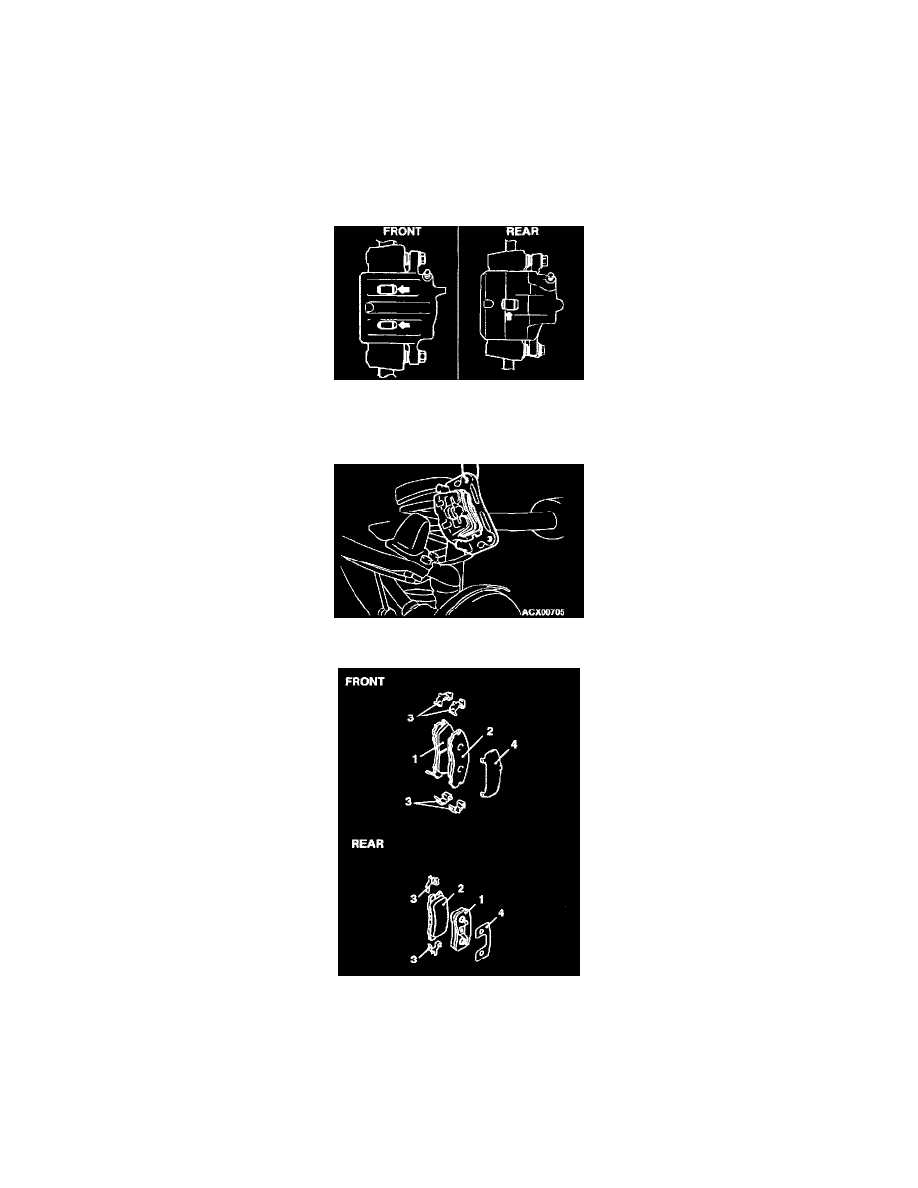
1. Check the brake pad thickness through the caliper body check port.
Standard value: 10.0 mm (0.39 inch)
Minimum limit: 2.0 mm (0.08 inch)
2. Remove the guide pin lock bolt. Lift the caliper assembly and secure it with a wire.
3. Remove the following parts from caliper support.
1. FRONT: Pad and wear indicator assembly
REAR: Pad and clip assembly
2. Pad assembly
3. Clip
4. Shim
4. Measure the hub torque before and after pad installation. Follow the procedure:
5. Install the pad and caliper assembly, and check the brake drag force.