
Montero XLS 4WD V6-3.5L SOHC (2001)
9. Engage the upper arm ball joint with the knuckle.
NOTE
Replace the inner race and outer race assembly as a set.
INSPECTION
^
Check the bushing for wear and deterioration.
^
Check the upper arm for bend or breakage.
^
Check all bolts for condition and straightness.
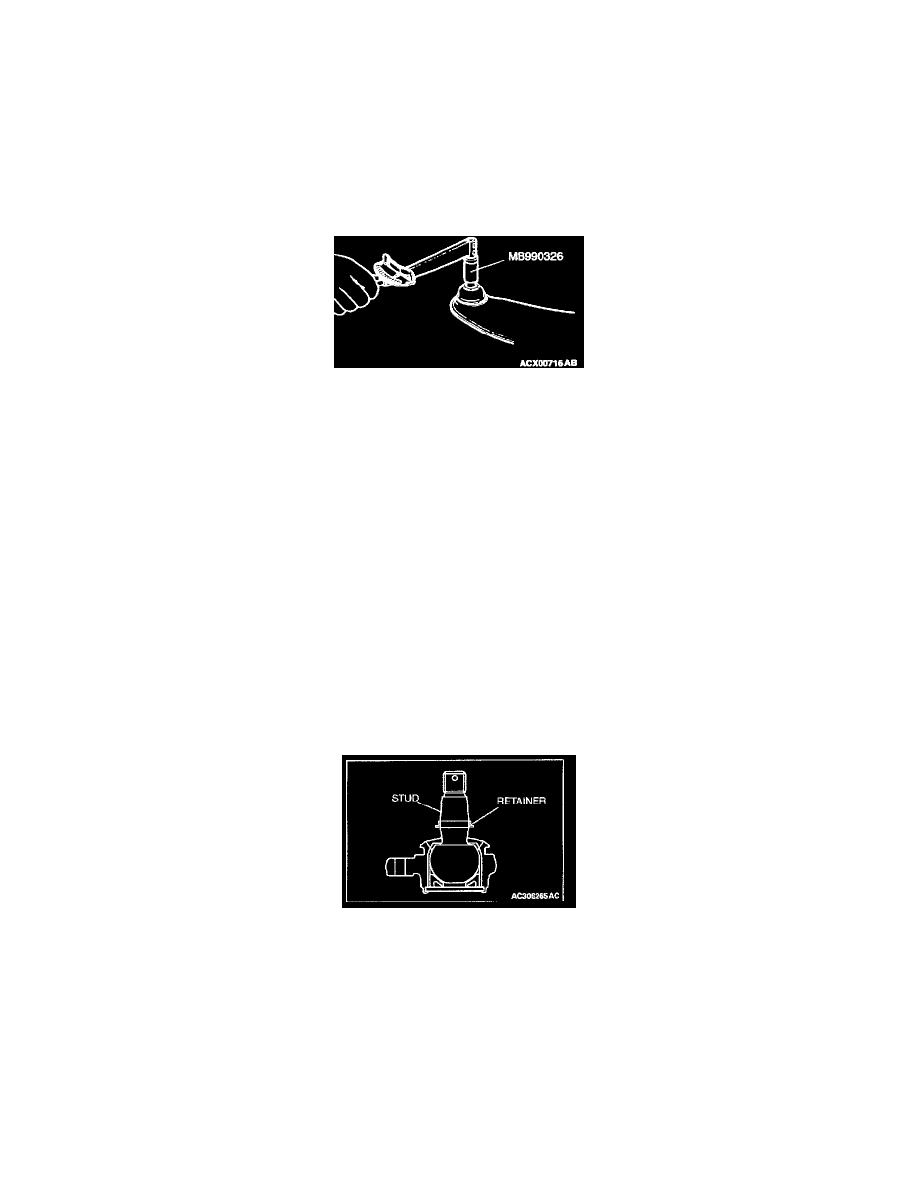
Upper arm ball joint rotation starting torque check 1.
1. After shaking the ball joint stud several times, install the nut to the stud and use the special tools to measure the rotation starting torque of the ball
joint.
Standard value: 0.4 - 2.5 Nm (4 - 22 inch lbs.)
2. When the measured value exceeds the standard value. Replace the upper arm ball joint assembly.
3. When the measured value is lower than the standard value, check that the upper arm ball joint turns smoothly without excessive play.
Upper arm ball joint dust cover check
1. Press the dust cover with your finger to check that there are no cracks or damage in the dust cover.
2. If the dust cover is cracked or damaged, replace the upper arm ball joint assembly.
NOTE: If the dust cover is cracked or damaged, it is possible that there may also be damage to the ball joint If it is damaged during service work,
replace the dust cover.
INSTALLATION SERVICE POINT
>>A<< UPPER ARM ASSEMBLY AND KNUCKLE CONNECTION
If the upper arm ball joint is disengaged from the knuckle, always renew the upper arm ball joint dust cover and retainer by following the procedure
below.
1. Unclip the spring ring to removed the dust cover.
CAUTION
Be careful not to damage the ball joint stud.
2. Use a flat-tipped screwdriver to remove the retainer.