
Outlander AWD L4-2.4L SOHC (2003)
2. Place the valve timing belt on the engine oil pump sprocket while pulling it with your other hand.
3. Place the valve timing belt on the timing belt idler pulley.
CAUTION: Install the valve timing belt. Then apply reverse rotation (counterclockwise rotation) pressure to the cam shaft sprocket.
Re-check to see that each timing mark is in the proper location while the belt is right.
4. Place the valve timing belt on the camshaft sprocket.
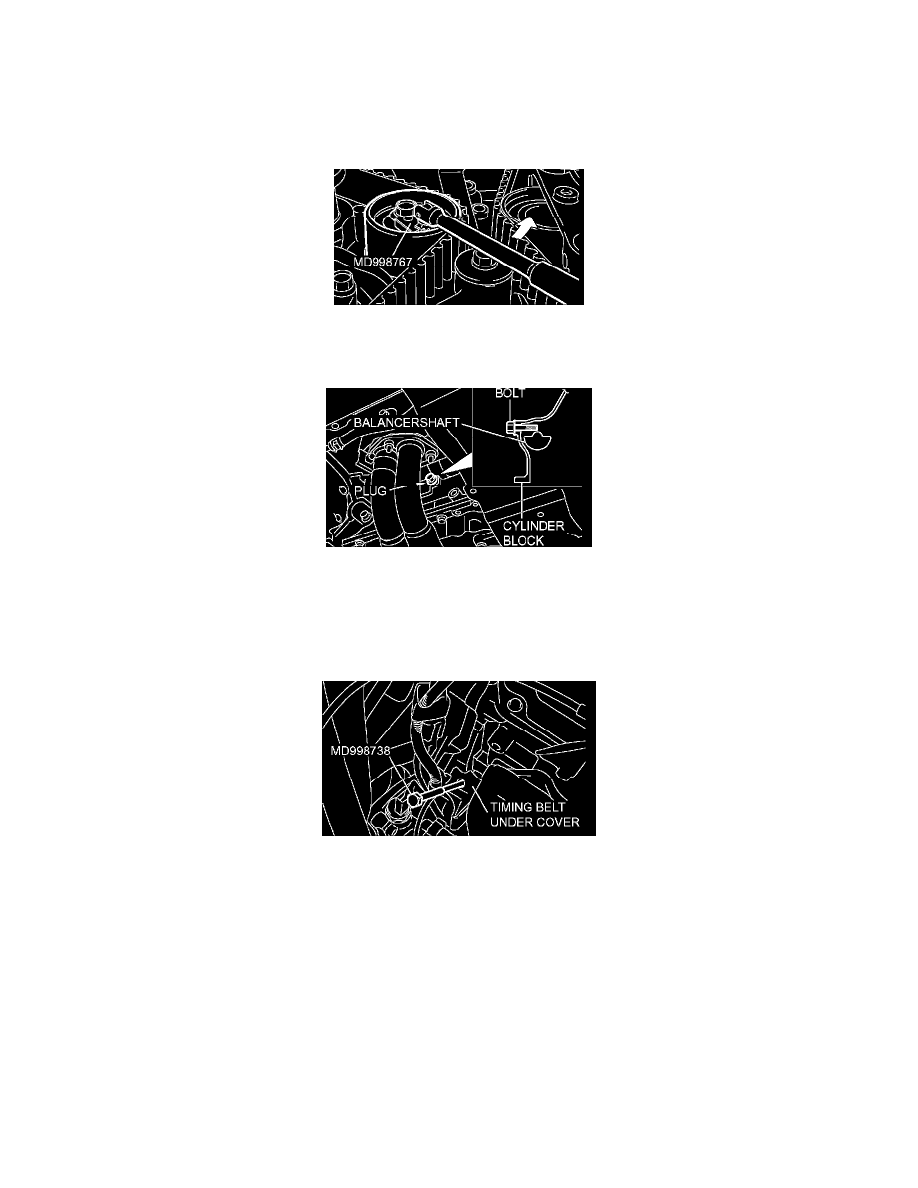
4. Turn the timing belt tensioner in the direction shown using special tool MD998767 to apply tension to the valve timing belt. Then pre-tighten
the timing belt tensioner pulley.
5. Check that the timing marks are aligned.
6. Remove the bolt inserted in Step 2 above, then assemble the cylinder block plug.
7. Tighten the cylinder block plug to the specified torque.
Tightening torque: 30 ± 3 Nm (23 ± 2 ft. lbs.)
8. Adjust the valve timing belt tension.
>>G<< VALVE TIMING BELT TENSION ADJUSTMENT
1. Set special tool MD998738 when removing the valve timing belt.
CAUTION: Always screw in special tool MD998738 by hand, since use of a spanner or other tools may damage the wire or pin inserted in
the timing belt tensioner adjuster.
2. Gradually screw in special tool MD998738 until the wire or pin inserted in the timing belt tensioner adjuster lightly moves.
3. Turn the crankshaft 1/4 turn counterclockwise.
4. Turn the crankshaft in the clockwise direction until you align each timing mark to set No.1 cylinder to TDC of its compression stroke.
5. Loosen the timing belt tensioner pulley mounting bolt.
CAUTION: When tightening the mounting bolts, ensure that the timing belt tensioner pulley does not rotate with the bolts. Allowing it to
rotate with the bolts can cause deficient tension of the belt.