
Outlander AWD L4-2.4L SOHC (2003)
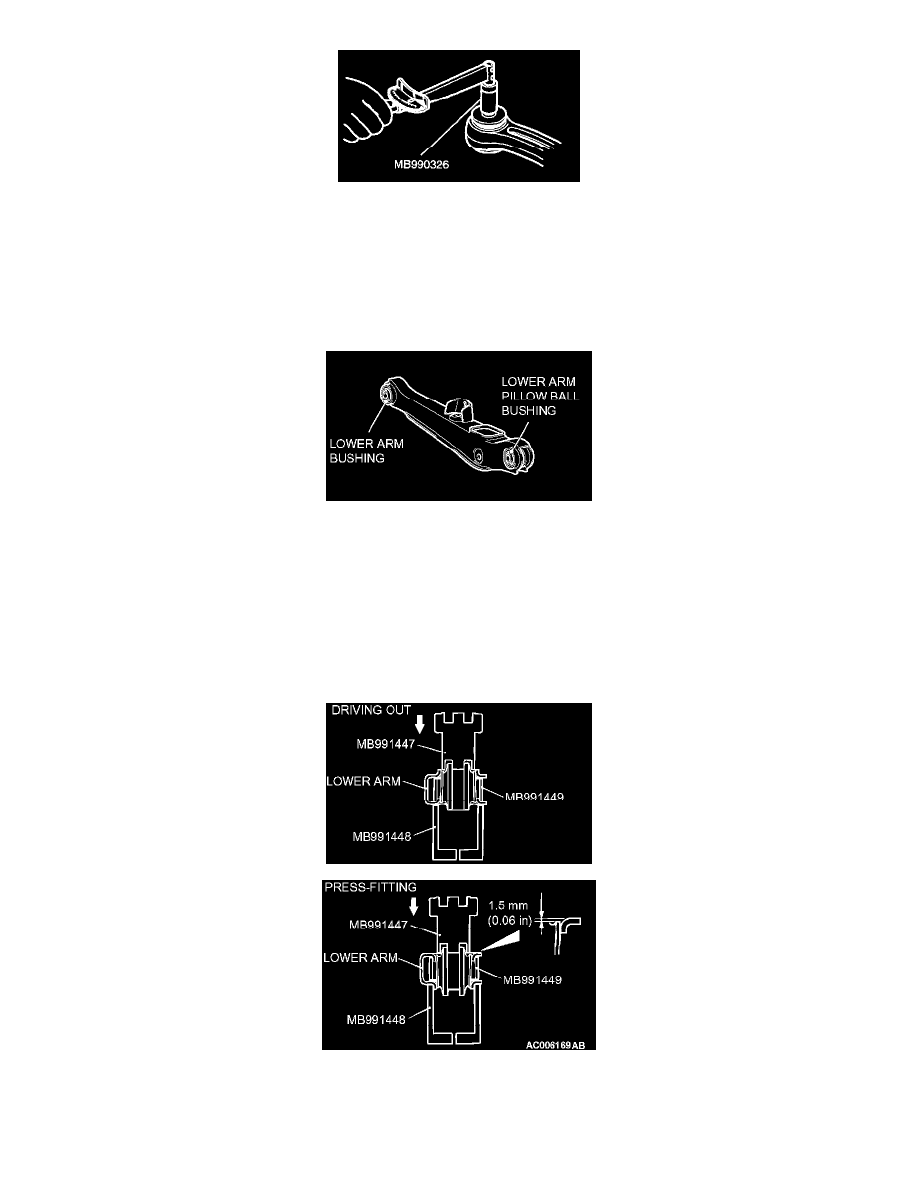
2. After rotating the inner sleeve (contained washer) several times, measure the breakaway torque of the pillow ball bushing using the special tool
MB990326.
Standard value: 0.5 - 3.0 Nm (4.4 - 26.6 inch lbs.)
3. If the measured value exceeds the standard value, replace the control link, the upper arm, or the lower arm pillow ball bushing.
4. If the measured value is lower than the standard value, check that the pillow ball bushing turns smoothly without excessive play. If there is no
excessive play and it turns smoothly, the pillow ball bushing can be reused.
LOWER ARM BUSHING AND LOWER ARM PILLOW BALL BUSHING REPLACEMENT
Replace the lower arm bushing and lower arm pillow ball bushing as follows.
LOWER ARM BUSHING REPLACEMENT
Required Special Tools:
^
MB991447: Bushing Remover and Installer
^
MB991448: Bushing Remover and Installer Base
^
MB991449: Bushing Remover and Installer Supporter
CAUTION: Because the outside of both edges of the bushing are different, be careful not to mistake the direction.
Use the special tools MB991447, MB991448, and MB991449 to drive out and press fit the bushing. After press fitting, the space between the edges of
the bushing outer sleeve and of the lower arm should be 1.5 mm (0.06 inch).
LOWER ARM PILLOW BALL BUSHING REPLACEMENT